Clowning_Around's Tank Journal thread.

So I was thinking to paint my 45's 90's T's ect a different color from the pipe. What's the best way to block off the inside of the fittings? Also I assume I wouldn't want the part of the pipe that goes into the fitting to be painted right? Any idea of how to figure that out?

Thanks
Well a couple thoughts on that.

First if you prepaint, when you make the connections the primer n solvent will mess up the area it comes in contact with. Even if you keep the solvent job precise and clean, when you push them onto the pipe at best case /the least you will probably have a little disturbed finish at the fittings edge face, so be careful with that.

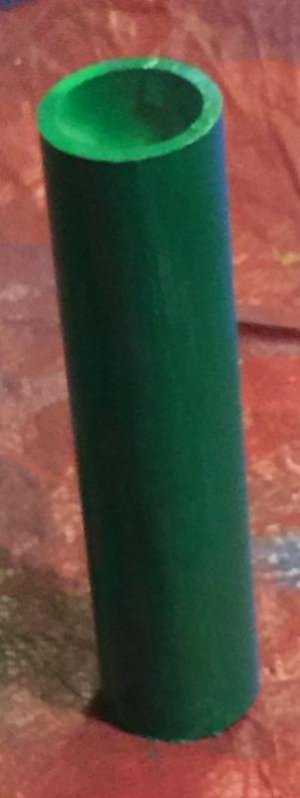
So if you look back art mine i did this but just not with different colors ay my pupe to bulkhead connections. I preprimed the pipe and let it dry. Then i masked it off with tape before painting the nearby surface, you can do the same with your pipe insert portions. As for the fittings, you could tape those off but i have another idea i like better. Get a scrap piece of pipe n dry fit it in the fitting, paint say 70% of that piece so that you can still grab the one side. Remove the dry fit scrap while the paint is wet and prop/ hang the fitting from the unpainted side. Rinse and repeat with all fittings and then hit the other sides up the following day after the first half is dry so you can yank on its side. Make sense?

Now for the easy way
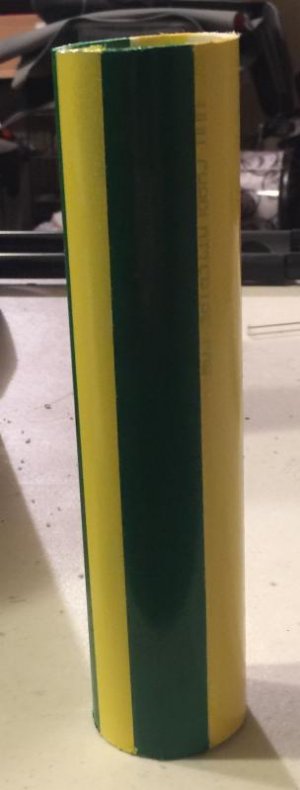
 :) how many colors you want to use, 2 , 3, 4 whatever - ill assume you want to do sometging complex for the example, say a different color coding for each fitting type - the easy, here ya go. Start with whichever color you have as the dominant amount of area coverage, depending on assembly but I'll presume straight pipe. Go ahead and glue it all up. Next after its cured! (don't paint wet solvent, it will effect the paints cure negatively) go ahead and paint all the areas that get the dominant paint and not worry about overspray (except for anything not ultimately getting painted, go ahead and take that up completely first). Now let that dry. Now tape off the portions to remain that color. Paint the next dominant color on the respective portions, again not worrying about overspray . Rinse and repeat these steps until all colors are painted, just keep painting over the old over sprays of the prior color as needed. At some point you will need to decide on painting a particular color against how many fitting you have in thay color vs a more difficult tape job, say a valve for example. Once all painting is done and dry remove all painters tape to reveal your rainbow :), err i mean plumbing art. This eliminates the hiccup I first mentioned about the solvent n portions messing up connections after painting.

I do recommend you do some test with scrap pipe and a couple cheap elbows before proceeding with your good plumbing.

Ok so the fun warning language - proceed at your own risk I'm not responsible for your following and/or not following these suggestions, there you've been warned :)

Sent from my SM-G930P using Tapatalk
 
I have to say i'm bit surprised how easy it was to paint the pvc. I was thinking it would be more of a PIA.
 

Attachments

  • IMG_3480.jpg
    IMG_3480.jpg
    21.7 KB · Views: 1
  • IMG_3482.jpg
    IMG_3482.jpg
    20.9 KB · Views: 1
Okay back to my rebuild, I made a good bit of progress this weekend. I even was able to get my stored water back up and running. Here comes the photos.

Built a makeshift cable rack out of spanning zip ties (top right of pic) hidden behind my stands top horizontal member for chords on equipment that needs periodic removal for cleaning
21d98b05aa1525ca28af9d4880986351.jpg


Sent from my SM-G930P using Tapatalk
 
Im happy with how my chord management turned out. I also added some roofimg panels for lid sections on my sump.
231ff2d0cc31f3c80cadafb57dfe0ed2.jpg
19683b3c0270996749fb030749e1a835.jpg
93c054be64a8e8a2a36bf5f27038c3bb.jpg


Sent from my SM-G930P using Tapatalk
 
I created a lid for my overflow box out of some spare black acrylic. Given it was thin, I added some ribs on the underside to act as both stops for it to remain in place but also as support. Then I slapped on a small piece of spare 1/2 in acrylic I had. I sanded it for the frosted look to match my DT's rear plastic cutout inserts.

P.S. I noticed after it all I had my air valve cap on my siphon instead of open channel lol doh, easy enough adjustment though, a simple flip.
17e4de3117367b6f85d0ba2b8b2e1fd3.jpg


Sent from my SM-G930P using Tapatalk
 
Heres my last pics before I placed it back into position and into service again. Everything leak tested oit with flying colors THANK GOODNESS! Tonight I'll prov2eed with the valve adjustment, baffle adjustment and skimmer height.
95df60b47d9d42b6a9cb3feb4b8350ae.jpg
729dca3bb80bce9ab742fd5fe7328991.jpg


Sent from my SM-G930P using Tapatalk
 
looking good!

I spray painted my pvc using the home depot stuff. It looked glossy while still wet, but looks flat when it dried. I just used it even for the parts that will go into water (just the 2 street elbows of the return output).

question on your filter sock holder. did you use acrylic or glass? can you post more detailed (close up) pics if that's not too much trouble? does the drain pipe section go all the way down to the bottom of the sump? I'm just wondering if it accumulates detritus in that section, it may be hard to reach to clean. I like that design that you can switch socks without turning off the pump.

thanks
Thanks. Ill try to get another photo or two of the feed and sock area. I use a piece of 1/2 in acrylic for the sock tray. I opted for this given the constant working with factor, the proximity of holes I desired, cutting of the holes themselves and the fact that I had spare 1/2in acrylic on hand. As for my drain pipes I have three (bean). The wmwrgency is held bout an inch above the tray so If anything comes thru it, it will be obvious. The other two are just below the tray / water surface to reduce back pressure on the siphon restart process. I havent obviously been running it long enough to state for sure about buildup but I will say I highly suspect not given the intense flow i see in this part of the sump. If it did i can unscrew the siphons union and slip the pipe out of the way and reaxh my hand inside (i sized it for such, although wish I had made it a tad bigger, the pipes are a tight fit ).

Sent from my SM-G930P using Tapatalk
 
It's hard to get a decent picture, here's the best of the ones I snapped.

So you know for the acrylic tray, I first created a shelf/ lip for it using various segments of 1/4 glass underneath via silicone. Thisallowed me to provide adequate gaps for expansion around the perimeter whike it was just laid in a need of sealant as opposed to being supported and attached to the glass sidewalls. This served two purposes, i don't have to worry about cracking from the acrylic expansion/ swelling or the typical concern of weak silicone connection between acrylic and glass.
e18c54b430e2cee0eb1cab143e38f470.jpg


Sent from my SM-G930P using Tapatalk
 
Clowning_Around's Tank Journal thread.

Question, do you hear water splashing sound when water flows into the filter sock?


The reason I ask is I just built one and it makes a loud water splashing sound.


9c7b7c0ba6fd561d9cc3c90089d2181f.jpg


I then checked how it is done on trigger systems sumps and eshopps 3rd gen sumps, and they all come with a cover that completely covers the drain pipes and socks. I can see why that is needed now and just want to know if your experience is the same.


I'll add a cover to my sock holder and see if it helps.


this is a short video, you can hear water splashing sound
<iframe width="560" height="315" src="https://www.youtube.com/embed/Wv2E_iBjOuM?rel=0&controls=0&showinfo=0" frameborder="0" allowfullscreen></iframe>
 
Last edited:
Question, do you hear water splashing sound when water flows into the filter sock?


The reason I ask is I just built one and it makes a loud water splashing sound.


9c7b7c0ba6fd561d9cc3c90089d2181f.jpg


I then checked how it is done on trigger systems sumps and eshopps 3rd gen sumps, and they all come with a cover that completely covers the drain pipes and socks. I can see why that is needed now and just want to know if your experience is the same.


I'll add a cover to my sock holder and see if it helps.


this is a short video, you can hear water splashing sound
<iframe width="560" height="315" src="https://www.youtube.com/embed/Wv2E_iBjOuM?rel=0&controls=0&showinfo=0" frameborder="0" allowfullscreen></iframe>
I don't have that noise but also my water doesn't fall through the sock but rather it flows through it. Meaning my water level at the outlet side of my socks is high up on the socks themselves, so really theres no opportunity for splashing given muy sumps chamber height.

Sent from my SM-G930P using Tapatalk
 
Well it's been awhile since I've posted, large in part due to being on hiatus from surgery. But I've wrapped up my build and things seem to be going we'll. I have introduced my first four livestock members. A dartfish and three dwarf angels. All seem to be doing well.
913d95189bf33cc00a11024accd641df.jpg
c029b18543e2347db63ff4cde9c8c334.jpg
dc5197225f811361b3a4f2d544192aea.jpg


Sent from my SM-G930P using Tapatalk
 
Back
Top