DIY LEDs with Radion Pro G2 pucks?

So are you running your 1000s off the same power supply as your 700s? If so, how is that functioning because I don't know how you could provide power to the LDDs at different amperage and different voltage and not fry them..I would assume each has a max input and also assuming you have them wired parallel to each other...

Depending on which LDDs you get (Ls vs Hs - example LDD-1000H vs LDD-1000L) - they allow for different input voltages. They do all the work for you regarding amps and voltage output to your LED string assuming you have a load (total voltage of your LEDs) lower than the max output of the driver. Add a couple volts to your calculations for the driver itself.

Ultimately - add up the voltage of each LED in a string add a couple volts. Do this for each LED string. Take the largest one - and make sure your power supply can go at least that high with supply voltage. Also make sure you get the proper LDD drivers to handle the voltage of each string ( you can probably use H's to be safe across the board). You are driving each string at a certain amount of amps - defined by which LDD driver you get. You can add the Amps of each string up, for your total Amp rating of power supply you need. For example - if you have 5 colors/strings of LEDs, driving two at 1A each and 3 at 700mA - your power supply needs to be able to supply at least (1 x 2) + (.7 x 3) = 4.1A total.
 
So are you running your 1000s off the same power supply as your 700s? If so, how is that functioning because I don't know how you could provide power to the LDDs at different amperage and different voltage and not fry them..I would assume each has a max input and also assuming you have them wired parallel to each other...

You can mix and match any current rating of LDD on the same power supply. (you can even mix and mach H and L versions as long as the PSU voltage is below the input voltage of the L model) They all draw the same voltage (whatever the supply is providing) and output their set current and the voltage the strings of LEDs need. (simply put they convert extra voltage into output current instead of heat so they do not burn up) Also the reason you calculate LDD drivers based on Watts not amps since the LDD will not, in most all cases be drawing it's rated current from the power supply.

This thread discusses everything you need to know about the LDD driver:
http://www.reefcentral.com/forums/showthread.php?p=22808166#post22808166
 
Anyone have any details on where to buy the extra LED chips to upgrade the Gen2 to the Gen2 Pro? I would prefer to get them mounted on the same chip, as opposed to running some star chips.
Shorty, what did you supplement yours with if you don't mind sharing?
I have 2 pucks in the mail, so looking forward to see how they compare to my Dreamchip build.


Edit - ok done some of my own further research, here is what I have come up with.
Indigo: 4 SemiLEDs UV, 415nm
"Ultraviolet": 4 SemiLEDs UV, 405nm
Yellow: 2 Osram Oslon SSL Yellow, 590nm
 
Last edited:
Lime is getting popular as well, never seen one in person though.

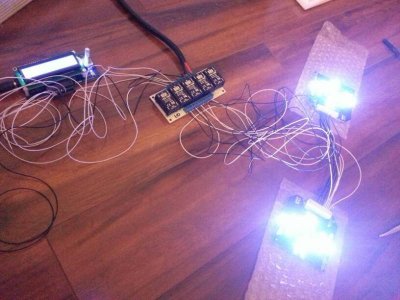
Here is my setup at 1%, finally get to confirm everything works! Now to build the fixture for it all.

FYI I used 26AWG stranded wire for the puck conections and made my own harness, those Itty bitty pins are a a huge pain. Unless you have a good way to crimp those plugs buy a harness lol

uploadfromtaptalk1401535134295.jpg
 
Would anyone be willing to order the connectors and pins from digikey on my behalf? They want a flat rate shipping of $30 to Australia on something that will fit in an envelope and cost less than $10 to ship here.
 
I tried researching it last night the package number is B2TK, couldn't find any information online on it...

I am pretty much debating if I should go with 4 or 5 18" maker led they are pretty pricy but includes a fan splash gaurd and they are completely closed so dust doesn't get on the LEDs... Hopefully will last longer that way.

I wonder if I am over killing it a little, planning to light up a 265 gallon tank 84by30 inches two pucks on each heat sink

Here's a picture from me playing around with it yesterday...
aru2y9ed.jpg


What did you use to test these? My multimeter isn't strong enough I don't think. I just got my gen2 pucks and want to test em
 
Anybody want to wire up some connector harnesses for me? I have no idea how to make those and I don't know how to even start making one of those harnesses. If nobody can, sorry to ask again, but will anybody post some step be step instructions and a parts list? I thought someone posted a link to a crimper but it was not what I expected...
 
Other than Shorty's setup, what are you other guys planning on using heat sink wise? I have been astounded at the costs of heat sinks. Has anyone ever tried using a CPU heatsink/fan combo on one of these types of pucks? Do you think that one like this one would suffice for each puck: http://www.newegg.com/Product/Product.aspx?Item=N82E16835186070

That would suffice, if the puck fits. But if the fan ever failed it will have little cooling power and the LEDs will quickly fry!

For a more finished heatsink why not use the MakersLED heatsinks? One of the 6" versions would be more than enough per puck and it has much more surface area so if the fan did fail you wouldn't be in imediate danger of frying all the LEDs.

Also, www.heatsinkusa.com many size and shape of extruded heatsinks. With some fan cooling a 5" piece of this one would be more than adequate:
http://www.heatsinkusa.com/4-850-wide-extruded-aluminum-heatsink/
 
I just nearly killed myself cutting a 5" chunk off my old 23" heat sink...cut it by hand with a hack saw...

I'm going to put a computer fan on top of each heat sink to keep it cool.

Is everyone just using the screw holes to attach the puck to the heat sink? Any thermal paste/grease/etc. needed?
 
I've been behind on the thread a bit, going to have to go back and read the posts from the past two days... Shipping form China seems to be super fast (not cheap tho) the sample harness was supposed to arrive on Friday, but DHL couldn't find my house. It should arrive tomorrow. I'll post an update once it arrives.
 
I've been behind on the thread a bit, going to have to go back and read the posts from the past two days... Shipping form China seems to be super fast (not cheap tho) the sample harness was supposed to arrive on Friday, but DHL couldn't find my house. It should arrive tomorrow. I'll post an update once it arrives.

Please let us know. I just got my pucks in yesterday and I'd rather just buy a harness than build one.
 
I would use thermal paste/grease, it's cheap and can't hurt.

your choices..
1)Thermal paste (heatsink compound, no real adhesion but will stick a bit) and screws (lots of tapping and or drilling but removeable)
2)thermal epoxy (expensive, generally non-removeable)
3)heatsink plaster (basically a thermal silicone caulk so I was told, possibly removable)

for Kentuk.. really
 
Back
Top