DIY Stands Template and Calculator

<a href=showthread.php?s=&postid=14501604#post14501604 target=_blank>Originally posted</a> by maypo59
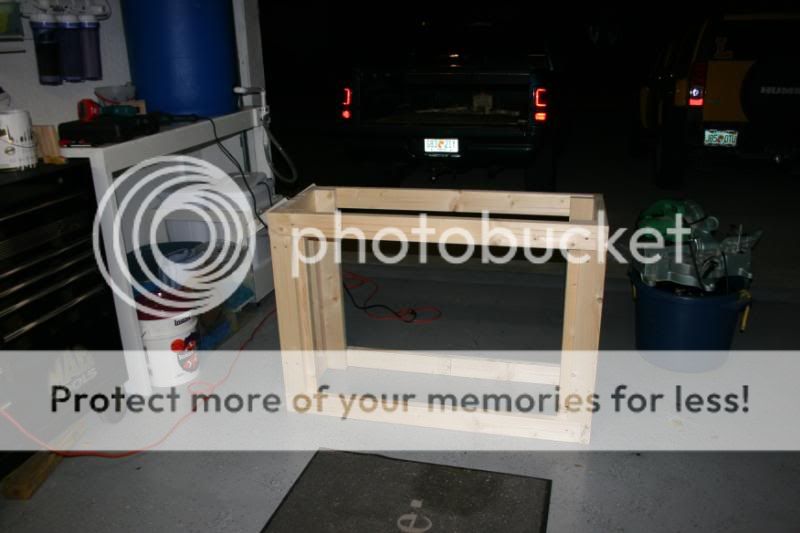
As a bit of a note from a true dyed in the wool cabinet maker, while that is a pocket hole in the picture, that is a drywall screw stuck in it, and that type of screw, used in a pocket hole *can* cause the joint to fail, because it wedges the wood at the joint, where as the screw that should be used with a pocket hole joint has a flat bearing surface, to match the bottom of the pocket as cut by the jig's drill bit. Also, there are two different pitches of pocket hole screw, depending on what kind/type of wood you are fastening.

Maypo,

Do you think you kind find a picture of what you are describing? I want to make sure that I do this right.
 
<a href=showthread.php?s=&postid=14504307#post14504307 target=_blank>Originally posted</a> by audiophile42
Maypo,

Do you think you kind find a picture of what you are describing? I want to make sure that I do this right.

what he is describing is if you look at a drywal screw, the top of it is in a V shape & that pushes the wood outward as the screw seats in.....what you want is a screw that the top of the threads is flat like a T

that make sense???
 
<a href=showthread.php?s=&postid=14504307#post14504307 target=_blank>Originally posted</a> by audiophile42
Maypo,

Do you think you kind find a picture of what you are describing? I want to make sure that I do this right.

Here is a link to Kreg's site.. see how the bottom of the screw where it contacts the bottom of the hole is flat? Thats what I am talking about..
 
Well I thought I would update everyone with my Stand. It is for my 125g and I will say this is my first attempt at a nice piece as opposed to a "Hell it is in the garage and works" piece. I still need to set the nails and putty it up and sand it before painting but here it is, plus the cost was under $120. Enjoy!

stand18.jpg


stand19.jpg


tanko.jpg


Build thread
http://www.aquaria.info/index.php?name=PNphpBB2&file=viewtopic&t=73593
 
<a href=showthread.php?s=&postid=14506180#post14506180 target=_blank>Originally posted</a> by james3370
nice....is the drawer functional or just for looks???

Thanks a lot.

Yes indeed it works! I picked it up at Habitat for Humanity Restore for $6.00 with Sliders. Picked up the doors there as well for only $4.00 :)
 
Well, here is my attempt at making a stand for my 180. I leaned a few things along the way and may want to start over.

The top and bottom frame are 2x8s. I wanted the the ability to remove the center support if I needed to and I wanted to have a basin in the bottom to catch spills if/when they happen. I have not put plywood on the bottom yet. I used 2x4s for the legs and used pocket screws and glue for most of the joints.

top frame

topframe.jpg~original


bottom frame with legs

bottomframewithlegs.jpg~original


bottom frame corner with legs and pocket screws

pocketscrew2.jpg~original


additional screws in top and bottom frame for added support (first time using pocket screws).

bottomframe3.jpg~original


screwed corner legs to each other for stiffness

legsscrewed.jpg~original


gap under one of the side legs at top. I did shim it later.
gapattop.jpg~original


stand framing done

stand.jpg~original


After I finished I realized my 20" tall 55g tank for a sump would not fit through the 17" tall opening and that it would be rather difficult to get into it to work because of its height. I wanted the top of the stand to be 32" tall for appearance purpose and ease of access to the tank but I may have to make it taller. I am also thinking of making the bottom frame out of 2x4s or 2x6s. I wanted an area to catch spills but I'm thinking the 2x8s might be over kill. Plus it reduces the opening in front.

Well, I'll have till this weekend to come up with a new plan. That should keep me busy and out of trouble for a while. Besides, I could use a second workbench in the garage!
 
Last edited by a moderator:
<a href=showthread.php?s=&postid=14516627#post14516627 target=_blank>Originally posted</a> by Rhodes19
Besides, I could use a second workbench in the garage!

LOL i used an old scraped stand for a bench when i was building my new one too
 
<a href=showthread.php?s=&postid=14306804#post14306804 target=_blank>Originally posted</a> by RocketEngineer
Hello Rocket Engineer ---
Do you have a stand design for a 180 gallon tank, 72" x 24", that will allow me to have those dimensions available on the inside of the stand? I need 72" long x 24" wide on the inside of my stand for my sump, chiller and return pump. Please let me know.
Thank you ---
Chris :D:
 
Rhodes19- Looks like it was shaping up well, Your next attempt should be right on! Nice documentation-

I finished my stand-here are the the final pics=the photos are a little dark but you should be able to get the Idea:

2-08-09006.jpg


IMG_3700.jpg


IMG_3769.jpg


IMG_3797.jpg


IMG_3802.jpg
 
Thanks Roger. Nice pictures. What kind of stain did you use? My wife wants me to stain the stand a similar color. After looking at my stand framing I think its lending itself to plank wood instead of plywood as well.


James3370, I'm glad to hear I am not the only one who is enhancing their garage appeal! LOL


Chris

:D
 
<a href=showthread.php?s=&postid=14519349#post14519349 target=_blank>Originally posted</a> by Rhodes19
Thanks Roger. Nice pictures. What kind of stain did you use? My wife wants me to stain the stand a similar color. After looking at my stand framing I think its lending itself to plank wood instead of plywood as well.


James3370, I'm glad to hear I am not the only one who is enhancing their garage appeal! LOL


Chris

:D

I used minwax red mahogany stain-check my 90 gallon thread(red house) on page 8 I documented the steps I took for the finish-the red in the mahogany did not show up until later in the process- I cant say I did the process exactly the best way but it worked for me...good luck.
 
<a href=showthread.php?s=&postid=14520253#post14520253 target=_blank>Originally posted</a> by buccard
I used minwax red mahogany stain-check my 90 gallon thread(red house) on page 8 I documented the steps I took for the finish-the red in the mahogany did not show up until later in the process- I cant say I did the process exactly the best way but it worked for me...good luck.

Thanks Roger. Thats the color my wife wants and she wants the stand to look like furniture as well!!! I just finished reading your build and came away with some other ideas I had not thought about. I'm going to make my next stand 36" inches this time and use 2x4s for the legs and bottom frame and that should give me room to get my 55 in there as a sump/fug and have room to get to the equipment. I'll also have to play with my camera to get clear pictures of the corals and fish. Hasn't worked to well yet.

Chris
:D
 
Hello Rocket Engineer... I do not know if I will explain this properly, but I have a 'hypothetical' situation/problem.

Let's say someone built a stand for a 125 (~72" with 2x8's) from the specs, but messed up on his cut list and made the depth 3 inches too long. Is there a best solution to this again hypothetical problem?

Taking it apart would not be an option as it was glued. Starting over would be undesirable as it is a wast of wood and is demoralizing.

My initial thought is to build a duplicate of the outer frame inside at the correct width. This of course would line up just inside the nailing piece. The only significant difference would be that the rails do not span the full length and instead would screw into the existing ends. I would just end up with a larger stand and the excess could be made to look like a good place to hold test kits/beer etc.

Not a good explanation but hopefully it makes sense.
 
Little more detail... I was thinking along the lines of doing something like below. Exception... I would not bring length of the tank in only the depth. I was also thinking of supporting the new 2x8 on each end. That would make two corners doubled up with two legs sandwiched around the nailing board.

I will try to take a picture of this hypothetical stand and add some crude markups tonight.

Originally posted by saltwaterfishlover
support.jpg~original
 
Last edited by a moderator:
Here are my photos of the hypothetical screwup...

Stand as is... 3 inches too deep.
AquariumStandpre-fix.jpg~original


Mock up of proposed fix. Would do the same with header 2x8.
Standproposedfixmockup.jpg~original


Would this be OK?
 
Last edited by a moderator:
Are you all planing or sanding down the crown or imperfections of the 4 top rails where the tank rests?
 
Hello Rocket and all other DIY people,

I first wanted to say what a great thread this is. It took me a couple of days but I read the entire 40 page previous thread. Some amazing work and advice given. If you can believe it I still have a few questions I would like to ask. I am a total woodworking rookie. I know they have been answered but after reading so many different responses I want to clear a few things up.

The stand I am going to build is for a standard 75 gallon with the typical 48x18 footprint.

For the upper rails. (Red and Yellow). Would 2x6's simply be overkill and add weight to the stand? From all I have read it seems as though the 2x4's are plenty and the lighter the stand the better. I just want it to be extra safe.

Next question is the wood. Sounds like it really doesn't matter too much but would you go with pressure treated or not. I had heard people using both but wondered what option would be best.

Last question involves the actual assembly. Are you supposed to glue it, clamp it, wait for it to dry and then put the screws in? Or screw it right off the bat? Is this done as a complete square or do you start with 2 pieces of the frame, then the other 2, then put all 4 together?

Also, the purple uprights, is it correct that they are not directly screwed in to the upper rails or the base. They are only screwed into each other, and the green screw strip?

Thanks so much!!
 
Pocket screw joints

Pocket screw joints

Out of curiosity, has any one used pocket hole screws to assemble their stand? I have a Kreg jig that I used on my “practice” stand (now work bench LOL) and I wanted to know what other’s thoughts and experiences were. Assembly was easy but I don’t know if it is as strong as screwing corners at 90 degrees. Two things I noticed was that some of the screws poked through the other piece even though the depth of the drill bit was set correctly and that some of the screws felt like they were stripped and spinning in place. I was using pine 2xs and the Kreg course screws. Let me know what your experiences have been. Thanks.
 
<a href=showthread.php?s=&postid=14532680#post14532680 target=_blank>Originally posted</a> by Reefer2727
Hello Rocket and all other DIY people,

Last question involves the actual assembly. Are you supposed to glue it, clamp it, wait for it to dry and then put the screws in? Or screw it right off the bat? Is this done as a complete square or do you start with 2 pieces of the frame, then the other 2, then put all 4 together?

Also, the purple uprights, is it correct that they are not directly screwed in to the upper rails or the base. They are only screwed into each other, and the green screw strip?

Thanks so much!!


Hi Reefer 2727,

I think I can answer these 2.

Glue and screw right off the bat. When you cut the wood, make sure the ends are square. What I do from there is to glue the ends together, place them in the clamp, then screw them together all in one setting. You can assemble the whole frame at one time instead of pieces. Once the screws are in you will not need the clamps so you can take them off and continue with the rest of the project.

From what I have read, the purple up rights do not need to be screwed into the upper or lower rail/base. Their purpose is to support the weight of the frame and tank. The green screw strips hold them in place.

HTH
 
Back
Top