DIY Stands Template and Calculator

kass,

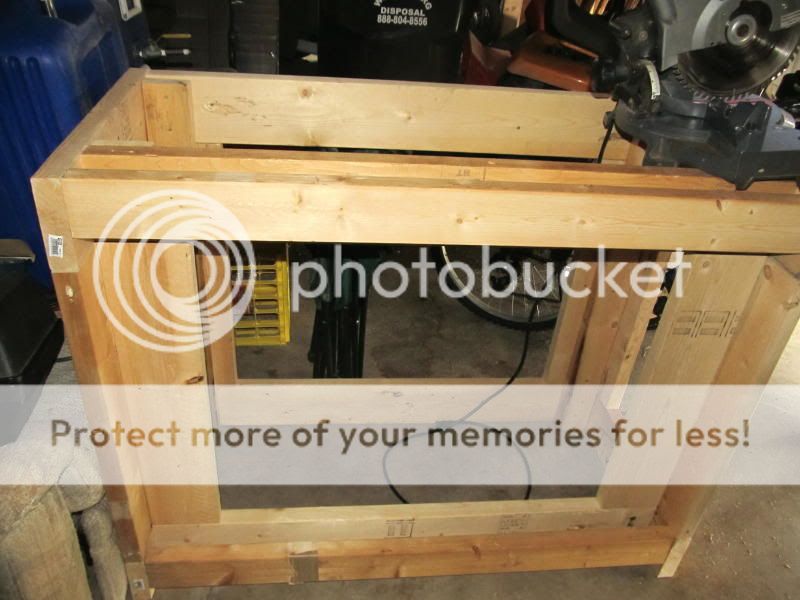
The top is 2x6 so subtract 5.5 from your 37. The bottom (following the design) is 2x4 so subtract 3.5 from the left over (37 - 5.5) or 37 - 9. Now if the bottom frame is not 2x4s then you will need to adjust.
 
Ohhh ok I didnt know the bottom was a 2x4. My hubby had a bunch of 2x6's laying around so were using all 2x6's.
I couldnt figure out where he got -9 lol I thought it had to be -11 if you use 2 2x6's but wanted to make sure before I told my hubby what size to cut them.

Thanks alot

kass
 
Designing this for a 180 gallon. This is my rough idea, haven't smoothed it out yet.

Looking for any design deficiencies or overbuilding. Stand size is built with a 1/4" overlap of the aquarium its self.

I placed a single support in the front to give me 3 doors of even size considering a 1/4" over lap. My uncompromising goal for this stand is a wide entrance to work on my sump.

What is not in my model is the plywood that will support the sump and the plywood that will be on the top (rimless tank) and the skinny ply that will skin the back to keep sump lighting inside the stand. The front and sides will have some sort of wood for looks but I am not sure yet if i will use a sheet of something to skin it for fit sections of smaller board of nice wood over.

I hope this is enough information to get some feedback.

Thanks for all the information in the thread and design.
 
I have another question.
My hubby built me this frame 2ftx4ft for a 75g but we are reversing it and putting the tank in the back so the extra 4 inches goes in front. He did use 2x6 boards because we already had them.
We are using a laminate countertop for the top.
I'm wondering if we need the center board on top? Its not shown in the picture of the frame we built but is in the original drsign.

The frame we built reversed so it also has boards in the front.

StandWithbackgap90g.jpg


original design with the blue board in the middle on the top. The blue board is the one I'm questioning.

StandTemplate.jpg


This is the frame my hubby built. This is the front of the frame.

IMG_02401.jpg


We just dunno if he's suppose to put 1 more board in the middle on top (blue board in second picture). It was'nt on the plans we used but Im wondering if it was suppose to be?

Thanks
kass
 
Thanks thats what my hubby says but I wanted to make sure.
I wasnt sure if it was there to keep the wood from bowing.

I'd rather have a board there but now he has the board on the front so dunno if he has room for the drill to put one in anymore.
He made it according to the drawing and I didnt notice til after that it's missing that board.

kass
 
Last edited:
Just got the wood for the new 40b tank stand. Went to grab the drill and realized it is in my truck and the wife took it today.

Will get it put together tonight and update with pics!
 
Hi I read through nearly every page of your guide and finally almost feel comfortable to build a stand. I am building it for my 180g acrylic as my current stand looks like trash! I will follow your basic template but have one question. Where I will be putting my tank there is a major leveling problem. one end of the tank will sit about an inch and a half taller then the other end. What is the best way to approach this? Thanks!
 
Hi I read through nearly every page of your guide and finally almost feel comfortable to build a stand. I am building it for my 180g acrylic as my current stand looks like trash! I will follow your basic template but have one question. Where I will be putting my tank there is a major leveling problem. one end of the tank will sit about an inch and a half taller then the other end. What is the best way to approach this? Thanks!

The absolute best way to approach this is to create a level platform onto which the stand will sit. You can do this a couple different ways depending on the floor. If it is in a basement and on concrete, you could pour a small concrete pad that is level on top of the existing floor. Another option that works for all floors is to build a sub-base and trim it to match the contour of the floor.

With a 1.5" change in height over 6' I hope its in the basement. That much slope in a wood structure would make me suspect the strength of the floor.

HTH,
RocketEngineer
 
Thanks for a wonderful thread. I have a few questions

Background - 300 gallon acrylic tank 96 x 24 width x 30 height. I followed the format in this thread except i used 2 x 6 for everything and added 1 center brace. There is 3/4 plywood on the top and the bottom. Stand is short only 24 height to make it easier to get into the tank, plumbing will go into back room not under the tank.

Questions
1) Do i have enough vertical support with only one center brace?
2) How do you attached the skin?
3) what type and thickness of foam should i used under tank
4) What type of stain to use on the skin and do you have to coat it with something?

Once again thanks for all the info.. i wouldn't have been able to do this on my own

picture.php
 
1 yes
2 nails screws adhesive. Just about any way you want to attache the skin will work.
3 Thin foam is fine, you don't have to use any but it is nice encase there are any sharp points on top of stand.
4 what ever type you want to use will work. Do you have to coat it, no, but I would suggest it just to protect it. Some type of a polyurethane would by my suggestion.
 
Wonderful thread, thanks you to all the contributors!

In the original design, why do the interior green boards not extend to the top of the red rails. It also appears that they do not extend all the way to the ground?

I'm just curious as I'm about to start building my stand next week. My tank is a 36 inch glass cube, 20 inches tall. I want 6 inches of surface around all 4 sides of the tank, so the top plane will be 48"x48".

I would also like to distribute the weight across 48 inches of my floor rather than 36 inches if this is possible. thanks again
 
My hubby and I wondered the same thing about the green boards until I reread the description lol.
The green boards are just screw boards. Boards there so you can screw the other boards to them. So they don't have to go all the way to the top or bottom. It's an easy way to build the frame.

kass
 
thank you kass03, i recall reading that in the original description, I just can't figure out why they'd intentionally be shorter.

Are the support legs tied into the top and bottom boxes primarily by the screw boards then? thanks
 
Yes the green screw boards are used to attach the pink boards.
On the first page of this thread some people used pocket screws instead of the green boards to screw the pink boards in. It all depends on your skill and which way you want to do it. We used the green screw boards because it's easier.
You don't have to make the screw boards shorter but if you do you don't have to worry about the boards being level with the rest of it.

Also related to my earlier post my hubby did end up putting the center blue board on the top and bottom of our frame in the picture above.

kass
 
cFloor,
The green boards are shorter to ensure that they are NOT load bearing. The idea is that the load is transferred directly from the top frame, through the legs, into the bottom frame. The green boards prevent the need for directly attaching the legs to the frames as it would involve screwing at an angle which difficult or directly through 3.5" of board which is hard. Pocket screws are designed to use screws that are flat under the head to match the pocket hole and are perfectly acceptable in place of the green boards. However, it involves buying another tool some folks may not want.

kass03,
The blue boards help with twist, help support the plywood top and lower shelf, as well as give you a convenient place to mount things. Otherwise, the don't add to the strength of the stand directly, but they are nice to have.

RocketEngineer
 
Thanks for clearing that up rocketengineer and thanks for your plans for a stand.

Yeah we did put the blue middle boards in.

kass
 
I need your help new to this forum so I cannot pm u. I need help I want to built a stand for a 125g stand. Can u guide me in the right direction?
 
Back
Top