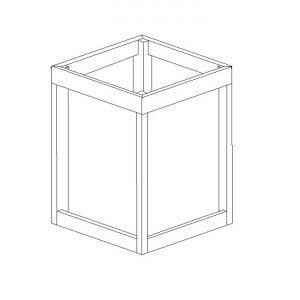
Hoping it will hold after all the money/time...plz help!

I think i understand most of what your saying, but wouldn't one of the 3 added legs to each corner not be able to fit underneath the frame? specifically the ones closest to the centre.

Also I don't mind adding the slab of granite, i actually think its a neat idea...hopefully not too costly but if it means it will work then i don't mind. So going with this method, would i still have to sacrifice the one door and cover it with a piece of plywood? or is that only if i go with the second option?

I wish i could see what you mean about the other method that doesn't require the granite though...
 
I was only using 2 extra legs on the corner. The third one like you said, is in a less usefull area, plus it really intrudes on your space. If you can spare the room, and want to utilize a 3x3 area for legs, I'd get a single 3" square piece and either notch it out to fit around the existing legs or replace them entirely if it's easier.

I don't see any way to keep the second door. How crucial is it? Could you cover half of the space and keep half as a door or would that not work out? Or cover the bottom half and make the top half open?

For the non granite method, picture pieces of 3/4" plywood cut into strips. 3" x ?"(the distance between the 2 walls). Notch out the top on each side for the upper frame. If your upper frame is thicker than 1.5", I'd use 4" strips to keep it strong where it attaches to the walls. I made a caveman style drawing in paint but it's too big to attach here. I can e-mail it to you if you want. It should give you an idea of what I mean as well as make you chuckle! :lmao:
 
Looking at the pics I don't know how strong it will be looks kinda light unless your a master carpenter and really did a nice job I always start with 2x4 frame go strong pretty last
 
I will go ahead and disagree with every one a tiny bit. It really does not look that bad. I think it would hold, in a best case setting. I would not trust it as is myself, but do think it would hold. However, I always think about things like an earth quake or child running into the stand. If your guy removed the base. did some quick supports across the bottom of the top shelf that ran to the ground, he could then put back in the base and you should be golden. I would not over complicate it. Just some internal 2X4s. It looks very salvagable with only a minor change.
 
chaaban: If I see the cabinets problems correctly:
The main problem is the underside support of the Weight of the tank is relying on just the plywood of your cabinet. You need to build a support beam construction which will best fit inside. If you were to save this cabinet you will require exstensive remodification of the interior supports. I've done some crude drawings of what would need to occure in pdf format and have hopefully attached them.

The 1st shows the Cross Beam and Beam support you would need to fit to the bottom inside of your top and inside frame. Built out of 3/4" x 1 1/2" solid oak this will support/distribute the tank weight better then just the plywood alone. It would need to fit into, as close as possible, to the interior of the outside walls and inner top support frame. Screwed/glued to the inner Cabinet top frame sides- not the top.

The 2nd pdf shows the leg supports. These built out of 3/4" x 1 1/2" solid oak should support the interior framework as shown in the 1st diagram. The corner leg supports need to be in every corner. The mid beam supports need to be on all sides as well. These, if made properly can be added to the inside of the cabinet door openings after the sump is installed using angle brackets top and bottom. I don't know what type of room is left inside of the cabinet with the sump but from what I saw it would be difficult to get this to all fit.

Get rid of the bottom support. It is sadly insufficient for the weight involved. You would be better served by building a 2x4 base with some cross beams. This would continue the weight support/distribution thru to the floor. Make sure the base is as close as possible to the outside dimensions of the cabinet. You can go 3/4" in on the sides but no more if you must have a toe kick.

What this will do is make your cabinet basically a "skin" to the support needed for this tank type. All the weight will distribute across the beams down the legs to the floor.

If it were me I would move the cabinet out, use it for a TV and build another stand from scratch. The cabinet looks nice but it's just not going to last for your purpose as it is.
 

Attachments

  • Tank stand fix #1.pdf
    31.1 KB · Views: 0
  • Tank stand fix #2.pdf
    19.6 KB · Views: 0
myself,

i would rip a piece of plywood down to 2" strips the width of the top of your stand, glue them down to the top with even spacing say about 6" apart and standing on edge. i would then cover the top with a new piece of 1/2" or 3/4" ply glued to the top of the strips you just laid on top...then i would trim the sides of the strips with a 3" or so piece of nice decorative baseboard or trim...that will shore up the top of the stand...

i would then take the toekick and bottom off the stand...i would cut a piece of ply to fit vry tightly inside the stand along the side with the door, i would then cut the inside of that piece of ply out leaving a 3" solid border all the way around, i would then glue and clamp it in...then i would cut a piece to fit the front in the same fashion...(hopefully your sump will still fit through the door) once those two pieces of ply are glued and clamped in i would reattach the bottom piece you have, i would then add a new bottom piece of 3/4" ply on top (underside of stand) to it...i would then reinstall the toe kick (as i really like the idea of it) i have a fake toe kick on my stand, as my trim sticks out and the legs run to the ground, but appear as they are recessed..i would try to find a similar style piece of trim to cover the edges of the doubled up ply on the bottom of the stand, this will further the effect of the toe kick....

anyway, doing this will add 3.5" to the overall height of your current stand, it will only effect the interior space by 3/4" in each direction, other then that the exterior will look pretty much as it does, you will be able to keep your big doors (although the openings will be slightly smaller)
 
Honestly, I'd consider just getting a new stand, it may be easier than modifying the current one. Did you tell the builder what you were doing with it? If so, I think he made some major errors in design. Better to do it right at the beginning while you can. I ended up scrapping the first stand I got for my 120, and used the pieces of it to house ATO and WC reservoirs.

Are you dead set on the cylinder tank? Its tough to fit stuff under them, and they tend to severely visually distort things inside the tank, offering a very narrow field of vision. Even bowfronts run into that problem to some degree, curved glass and the water effectively act as a lens. Everything towards the edges tends to be severely blurred, stretched, and distorted. The thicker the glass, the worse. Just my two cents.
 
So many ideas im lost, I did tell the guy that built this stand that I want it for that purpose and he said the stand will hold the weight... You all proved him wrong.

imchris- covering the one door is fine with me, especially if i can do half of the door, by having a pieces of plywood cut to fit in the middle of the door going vertical, this would allow for some room on both ends of the door.

fla2341- I appreciate the time you took to draw up the diagrams, your idea is great but you have me thinking if building another stand all over again is a better idea...

NanoReefWanabe- I like your idea but the tank already sits so high that maintenance of the tank is already going to be a bit of a PITA and I don't have the room to go any higher with the lights being on top. P.s- Im also from Ontario :)

GroktheCube- Honestly, lately with all the problems I've had, Ive been thinking of perhaps getting a cube that would sit perfectly on the top of the stand. Of course this also depends if one of the advantages allows for no modifications necessary to the stand.
 
FWIW, I believe there is a sale on Marineland 60G cubes at the moment. Someone I know was quoted $160 for one today, and the pet shop owner mentioned something about a sale (Marineland's or the wholesalers, not theirs, it was a special order).
 
Hopefully the below sketch gives you what I would do. The top rail is screwed in from the inside of the vertical. The bottom rail is finished nailes to the verticals. Then for the back sides is all you need is 1/4 Pluwood to add stability. But the weight of the top rails needs to sit on the verticals.
 

Attachments

  • corner stand.JPG
    corner stand.JPG
    31.6 KB · Views: 0
FWIW, I believe there is a sale on Marineland 60G cubes at the moment. Someone I know was quoted $160 for one today, and the pet shop owner mentioned something about a sale (Marineland's or the wholesalers, not theirs, it was a special order).

Having had a business and dealing with Marineland I will say they always had something on special. They used to rotate there tanks on special to the stores. Some stores would grab pass along the sale price others would take it as profits.
 
Back again with some more questions guys! Hope i can get some help, I haven't done much with the project since I had exams to worry about and now my summer is here and I have some time to spare.

I cant find anyone to give me a straight answer on wether or not what i have in mind will be good enough, below i have pictures of the stand in question again, but this time i have added 2 x 4 pieces of wood hoping it will be enough to support the weight,

I placed two on the corner piece that has very little support due to the giant doors, and several others spread out:

picture.php


picture.php


picture.php


picture.php


picture.php


Corner piece with little support:
picture.php


And heres a picture of the toe kick:
picture.php


As of now, all the pieces are just tightly squeezed in to place and will be some how screwed in if everyone thinks this will work.
 
How thick is that plywood top? I think that is the key to if this will work or not. You have supports at multiple points near the edge of the plywood top but the wirght of the tank is not directly over the suports. If it is 3/4" plywood top and the suports are near the corners of the tank it will probably be safe. If the top is thinnner or there is a big space between the suports and the edge of the tank I would run cross bracing between the suports.
 
ok i am going to butt in here and put some of this to rest a 3/4 ply is just as strong as a 2by4 when on its eage as long as it is conpleatley under the top of the stand ! after building cabnuts for 10 years for tanks i have onley seen one not work and that was becouse of the person swiched tanks and went a lot taller
 
and for the ones that do not under stand this the new but not so new standerd on razed foundation homes is lament joices hence plywood with a 2 by 4 on each top amd bottom
 
I think you overkilled it and sacrificed some space and accessibility that you didn't want to and didn't have to.
 
ok i am going to butt in here and put some of this to rest a 3/4 ply is just as strong as a 2by4 when on its eage as long as it is conpleatley under the top of the stand ! after building cabnuts for 10 years for tanks i have onley seen one not work and that was becouse of the person swiched tanks and went a lot taller
if the stand is properly built, changing the height of the tank would not matter...weight placed on the edge of plywood is not going to cause it to fail, especially if it has proper lateral support....but changing a 24x24x24 cube to 24x24x36 cube is not going to make the stand fail...nor would making it 48 tall...the ply is more then capable of the weight capacity (if constructed properly)


and for the ones that do not under stand this the new but not so new standerd on razed foundation homes is lament joices hence plywood with a 2 by 4 on each top amd bottom

what you are trying to describe with painful spelling errors are two different things, Laminate beams (para-lam) or laminate joists (LVL's) are completely different then TJI's (silent floor) joists..paralam's and LVL's dont have flanges on them, and TJI are constructed from OSB (orientated strand board) not plywood, and for the most part, the flanges are laminate ply construction and not 2x material.

nobody is saying the plywood stand wont hold weight, we are saying there is no support for racking, the toe kick portion was not done correctly for the weight of a tank, and the top of the stand ( a piece of ply on its flat) will not hold up long with the weight of the tank being strictly held up by the edges of the ply and no centre support...properly built a stand doesnt need a plywood top, the tank should rest on the vertical supports.

I think you overkilled it and sacrificed some space and accessibility that you didn't want to and didn't have to.

i agree, there were much more elegant solutions posted to fix this stand...simply sacrificing 4" on the top of each door, and 1.5" on the verticals of each side of the door would have fixed this without sacrificing hardly any access to the sump...i would have glued 1.5" tall strips of cabinet grade ply to the underside of the top going across the stand...i then would have glued a 4" strip across the top of the door on the left side of the stand (the secondary access door) ensuring it was pressed and nailed in tightly to the bottom of the strips under the top... then i would have glued 2-3" wide strips up the corner of each door, ensuring they fit tightly between the floor and the 4" piece above the door, do the same to the other opposite side of the stand...i would then glue in a piece to the back of the one corner leg in the same fashion as the first, which would slightly reduce the opening of the front door...then i would flip the stand over, and put a bunch of strips of plywood behind the toe kicks, to transfer the loads of new post and beam construction of the stand directly to the floor...all you have sarcificed in this situation would have been ~2" in the interior height of the stand, ~3" in the width of the side door opening, ~ 4" in the height of the side door opening, and ~ 1-2" in the width of the front door opening. stain the pieces to match the stand and you would never know it was built otherwise.
 
Last edited:
I really appreciate everyones help, dont worry non of the 2x4's are glued or screwed, i had them laying around so i thought i would give it a try....after reading "nanoreefwannabe" suggestion, I think it all makes sense to me but im not sure about what to do when you say, "i would then glue in a piece to the back of the one corner leg in the same fashion as the first, which would slightly reduce the opening of the front door."...


Below i have a picture of a quick drawing of the steps you suggested i take, aside from the portion i mentioned i dont understand. And i didnt draw anything for the toe kick but i know i understand that 100%. Please take a minute to see if this is what you mean, also am i using glue only or screws as well?

picture.php
 
the strips under the top have to be glued on edge...as for the other comment...essentially the front door would look similar to the left side door other then having a piece across the top and up the right side...essentially only having additional support up the left side (the post corner) you can run a strip up the right side corner too but i dont think it will really help anything...hopefully you can still fit the sump in and out with those mods...if not i would consider rebuilding the whole stand...screws will help the glue set better, however they arent required if you clamp everything...
 
Back
Top