New 90 build-up - suggestions please..

BallaBooyeaH

Premium Member
Well after 2 years I have finally got my tank close to finishing. After having 2 kids everything has been put on hold, but now I am getting close to the final stages.

From having a tank stand worthy of the Getto Tanks thread I now thanks to my brother in law and his worker from Croatia a fine piece of cabinet making stand and hood.

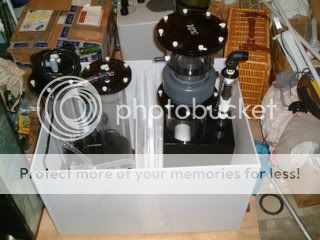
Here was my first attempt of the stand. I tried to copy that of Flame Angel in Canada.

DSCF0015.jpg


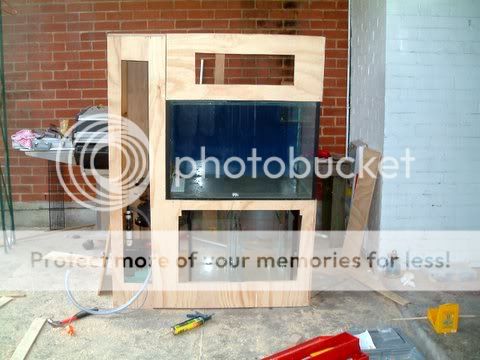
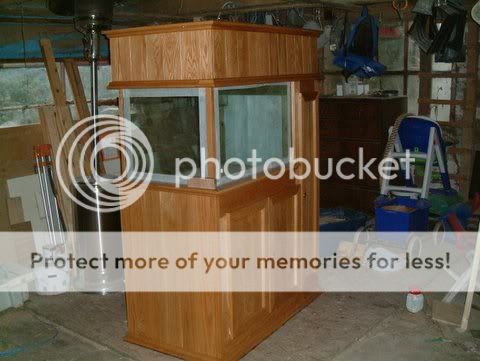
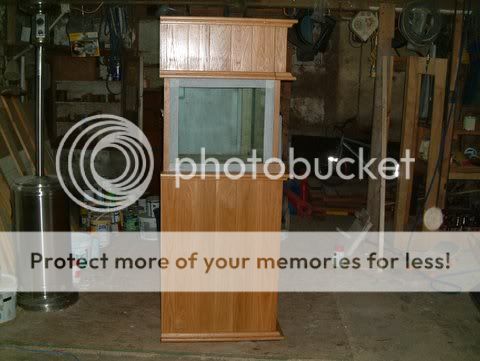
Here is my new stand that has just been built with Oak wood. Just finishing off the final coats. The insides are now all white and I have 34 costs of varnish on the outsides.

DSCF0014.jpg

DSCF0013.jpg


Now that I am this far I need to get the sump designed for underneath. My plans at the moment are to have a sump with a refigum below ââ"šÂ¬Ã¢â‚¬Å“ and also have one up next to the tank in the hood to allow Pod to fall into the tank (again like flame angel). In the side cabinet at the bottom I plan having a container for auto top up of RO water controlled by float switches and a small pump. I would prefer a larger sump to go the side of the cabinet but then I would not have the space for the top up. And according to Melev I need to have the top-up level that of the sump or it will siphon right into the sump

Please check out the sump design I have at the moment. My big concern is that the return area is too small.

sumptop.jpg

sumpside.jpg


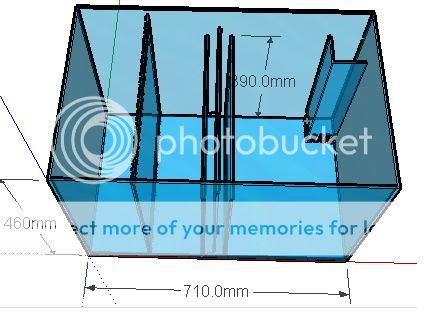
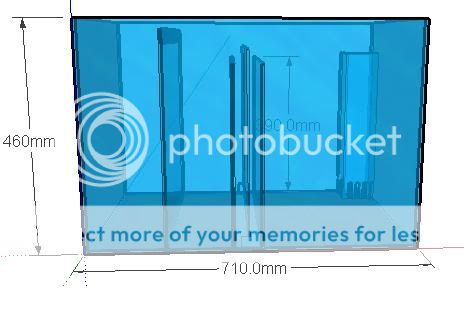
It will be made from 6mm Polycarbonate plastic and welded together. It is not transparent like acrylic but the guys making it for me say it is much easier to work with and stronger (plastic engineers) It will be cut via a CNC router so it will be on the dot of the drawing.

I have a MRC MR-2 with an Iwaki 55 RLT pump. Also a CR-2 and a PH controller.
For lighting I have 2 X 150W Icecap DE MH with 10k bulbs. I also have a 660 for 4 X 3ft antics and whites with VHO end caps. I am not sure whether to go for the T5ââ"šÂ¬Ã¢"žÂ¢s over the VHOââ"šÂ¬Ã¢"žÂ¢s, Love some comments on this from experience.

Andrew
 
looks nice so far.

Dont get too worked up w/ making a pod-return fuge. It has been shown that pods have a low mortality rate when getting shot through a return pump.
 
Hey Andrew, thanks for the kind words in my thread!

I think your cabinet looks awesome. The three of you did an amazing job.

I like the design of everything, the only thing I would change is your bubble trap. I have better luck with the under/over/under method as opposed to o/u/o.

Imagine a bubble, it is going to rise as fast as it can in the water. If it rises near your bubble trap it will go over the first baffle and then follow the water stream to the last chamber. Whereas on the u/o/u method the water will stop at the first baffle.

Melev is right, if your topoff water is higher than the water level in your sump then you will siphon the topoff water to your sump. To remedy this you can put the topoff output to your overflow in your display tank.

I also recommend getting a dosing pump to supply the topoff water. A maxijet pump will work but I like the dosing ones better.

One thing I notice with the sump, and I may be wrong but the baffles look awefully high. I worry that when you turn your main pump off the water backflow will be too much and you'll overflow the sump. If that is the case I would lower the baffles, mainly the bubble trap ones. You could install a checkvalve on your return plumbing to stop the backflow from happening but there is one thing guaranteed with those, they will fail at the wrong time.
 
Looks good Andrew, I will be starting to build a stand for my new 120 soon so I hope to "borrow" some ideas.:D
 
If you plan to put a refugium in your narrow cabinet like Flame*Angel did, then you don't need a refugium in the sump.

I would just build the sump with the skimmer section (and the bubble tower you drew in), the bubble trap, and the return section. Find out what depth that skimmer can be in. I tend to make the skimmer section 9" (22.5 cm) deep. Is that 71 centimeter long, or am I reading that wrongly? I see 710.0mm. You don't have room for a refugium in a sump that is 28" long.
 
Dr Chek - Thanks for the comments on the stand - Will post more pics as it comes closer to finished the varnishing. It came out better than I expected. I was on holidays in Italy and came back to it close to finished - few changes I would have prefered but not complaining.

King Kong - I wanted 2 refs. one next to the tank at the top in the hood so Pod could just fall into the tank from a over flow pipe - this made great sense to me so I decided for this - Melev is suggesting just one at the top - I was thinking 2 is better than 1. Will see what is decided.

Thrlride - Great points - the u/o/u sound like a good idea - I will change this in the new revised drawing. I have the baffles high to get more water in the sump - trying to increase the maximum gallons in the space I have. I do have a valve for the line that will go to the tank - so if I get a power outage it will stop the back flow - I assume this is what you mean?

Top off to the main tank is another good idea. I did not think of that. In theroy - I could have my float switch in the sump - when it gets low the RO water pump will kick in and send the water to the main display tank where the feed goes to the sump. this will let me not need to have the RO bucket on the bottom of the stand next to the sump - allowing more room.

Cprowler - no problems - I suggest look at Reef Angel tank pf the month - few years back - got all my idea's from there. as for the hardwood oak - I was firstly looking for long floorboards but could not get them - I then just purchased planks of Oak and they needed to be planned and sanded before getting joined. It was a cabinet maker that did it all for me from photo's if other similiar tanks I sowed him.

Master of the sumps Melev - I was thinking 2 would be better. The top one has say 9" max on the top. not sure if I will have the sizr to be able to make it usefull as I was under the impression that the bigger the more benificial. As I can now have my RO water not at the bottom (send the RO water to the return in the main tank) I can have more room in the bottom of the stand. Would it be worthwhile to have a ref. at the bottom as well? Also with the PS section at 9" - My MR-2 can sit in 9 - 10 inches of water - I can also put it on a stand so it operates in this height. Iwould this be worthwhile or is 9" enough? It is 71cm in lenght but I will look at it again tomorrow at the workshop and see what extra I can get from it now with the other section.

To all thanks for the tip's - more pics comming soon
 
I forgot to ask about the coats of varnish. Are there really 34 coats? Wow.

Having a second refugium is fine. One guy in our club has 6 minibow tanks set up next to his reef, each its own refugium. I typically aim for 10% of the display tank to figure the right volume. If you make the sump longer (at least 36" or more), the refugium can be incorporated. If you do that, I recommend you build it like the Model F (fuge - return - skimmer) so that you can regulate the flow in the refugium rather than having it full flow from the skimmer section through the fuge into the return.

If your skimmer needs to be raised up, a small stand is fine. Like I said, usually 9" is sufficient.

I've made sumps both with Under Over Under, and with Over Under Over, and the latter is the better method. You have a bubble tower in the corner anyway, so it is unnecessary to worry about microbubble issues. Any bubbles that make it out will travel around the skimmer and up the baffle until it gets to the Over part. Now they try to flow downward, but air rises so they either make it or they don't. On the other side, they have to rise up again, another chance at popping. It should really be fine. One last point - with Under Over Under, you'll have a section that is between those two outer baffles where the surface water grows stagnant. I've seen slime accumulate on this narrow surface, while water rushes under that skin. I try to avoid these types of situations, because it ends up being yet one more area that needs cleaning/attention.
 
Opps - typo there it is 3 - 4 (3 to 4) coats. I am sick of the paint brush in my hand. One more on the outside will make it 4. i have painted 2 coats of white primer on the inside and 2 coats of white gloss. I plan on 2 coats of varnish to seal of the inside then I will be done.

will re-measure everything again today and look at new design for the sump. I will make it like type F with the intake chamber included.

Andrew
 
Well the sump has been made and here it is.

DSCF0022.jpg


Made from 6mm poly..something - I'm told it is stronger then acrylic.

Now time to do some plumbing and get water in for a leak test.
 
Hey Andrew, I almost forgot about you. :D

How is everything? Do you have any other updated pics to show us?
 
Will do next week,

Need the tank delivered to my house from the workshop.

A little plumblin and wireing up then I will thrown questions left right and center.
 
We talked about that sump so long ago, I didn't even recognize the conversation (didn't read the dates until I saw my replies coming up) I was (re)reading. :lol:

That sump looks small and full! What are those items in the left section? Do you plan to keep those in there, because they will displace space where water would be.
 
HEY Marc,

Well in the right side of the sump is my MRC-2 and also a baffle like you do for dispursing the bubbles on the entry of the skimmer section.
Then the bubble trap to the return section. I have my CR-2 sitting on a stand so I can fit it under the cabinet. I made the side cabinet to small to fit it in. Once I do some tuning this week I will get this as high as possible so it will not be taking room in the return section.

I also have a submersible pump in this section connected to a swcd for the return line.

I plan on a OM4 way for a closed loop in the system with 2000 gph sequence pump to move it.

Got to get the lights all sorted in the hood today - need a trip to the hardware shop in my little irish town to get bits to hang my PFO 150's.

More pic's as they come.
 
Back
Top