Salt Water Mixing Stations Let's See Them

Apex is a MUST on a saltwater system!

Apex is a MUST on a saltwater system!

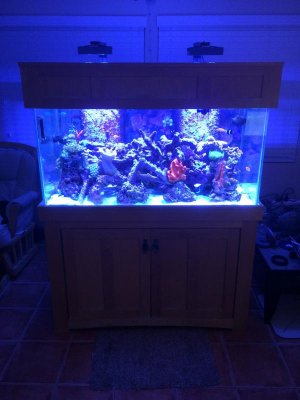
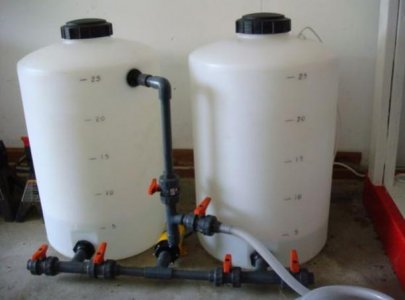
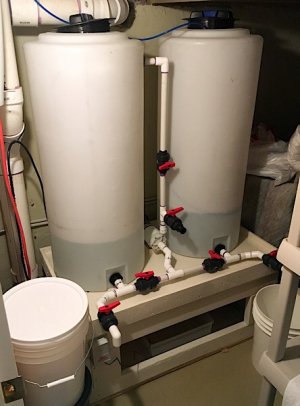
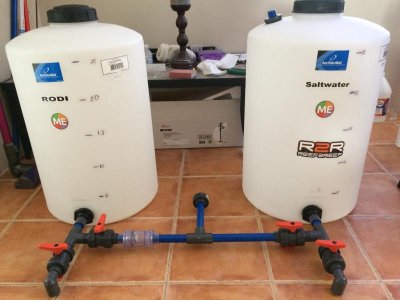
I would not set up a tank with out some sort of controller!!!! Best gear on my system by a mile is my Apex. You can do so much stuff with this thing, it's crazy/ I made a custom Apex control panel right next to my main display./
 

Attachments

  • IMG_2930.jpg
    IMG_2930.jpg
    52.7 KB · Views: 3
I have really enjoyed following this thread and have taken a lot of great ideas to incorporate into my setup below:

<a href="http://s1219.photobucket.com/user/gmitch72/media/In%20Wall/6D1EAC95-9094-4A7B-BB94-6554E2639B47.jpg.html" target="_blank"><img src="http://i1219.photobucket.com/albums/dd427/gmitch72/In%20Wall/6D1EAC95-9094-4A7B-BB94-6554E2639B47.jpg" border="0" alt=" photo 6D1EAC95-9094-4A7B-BB94-6554E2639B47.jpg"/></a>

I am using two 55 gallon drums with removable lids. The one on the left is fresh RO/DI and the right is the mixing drum for salt. Both drums can be fed with the RO/DI line via a 3 way valve. They are both hooked up to a panworld pump and there are lines/valves to recirculate water, send water to the mixing drum, send water to the hospital tank, and send water to the service sink.

Auto top off pump is attached to the barrel and a dual head peristaltic pump is hooked up to the salt water to do water small 7-8 gallon water changes 3 days a week.

@garrette, I have the same Peri pump and I was wondering how do you remove the salt water from your sump so you can new saltwater in for a water change using the peri pump??

i WAS THINKING OF GOING WITH A Lillimeter from Spectra pure to do my automated water changes but the peri pump is a lot less expensive? Currently, this my set up! I have an Inkbird Temp Controller that can plug in a heater if need to be and a Pinpoint Salinity Monitor and run a Panworld PX40 WATER PUMP.
 

Attachments

  • sm#2.jpg
    sm#2.jpg
    57.5 KB · Views: 4
@garrette, I have the same Peri pump and I was wondering how do you remove the salt water from your sump so you can new saltwater in for a water change using the peri pump??

i WAS THINKING OF GOING WITH A Lillimeter from Spectra pure to do my automated water changes but the peri pump is a lot less expensive? Currently, this my set up! I have an Inkbird Temp Controller that can plug in a heater if need to be and a Pinpoint Salinity Monitor and run a Panworld PX40 WATER PUMP.

Love your plumbing it looks super slick!

I have changed my setup slightly since this post. My philosophy on water changes has changed as well. I ditched the peristaltic pumps and swapped out the panworld for a waveline DC pump. I am doing bigger less frequent water changes and dosing trace elements while running a calc reactor.

I was, however, using two peristaltic pump heads. One to take water out and one to put new SW in. I ran this off two float switches in the sump. Drain the water using one peristaltic pump until the low flow switch hits and then start to fill the sump with new SW until the high switch hits.
 
Getting ready to redesign my Mixing Station

Getting ready to redesign my Mixing Station

Here is a shot of all my plumbing parts, Cepex Ball Vales and I will have two Spears True Union check valves as well on each side before the water hits the tee that will go into my PanWorld px40.

I am going with Two 25 gallon Ace Moto Vertical Storge Containers with lids with two 3/4'' buclkHeads. which i PICKED UP @ RuralKing for 65.00 a pcs with FREE SHIPPING. Every other place like Plastic-Mart, Tank Depot wanted more in shipping then the barrel. This time I'm going with Sch 40 BLUE pipe instead of the red I used on my station. Ones I am done with my station it will somewhat look like this one, see pix # 3. The only difference between mine will be it will have an extra Cepex ball valve on each side, incase I need to get a couple of gallons out of my fresh or saltwater barells.
 

Attachments

  • IMG_5141.jpg
    IMG_5141.jpg
    70.8 KB · Views: 3
  • Screen Shot 2017-07-02 at 12.50.33 PM.png
    Screen Shot 2017-07-02 at 12.50.33 PM.png
    61.5 KB · Views: 4
  • Screen Shot 2017-07-02 at 12.59.11 PM.jpg
    Screen Shot 2017-07-02 at 12.59.11 PM.jpg
    22 KB · Views: 2
It's got my wheels turning in my little brain on how I can do this in my spare closet that is near my tank.
I'm also debating small daily water changes or larger weekly/biweekly changes. Any input?

Corey
 
When building my mixing station, I chose to make the tabletop into a shallow sink, sealed with epoxy, to contain spills and placed a water leak sensor in the drain collection bucket.
 

Attachments

  • IMG_8280.jpg
    IMG_8280.jpg
    41.1 KB · Views: 2
  • IMG_1464.jpg
    IMG_1464.jpg
    68 KB · Views: 3
When building my mixing station, I chose to make the tabletop into a shallow sink, sealed with epoxy, to contain spills and placed a water leak sensor in the drain collection bucket.
Hey, are those 18" diameter tanks and if so, what are the dimensions of the stand?

Sent from my SM-G950U using Tapatalk
 
As of now I just use a Brute for my RODI with a uniseal and a valve, then mix my SW in a 5g bucket, after all I only have a Biocube29 so I only need a few gallons of SW for a water change. However, I'm planning an upgrade (somewhere between a 75 and 120g), so I plan on getting another brute to use for mixing larger batches of SW to store for changes. I might get some Uline containers if I can get some new ones from work before my boss hacks them up for one of his stupid projects </3.
 
Here is a Pix of my build!

Here is a Pix of my build!

I am Using 2 - 25 gallon Ace Moto Storage Containers instead of the Brute cans:


Equipment list, everything will be 3/4'' & Sch 80:

2 - Ace Moto 25 gallon Vertical Storage Barrels
6 - Cepex Ball Valves Slip x Slip
2 - Spears Check Valves Slip x Slip
2 - 58'' Blue Sch 40 Pipe
5 - TEES Slip x Slip
2 - Banjo Fittings /Male
2 - Banjo Fittings / Female
3 - Pipe Adapters Slip x Slip
4 - 90's Slip x Slip
4 - 90 Spigot x Street Slip x Slip
4 - True Unions Slip x Slip
4 - 45 Elbows Slip x Slip
2 - Male Pipe Adapters
2 - Female Pipe Adapters
1 - Spears Check Valve
1- ABS BulkHeads Slip x Thread
1 - Marine & RV Drinking water Hose 25FT
1 - Pinpoint Salinity Monitor
1 - InkBird Temp Controller
1 - Mag Drive for pulling out the old salt water
1 - PanWorld PX40 for the main pump
1- Heater
1 - BRS 6 Stage RODI system
1 - RODI Custom panel to install all my RO gear
 

Attachments

  • IMG_5176.jpg
    IMG_5176.jpg
    50.4 KB · Views: 2
Ace Roto Mold 25 Gallon Vertical Dome Top Tank VT0025-18

Ace Roto Mold 25 Gallon Vertical Dome Top Tank VT0025-18

Very nice set up. What's the cost And where did you get the barrels?

Sent from my SM-N920T using Tapatalk

www.ruralking.com is where you can get these ACE MOTO barrels, they make them in all different size but I thought the 25-gallon ones would be perfect for my set up. All of Ruralking competitors there shipping are more than the barrels @ like Plastic Depot, Tank Depot, etc etc their shipping is more than the containers. @ Rural King my total including shipping was $162.00 which was the cheapest on the net.

Here is the link for you:
https://www.ruralking.com/ace-roto-mold-25-gallon-vertical-dome-top-tank-vt0025-18.html
 
I used a template I found on RC (I included a potential link to the source, but I lost track of who originally posted this) but changed the dimensions to allow a 5 gallon bucket to fit under the spigots on the front (18 " tall) and made the table top from 3/4 " plywood and 1/2 inch plywood sheet (Home Depot stocks 2'x4') which I cut down to 42"x24" (the sheets were glued together after drilling drain holes). Two overlapping holes were cut in the plywood to allow a 1/2" bulkhead fitting to be inset from the top. A rectangular box can be slid into the bottom opening below the drain or one could run a pipe/hose to a floor drain if present. 2x6 and 2x4 's were used for the frame. I think I used 1x 4" stock to make the lip of the sink. A wood block stand for the pump was used to keep it above any pooled water

The top was caulked, painted, and clear coat epoxied. While I tilted the back of the table a few inches before the epoxy set to angle any water towards the front drain area, I would probably have used a few more inches of tilt if I had to redo (I could always add another layer with more tilt/slope in the future if needed)

http://www.reefcentral.com/forums/showthread.php?t=1567110&page=15
 

Attachments

  • IMG_1475.jpg
    IMG_1475.jpg
    49.8 KB · Views: 3
Back
Top