StoliReef, the Dream Begins

Stolireef

Active member
This is going to be my system build thread. The tank is a 110 LeeMar rimless with measurements of 48LX30WX18D. It is intended to be an SPS dominated tank with shoaling (non-jumpers) fish. It will be lit by LED's (to be determined).

Tank and wood cuts for stand attached.

Once I learn/remember how to include images in the posts, this thread will get better.
 

Attachments

  • Tank.jpg
    Tank.jpg
    23.6 KB · Views: 22
  • Wood Cuts for Stand.jpg
    Wood Cuts for Stand.jpg
    19.2 KB · Views: 16
I really like the beveled corners although the silicon work is not the absolute best I've seen. It's not structurally bad, but there are a few bubbles. My sense is that they won't be noticeable once the tank is up and since they are on the bottom edge and the stand will have a small moulding that covers that edge, it isnt a problem.

My only fear is that I have to drill the ports in the overflow for the returns (I don't like them over the top. I have to make sure my hands aren't too shakey. I think a few pillows inside the tank to guard against dropping the drill are probably a good idea.
 
That is odd, a small bubble or two is common in all tanks, do you have many?

Just make sure not to get the return holes drilled to low in the plastic. If you do, it will create a siphon and flood your sump if not setup properly :)
 
It's just a few very small ones. I plan on drilling the holes about 1" beneath the 'teeth' on the overflow. The sump should be more than sufficient to hold the entire amount of water at that depth (I'm doing a 40 gal sump so even if it is normall 1/2 full, I should have more than sufficient room to avoid problems).
 
Finished Framing of Stand

Finished Framing of Stand

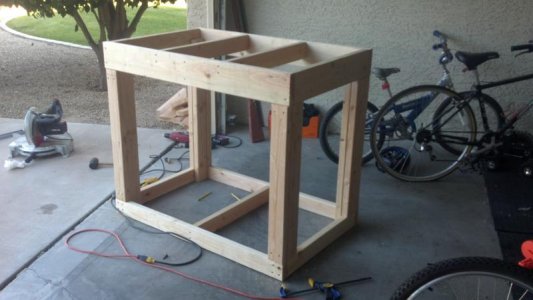
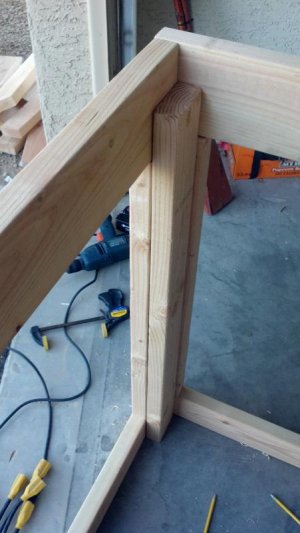
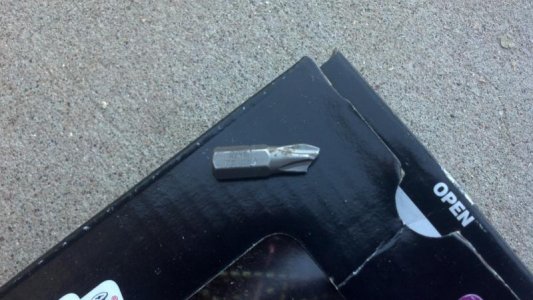
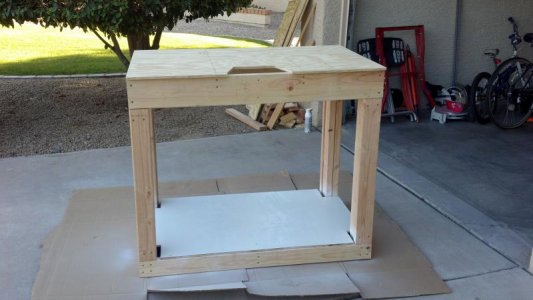
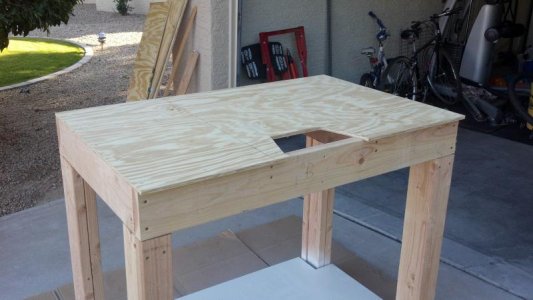
Here's the finished frame for the stand. The basic design is taken from Rocketengineer's posting in the DIY Forum. My sense is that it is heavily overbuilt but pretty easy to assemble with a chop saw, drill, screws and glue. Still deciding on a skin. Note that I used 3 inch brass drywall screws whenever possible. Although no screws bear weight, the long screws helped to square the stand and pre-drilling makes them pretty easy to screw in. Also note that the design calls for a center brace which, after adding, I realized would interfere with my center overflow, hence the double top braces at 16 inches. The center braces don't hold weight but they help square the top. Also, if anyone is contemplating this design, build the top and bottom box first, then add the interior tacking uprights (don't bear weight), then add one bearing upright per corner, then add the second upright. It took me a bit of thought to figure this out.

Now I have to figure out a skin for the stand. I was thinking about just clear laquering maple boards, but going to sleep on it. Also may paint the interior of the stand with a bathroom water-resistant paint.
 

Attachments

  • Finished Frame.jpg
    Finished Frame.jpg
    47.4 KB · Views: 22
  • Corner Detail.jpg
    Corner Detail.jpg
    46.8 KB · Views: 20
And just in case

And just in case

You think it can't happen to you, bits do break and when that happens, make sure you are wearing something on your eyes. The broken part embedded flew about 20 feet.
 

Attachments

  • Broken Bit.jpg
    Broken Bit.jpg
    62.2 KB · Views: 18
Lastly, in the corner detail shot, you will see some Quick Clamps. Other than the drill (with bits for both screwing and drilling...don't say it), the clamps helped imensely, especially with squaring the frame. I have several sizes up to 36 inches and they are great.
 
That is a great sized tank! With 30" wide, this will give you a lot of options for aquascaping. I'm hoping to buy my own place this year, and have had my eye on a 48x24x18 display, just to keep the water volume from being super high and needing new equipment, but going 30" on the width is a great idea! Keep the pictures coming!
 
Thanks for the kind words Fig. I'm putting the top on the stand today, cutting the carpet away from the floor and, if all goes well, putting the tank on the stand. Should be an exciting day.
 
Finished frame with top and bottom bases

Finished frame with top and bottom bases

This is the completely finished frame. I notched the top so that I could easily plumb the overflow and returns even with the bulkheads (last time I did this, I used a hole saw and the bulkheads made things complicated. I also painted the base on which the sump will sit. I used Rustoleum primer and top coated it with Rustoleum Paint/Primer to give it the hardest and most water resistant surface possible. Plus, the white will show less salt associated with the occasional drip or spill.

With luck, the stand will be moved to its final location tomorrow after I cut away the existing carpet. Concrete slab underneath so it should sit very solidly.

Next purchase will be a four stage RO/DI unit along with the sump. Any suggestions would be appreciated. I had a Spectrapure RO/DI unit that I liked but that was a few years ago and I figure things have changed a bit since then.
 

Attachments

  • Finshed frame with upper and lower base.jpg
    Finshed frame with upper and lower base.jpg
    49.1 KB · Views: 22
  • Top view of finished frame.jpg
    Top view of finished frame.jpg
    49.9 KB · Views: 28
Ecotech Radion Lighting and Return Pump/Stand in Place

Ecotech Radion Lighting and Return Pump/Stand in Place

The unskinned stand has now been moved into its final location (learned a new skill, how to cut carpet). I've also purchased two Ecotech Radion XR30w fixtures that will provide all (hopefully) necessary lighting to the tank. The fixtures were really nicely packed and are very well built (as is the driver). Lastly, I picked up a Secce Syncra 5 pump that will provide the return flow.

Sump is still under consideration although I'm leaning to the EShopps R300 (36" with fuge). Will also likely get an Octopus 150 for the skimming. The only drawback I see to most sumps is that they are a bit too narrow and that makes in-sump skimmer maintenance a real pain. Not sure how to get around that yet short of buying a custom sump. I will likely hard plumb the Secce leaving more room but still haven't made up my mind. Suggestions wanted and appreciated.
 

Attachments

  • Radion Fixture.jpg
    Radion Fixture.jpg
    35.8 KB · Views: 21
  • Unskinned stand in Final Location.jpg
    Unskinned stand in Final Location.jpg
    28.3 KB · Views: 20
  • Secce Syncra 5 Pump.jpg
    Secce Syncra 5 Pump.jpg
    40.2 KB · Views: 23
  • Radion Driver.jpg
    Radion Driver.jpg
    23.6 KB · Views: 21
Nice tank I love the dimensions! I tried to buy your tank from AA when it was sitting in the store(waiting for you to come and pick it up), but for some reason they wouldn't sell it to me. Good choice on lighting and good work so far on the stand. Have you considered a 40br for your sump? its really easy to add baffles and dublo8 has a really cool 40 br. sump design thread you could use as a reference.
 
Nice tank I love the dimensions! I tried to buy your tank from AA when it was sitting in the store(waiting for you to come and pick it up), but for some reason they wouldn't sell it to me. Good choice on lighting and good work so far on the stand. Have you considered a 40br for your sump? its really easy to add baffles and dublo8 has a really cool 40 br. sump design thread you could use as a reference.

I actually started with the idea of using a 40 breeder but I don't have any experience working with acrylic to add the baffles. Also, I'm still debating whether to hard plumb the return pump. If so, there's no way I have the skill to drill a bulkhead in a glass tank. Unfortunately, I haven't been all that impressed with the sump designs I've seen. They are all designed pretty narrowly. I have at least 20" front to back room. I should be able to get a sump that's at least 18" front to back without paying a several hundred dollar premium. Oh well. Just keep looking for the right answer.

So far, I've really tried to avoid settling on an 'OK' solution. Sump is just something that I'll have to keep researching.
 
You could always order glass baffles and silicone them in. I have purchased glass panels from local hardware store (ace) but they glass is a bit flimsy. A couple years ago I walked into a glass shop and ordered baffles, cost me about $40 for 3 or 4 I think, but they were a whole lot thicker and real nice, still have them in my 30g sump I made.
I'm sure there are a few people on here that would help you drill a hole, I have drilled maybe 6 holes (a 70g, 40b, and 10g) so I'm no expert, but it isnt that hard. I'd be willing to lend a hand if you took that route. (I forget what size bit I have, but they arent expensive)
Glad to hear you are not settling for 'ok' options! I cant wait to make my dream setup!
 
Light Rack

Light Rack

Constructed basic light rack today out of aluminum from Home Depot. Used 1.5 inch corner and 1" tubes. Strip will run at end of tubes to square rack. Chain will attach to wall to provide addtional support.

Rack will be primed with Rustoleum aluminum primer and flat black paint and then hung tomorrow (more pics).

Also purchased EShopps 200 sump, MP40 Ecotech pump, and Octopus 150 skimmer.

Hopefully, tap water testing starts next weekend.
 
Oh, and working with metal is way different than working with wood. Much less forgiving and really, don't forget your eye protection.
 
Back
Top