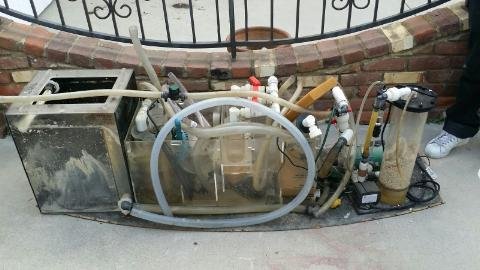
You may or may not want to do what I did. I didn't want to clutter up my cabinet. I have the sump and a large two chamber Ca reactor in there already and wanted to have some open space. I drilled two holes in the side of the cabinet and the skimmer is sitting outside the cabinet.
So you are saying that you have 12" to play with? (That's what she said)
")
For the input into the skimmer the pump is going to be in the sump and the input (venturi) will be above the sump, and then the vinyl tubing going straight down to that sump. That is no problem. The issue may be with the output from the skimmer. Ask Jeff what is the length from the back of the skimmer base to the end of the gate valve with hose barb on the opposite side. I'm not home to measure but off the top of my head, it is more than 12".
") .
.