6 foot rimless shallow reef build

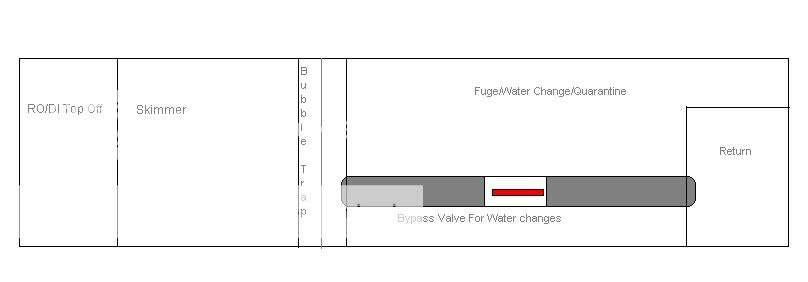
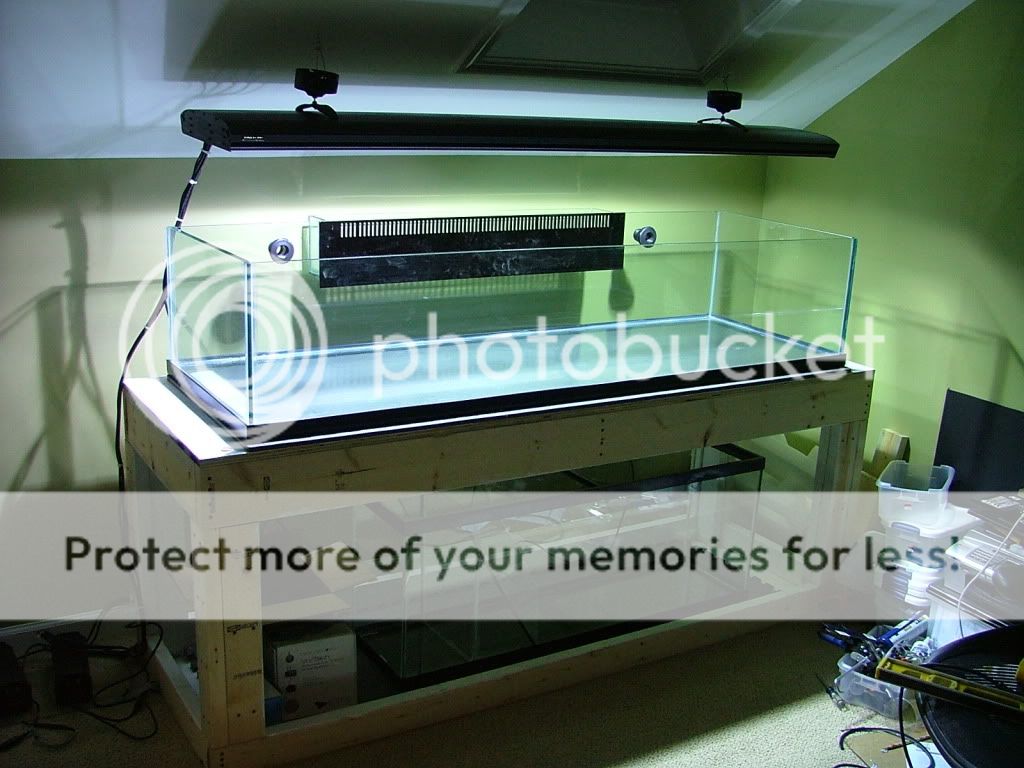
Bulkheads are on order, and I got a 48x13x19 to make into a sump. Just have to make calcs for the glass I need for the baffles to give to a local glass supplier to have them cut.

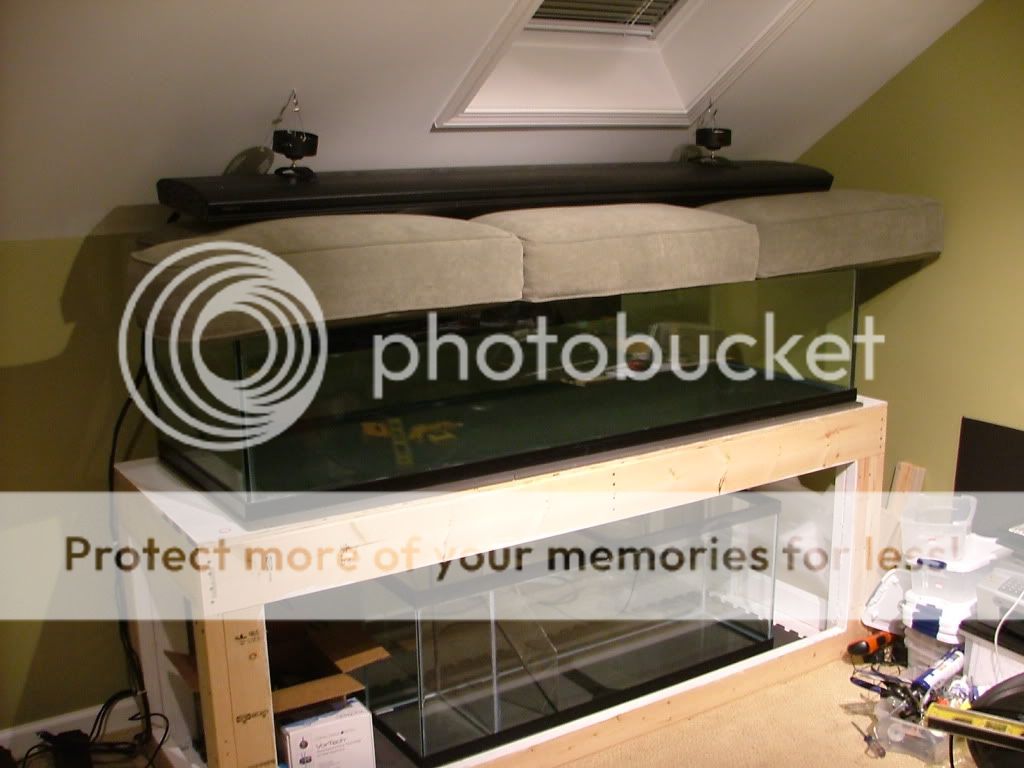
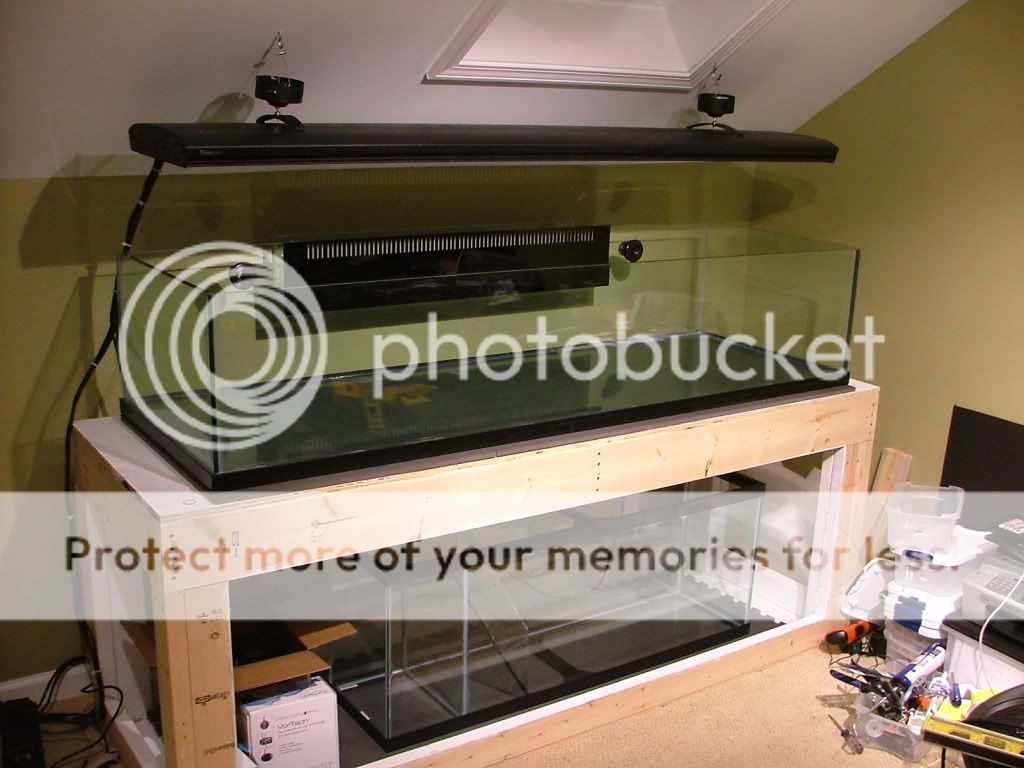
Any suggestions on a skimmer? I'm limited somewhat on space as there is 29" between the floor of the stand and the bottom of the 3/4 sheet on top. So, obviously I would still need room to remove the cup for cleaning.
 
Here's the sump I got (pre-baffles of course) it's 48x18x12.
DSCF6069.jpg


I'm making it partitioned as:
SumpSchematic.jpg


So, I'm basically putting in a 1" pipe that will allow me to open the bypass, and isolate the Fuge/Water Change portion of the sump. That way water will still pass through to the return section, but allow water changes to be done without turning anything off.

The Top off volume will be around 6 gallons, and the water change section will hold about 8-9 gallons.
 
Last edited:
FedEx man just dropped off the ACIII that I scored from RC member pencil3. Got a quick setup done and tested the email function. Works great. Way beyond the simple appliance timers I had back in the day.

The pieces are starting to come together....
 
The lights are up!
I had to use one longer J hook for the right side as it had to go through the window trim & drywall before getting to the stud.
DSCF6070.jpg


I used cushions to make sure it was up good before dangling it over the tank.
DSCF6071.jpg


Success:
DSCF6072.jpg


Moonlights Only:
DSCF6073.jpg


Actinics Only:
DSCF6074.jpg


3x150w Halides:
DSCF6077.jpg


DSCF6078.jpg


Halides & Actinics:
DSCF6080.jpg


Also, you can see the bulkheads came in. Let the plumbing begin!
 
I want to see some water flowing --- PLEASE.

Not sure I understand your plumbing for your water change by-pass. Sounds good just don't see the path of the water.
 
I was able to start painting the back of the tank black as well as plumb the bypass baffles for the sump. BradMugs, hopefully this will begin to help you picture it.
Here's a full sump shot (Baffles are just set in place, not attached yet, except the first one on the left.)
DSCF6081.jpg


Here's a closeup of the baffle bypass. Water will go over, under, then over with the valve closed. With the valve open, water will go over, under, through the bypass pipe, in theory.

DSCF6082.jpg
 
that bypass is nice. When I go to change 5 gallons out my return pump gets air and blows micro bubbles.

Awesome build.
 
Fantastic idea!!! Your own storage tank right in the middle of your main system. Another thing to store away for a future build....
 
Got the baffles in place yesterday, so we'll see later tonight if they hold water. Also started plumbing the overflow.
IMG00081.jpg


From L-R: Emergency Drain, Open Channel (still needs drilled on the top and airline added), Full Siphon. Thanks to beananimal http://www.beananimal.com/projects/silent-and-fail-safe-aquarium-overflow-system.aspxfor the design:
IMG00083.jpg


Emergency drains into the Water Change area, open and full siphon's drain into the Skimmer area.

IMG00082.jpg


I haven't glued the drain's to the slip/thread underneath the bulkehead yet. It's kind of permanent at that point and I want to make sure the sump baffles work first.

A
 
I'd look into finding a way to make at least the last section not glued just in case you need to get the sump tank out or something....I just don't like perminate.....
 
I can drain the sump and tip it to pull the sump back out. All pipes (including 3/4" return lines) are glued in place. Not I'm just waiting on the Mag18 that I bought from a fellow RC member to show up in the mail. USPS sent it from PA to FL, and I'm in TN. Go figure. Anyways, I've also modified the sump. I pulled out the baffle that was going to house the top-off fresh water. After looking at all of the sumps, I felt like I needed the extra room for the sump. I'll do the top off in another container. Water tested all other baffles and they are water tight. The bypass works like a charm. I'll post a video once I get the pump.
 
Back
Top