BeanAnimal
Premium Member
I would cut to within 1/16" to 1/8" with a jigsaw.. or use the spiral upcut bit to take multiple 1/8" to 1/4" deep passes 1/16" from the finished line then use the template to finish with a single full depth pass.
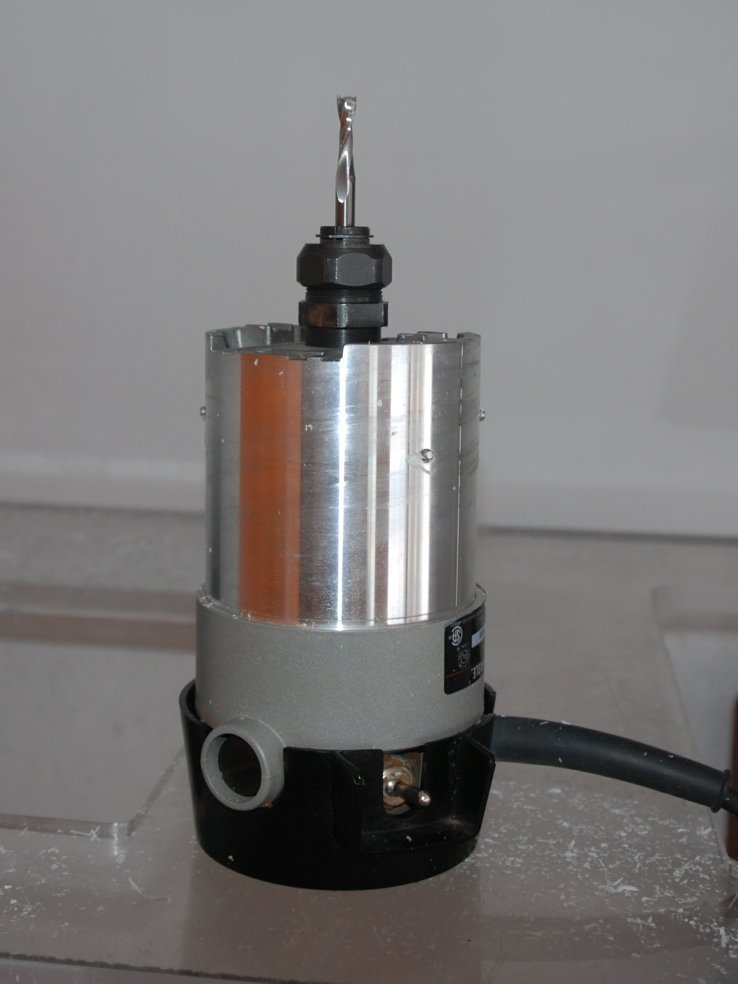
Most routers will accept a screw-in collar that is just slightly larger in outer diameter than the bit. The bit fits through the insert. You then build a template slightly larger than the area you want to cut out. The collar follows the edge of the template. Also, don't try to cut the full depth in one pass, make several passes a little at a time.
Todd
yes... the collar is a bearing that rolls against the guide/jig.
That is what you want, it is not a rolling bearing, the collar just slides along the template. The roller bearings are used to cut an edge that extends over the side, such as if you were laminating a counter top and used a larger than necessary piece.After hours of searching I can't find any guides that are bearings, only the steel/brass collars that have to slide along the template. I can find lots of bottom bearing wood bits and I can find a few top bearing straight wood bits... :sad2:
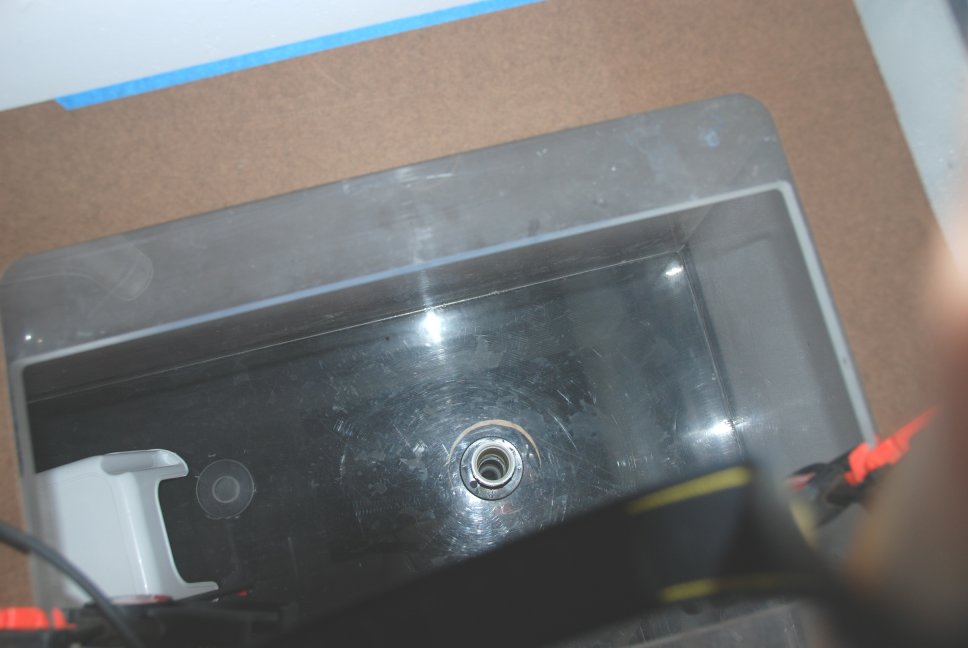
Typical wood bits tends to grab and crack on the back side of the acrylic. Forsner bits do a decent job, but tend to overheat and gum-up. It also helps to have a sacrificial piece clamped on the back side as well.I presume a wood bit would be a problem with acrylic?
I would cut to within 1/16" to 1/8" with a jigsaw.. or use the spiral upcut bit to take multiple 1/8" to 1/4" deep passes 1/16" from the finished line then use the template to finish with a single full depth pass.
A "wood bit" will be fine as long as you are taking small passes (as i mentioned above). Spiral fluted bits work will with many materials. Straight fluted bits (HSS or carbide) will work well but with acrylic you need to really limit the depth of cut. A freud top bearing slugh cut bit will work well...
http://www.hardwareandtools.com/Freud-50-102-1-2-Inch-Top-Bearing-Flush-Router-Bit-6114656.html
In any case, there is no reason you can't use a brass bushing type guide and your spiral (or whatever) bit, just make your patter accordingly.
That is what you want, it is not a rolling bearing, the collar just slides along the template. The roller bearings are used to cut an edge that extends over the side, such as if you were laminating a counter top and used a larger than necessary piece.
Typical wood bits tends to grab and crack on the back side of the acrylic. Forsner bits do a decent job, but tend to overheat and gum-up. It also helps to have a sacrificial piece clamped on the back side as well.
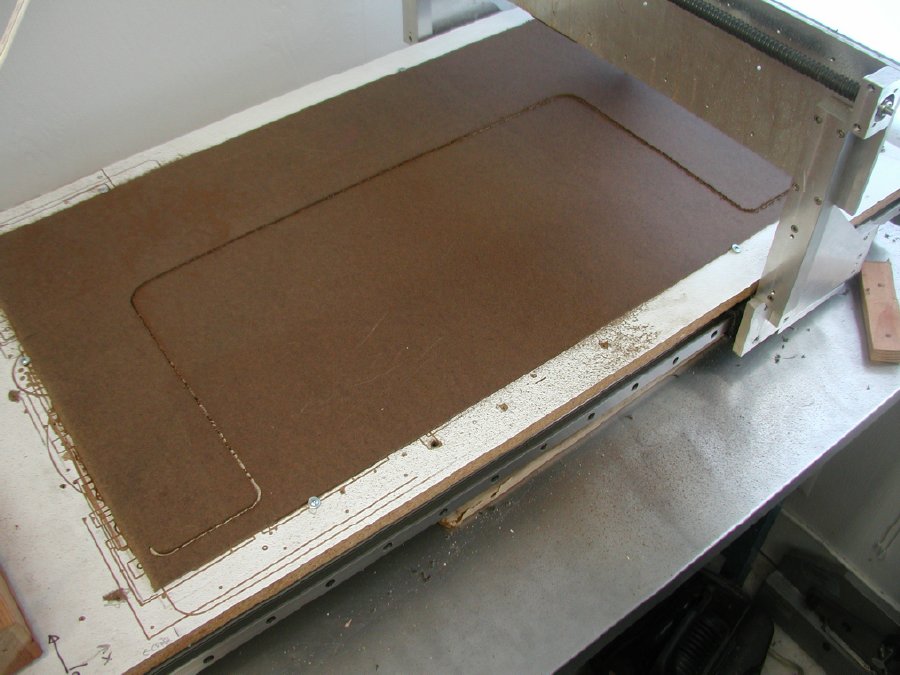
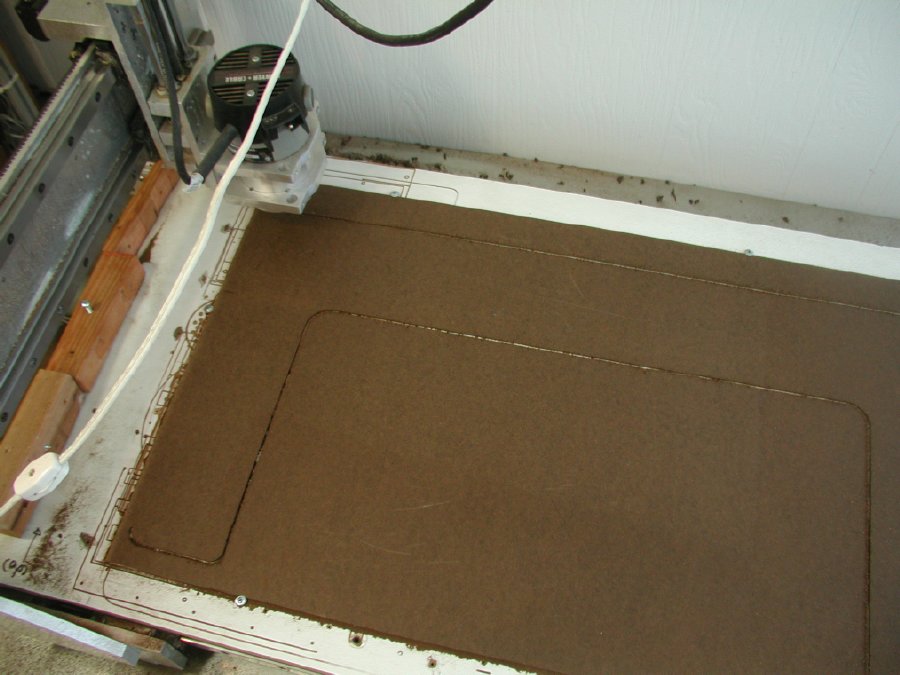
As for the template, the best approach is to make it from a single panel. It requires a bit more effort, but the nicer the template, the nicer the finished cut. Cutting a closed loop is more difficult using multiple pieces clamped in place. You tend to get poor matchup of the edges, particularly if you have to change the setup for each edge.
I would use a slightly larger collar for the rough opening, so that it cuts to within a 1/32 to 1/16 of the desired size. Then switch to a smaller collar and do one continuous full depth pass to finish it off.
Todd
")
Thats not a lot of wiggle room to hand hold a guide on a template! You are going to have to be super careful.
Why didn't you just cut a thicker template?
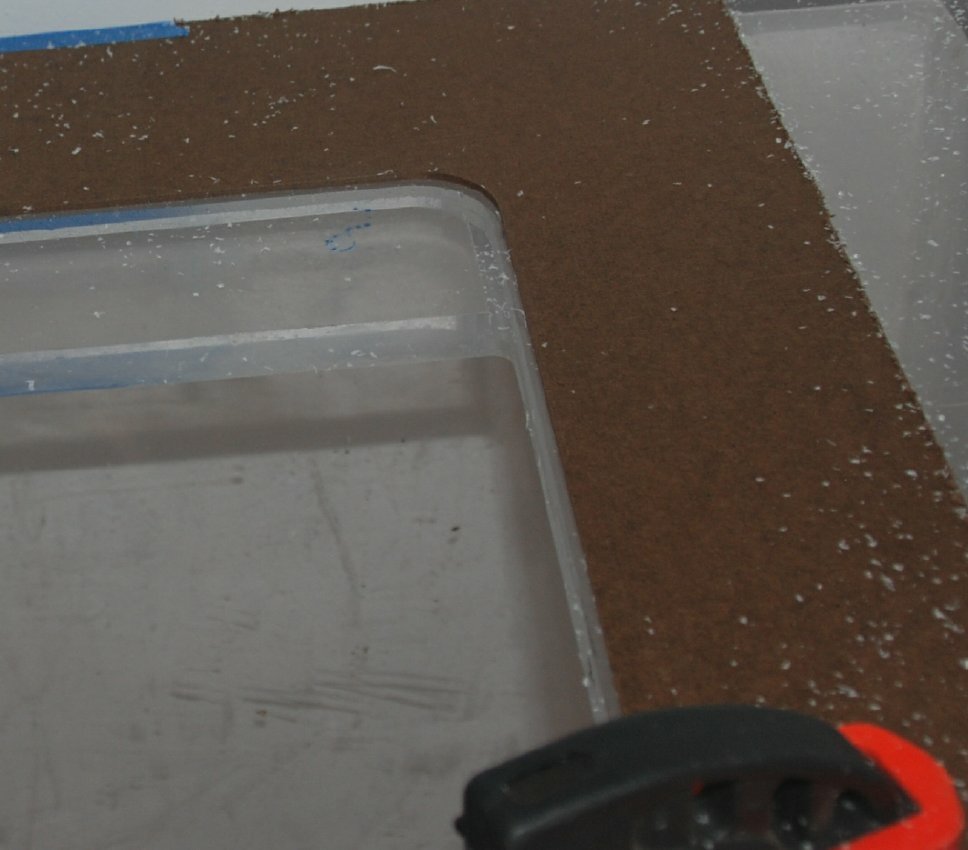
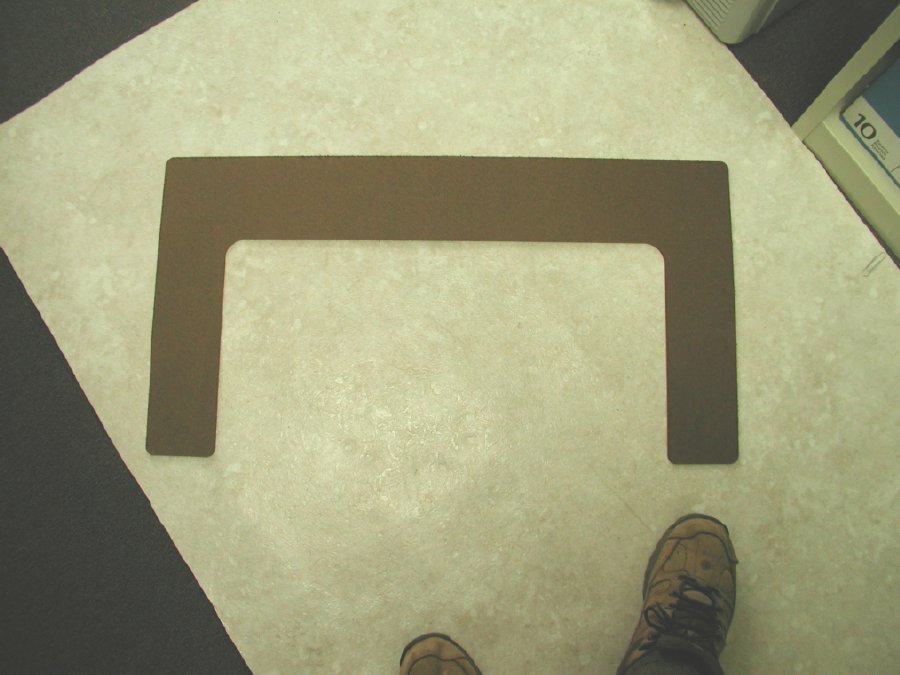
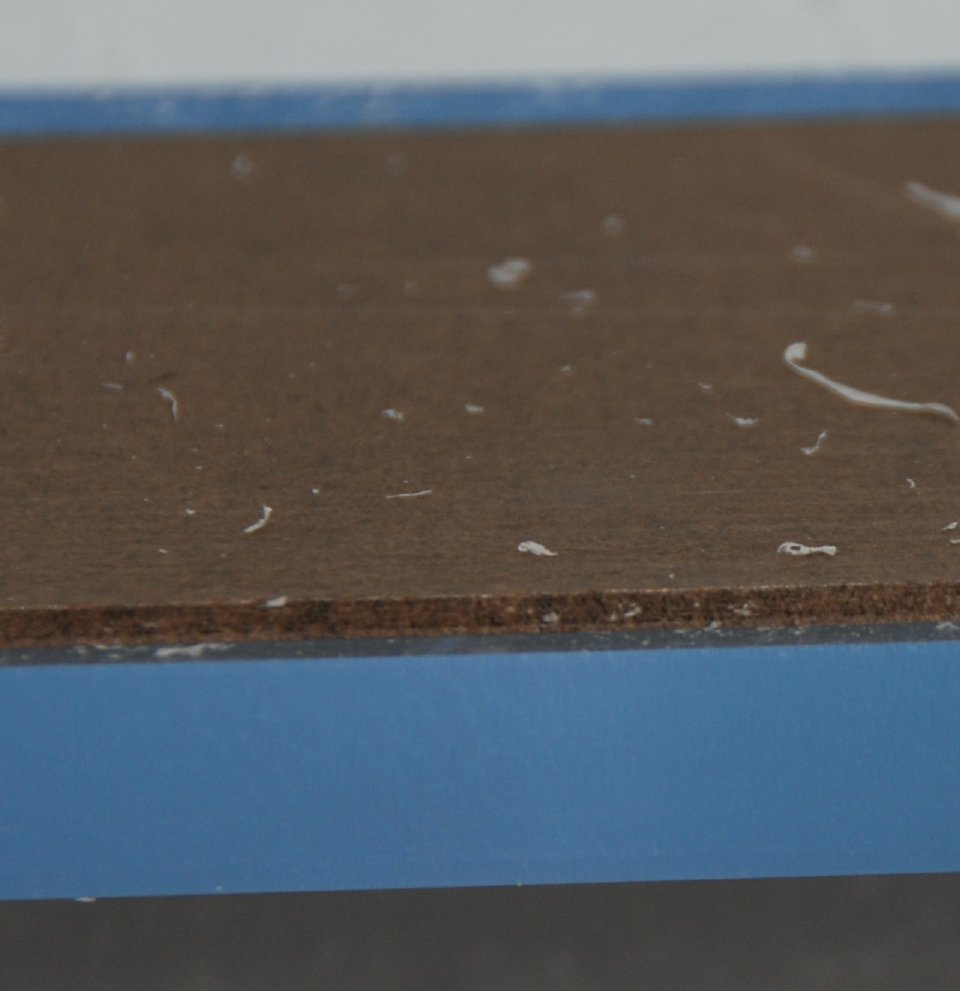
 After the many cut passes the result was vastly nicer than the factory cuts. I could have just stopped as there was no feel-able roughness from blade marks and no horizontal depth pass lines.
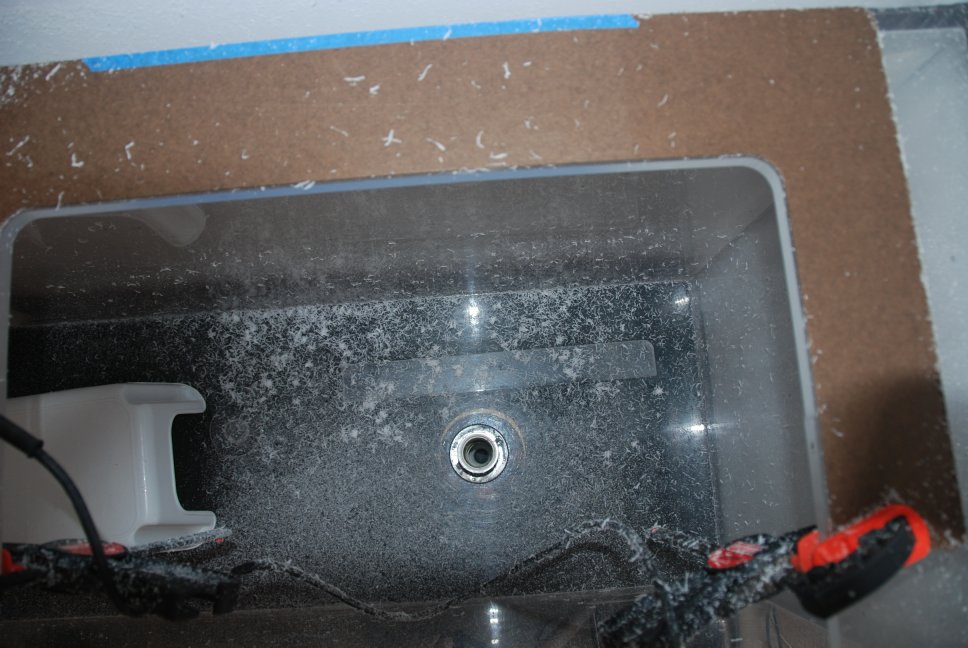

")
what part of cali are you in?