You are using an out of date browser. It may not display this or other websites correctly.
You should upgrade or use an alternative browser.
You should upgrade or use an alternative browser.
My 400 gallon in-wall Miracles Reef Tank
- Thread starter Cathy8424
- Start date
")
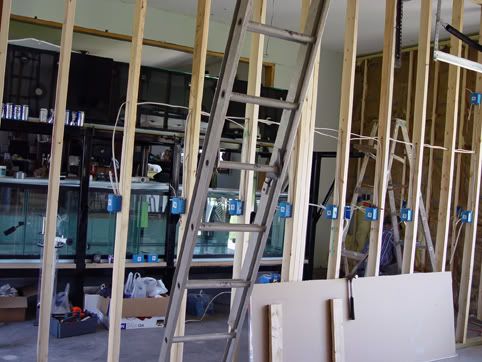
We got all the wire pulled except 2 switch legs for lights. I am not sure of their position just yet. They can be installed from the attic later.

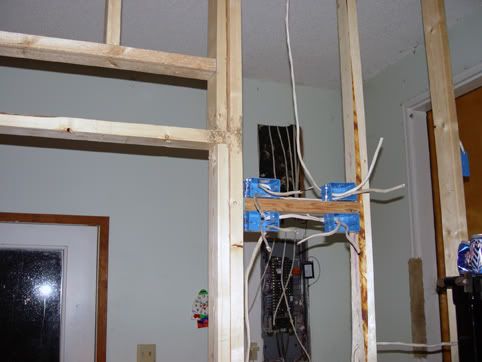
The framed opening above the door way will be a roll out tray with a slotted up and down small door, to allow for positioning the MH Ballast outside the fish room in the summer and inside the fish room in the winter. Next to the door, up high, is four duplex receptacles which are two separate 20am circuits dedicated to lighting.

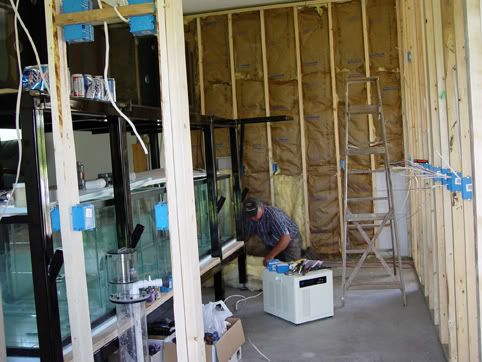
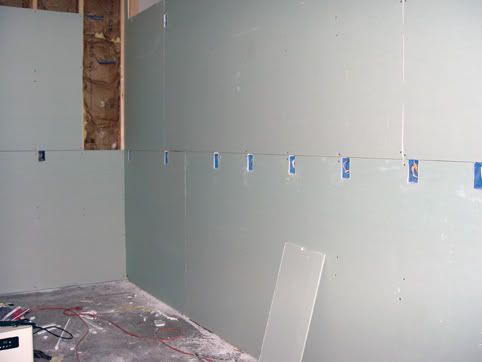
The garage door has been framed in and insulated. The outside fish room walls will be insulated tomorrow.

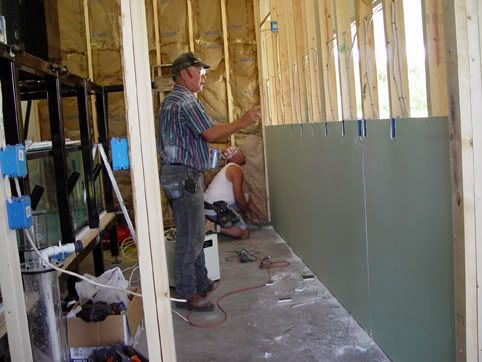
The interior fish room walls are probably about 80% rocked. Hopefully the interior walls will be taped tomorrow and painted Thursday.


This week is just going by toooo fast. I havenââ"šÂ¬Ã¢"žÂ¢t even got to start on the plumbing yet.
The framed opening above the door way will be a roll out tray with a slotted up and down small door, to allow for positioning the MH Ballast outside the fish room in the summer and inside the fish room in the winter. Next to the door, up high, is four duplex receptacles which are two separate 20am circuits dedicated to lighting.
The garage door has been framed in and insulated. The outside fish room walls will be insulated tomorrow.
The interior fish room walls are probably about 80% rocked. Hopefully the interior walls will be taped tomorrow and painted Thursday.
This week is just going by toooo fast. I havenââ"šÂ¬Ã¢"žÂ¢t even got to start on the plumbing yet.
Last edited:


Opinions Please! How to plumb Ocean Motion 8 Way Version 3?
Opinions Please! How to plumb Ocean Motion 8 Way Version 3?
Opinions Please! How would you plumb this Ocean Motion 8 Way Version 3?
There are four sets of two holes on the front bottom and 4 sets of two holes on the top back wall. All holes are Ã"šÃ‚¾Ã¢â"šÂ¬Ã‚Â. I will be using a Sequence Hammerhead pump, 5,000 GPH.
The Ocean Motion will have two ports open at the same time, 1 & 5, 2 & 6, 3 & 7, 4, & 8. It is my understanding that this is also the order they will sequence. Two holes will be T-ed together, so that with every cycle there will be water coming from 4 holes.
There are 4 - Ã"šÃ‚¾Ã¢â"šÂ¬Ã‚ holes in the bracing on the right and left ends. They will be used for a second closed loop, chiller and sump returns. The second closed loop will also be a Sequence Hammerhead and it will switch to simulate tide in/out.
Suggestions would be greatly appreciated, and a short description as to why you would do it this way.
Thanks, Cathy
<center><img src="http://www.high-velocity.org/saltcity/album_pic.php?pic_id=268"><br><br></center>
The fish room construction is done. Today the ceiling will be textured where the attic stairs were removed, and the last coat of paint will be applied. Tomorrow I will take vacation for the rest of the week and probably work on the finish electrical. The next day, I hope to get back to the plumbing.
The plumbing has been started with the help of a couple fish buddies.
Jeeze, where do we begin?
<img src="http://www.high-velocity.org/saltcity/album_pic.php?pic_id=281
"><br><br>
How about with these overflows that will need an offset because of the stand bracing?
<img src="http://www.high-velocity.org/saltcity/album_pic.php?pic_id=277"><br><br>
The baffles on both ends for closed loop 2 are done and sure look great!
<img src="http://www.high-velocity.org/saltcity/album_pic.php?pic_id=278"><br><br>
Closed loop 2 baffels.
<img src="http://www.high-velocity.org/saltcity/album_pic.php?pic_id=279"><br><br>
Some one asked me if I had it to do over, what would I do different with the tank.
Originally I was planning for two motorized ball valves, not an OM. If I had planned for the OM from the beginning, I would have put 4 - 1" returns in the back top and 4 - 1" returns in the front bottom instead of the 16 - 3/4" holes.
I would have placed the front bottom closed loop returns closer to the center of the tank. We had to use double 2 X 2 tubing in the front frame instead of 3 X 3" tubing that is in the rest of the frame, or we wouldn't have been able to get the nuts and plumbing on the bulkheads.
I am hoping to get it wet this weekend. It will not be fully operational, but I hope to at least get the substraight in.
Well, this was day two of some serious plumbing. We made a pretty good dent in both of the closed loops, intake and return. Closed loop 1 is an 8-way OM and closed loop 2 is an actuated or motorized ball valve.
There will be a 3rd closed loop in the frag tank. It will be a manifold with eight 1/2 jets on each end and half way around the house side of the tank. In the center of the fish room side there will be a 1" Sea Swirl.
Realistically and hopefully the plumbing will be done enough to test all three closed loops tomorrow.
The OM is the tall part in the middle and the actuated ball valve is on the right end.
<img src="http://www.high-velocity.org/saltcity/album_pic.php?pic_id=288"><br><br> The fish room is done, last coat of paint and all. So after the plumbing is done, I will concentrate on the finish electrical
So far, I haven't had problems with microbubbles and plumbing. I sure hope it stays that way! It would be a bear trying to find the source in this monstosity!
I hope to put a little water in it to re-check the leveling tomorrow, then if the leveling remains true, I will fill it up half way with tap water to check the plumbing. I would like to let them run for a while to help clean the system out some.
If all is well, I will drain the fresh water and start putting substraight, saltwater and rock in the tank Sunday. Monday I will do the finish electrical work. And after that, I should be able to start moving stuff from my other tanks into the new system.
The lighting will be rigged for awhile until I have time to fix it the way I want it and get it vented and all.
Kelly Marine
New member
Great looking layout! Very interested about your motorized/actuated ball valve. Who is the manufacturer? Is it electric or air driven? Thanks in advance for the help.
Thank you for the kind words.
Spears and George Fisher both make them.
You can get them from Andy at Myreefcreations.com with a time controller. The ball vavle it's self is not electric, but the actuator that turns the ball valve right/left is electric.
I will have one ballvalve switching ever 5 min. for wave and the other one will be switching to simulate tide in and tide out.
One will be controlled with my AquaController the other with it's own timer.
The display tank plumbing is complete. I could water test it tomorrow, but I want to wait till Erik and Mitzzi can come back on Monday to share in the excitement since he worked so hard on helping to get the plumbing ready.
OM and Actuated Ball Valve Plumbing
<img src="http://www.high-velocity.org/saltcity/album_pic.php?pic_id=290"><br><br>
<img src="http://www.high-velocity.org/saltcity/album_pic.php?pic_id=291"><br><br>
Tomorrow I will work on the frag/sump closed loop, return and misc. I still have to get the finish electrical done too. I am not sure what order these things will fall in, but there will be plenty to keep me moving.
Last edited:
Cathy, more like the other way around.<a href=showthread.php?s=&postid=7362411#post7362411 target=_blank>Originally posted</a> by Cathy8424
I may find a few pointers there?

Similar threads
- Replies
- 13
- Views
- 1K
- Replies
- 21
- Views
- 2K
- Replies
- 1
- Views
- 847