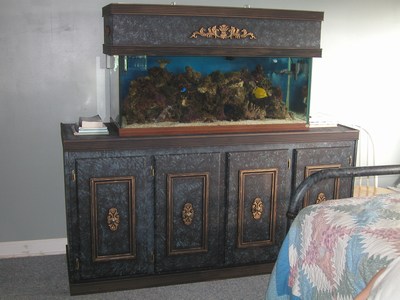
Our 210 upgrade is underway!!!

I am just about to build a stand for a tank similar to yours and am just in shock over how little support beams there are.. I am no cabinet maker but 1" supporting beams just seem like they will buckle under all that weight... I was thinking of using 4x4" for my stand... but that would be overkill... I would think you would need a few 2x4 in there to support the weight.. We are talking about a tonne...

I would love to hear some more input from people who build stands as I would love to have a clean open stand like that but I would also have to be able to sleep at night :)

Mike
 
I filled it up and leak tested it and nothing on the stand is buckling, bowing or anything else. Granted the sand still needs to go in and the rock, but i'm confident the stand is going to be just fine. If not, be on the look out for a thread regarding my stand falling apart. :)

I had him build me a stand the same way for a 48x24 (110gal.) with no center supports and the front and back corners on the face are only 2.5" wide, the whole front is open. No problems there, but about half the weight.

Time will tell. :)
 
Looking great Ereefic ... can't wait to see it in person, running.

Your present softie tank is stunning, hard to imagine how sweet this one will be ... done right from the beginning!

Keep up the nice work :)
 
The key in making a stand is the racking. The tank won't shatter the uprights just by sitting on it. It needs to displace them off to the sides for it to be knocked down. If you have 2x4's that aren't joined well at the corners you would be worse off than having a lightly built stand that doesn't rack.

1x supporting beams will work the thing that is questionable here is that they are 1x3 or so. I would have probably made them wider to help with racking.

Oak is a different beast than pine and ply is strong as well. there isn't a way you are going to blow out a sheet of ply(unless it has major voids) by putting weight ontop of if it is joined well to something that keeps it from bowing. In this case the first 1x3 of the back of the stand. Now I am not saying to try to build the lightest most open stand you can but find a good joining method an become proficent in it. Here they are using pocket screws on some of the joints. I believe the strongest joint is a floating tenon. I have a woodworking book where door makers were testing joints by making an L and trying to push both ends of the l together. The floating tenon took the most psi before it shattered. the biscut was a close second. I use biscuts on some of my stands but My joints usually aren't designed to take the weight of the tank they just hold the vertical pieces in position that do. so the biscuits have to keep it from racking. If I did a 210 I would use a floating tenion in place of biscuts if I was not using 2x4's

The hard part about using 2x4's is that you have to make them double to get good joints on the top. if you made your stand out of 1x4 oak and substituted the oak for each 2x4. it would probably be okay.
 
tsalter, if I were to put a wood triangle (bracing) in each of the 4 corners, front and back, that would help strengthen it so racking is a less of a possibility? Know what I mean?
 
Yeah you could definately gusset it. but you might run the chance of weakening it if you put in too long of a screw. You would just have to be carefull and do it right.
 
I would do it like this. It would get glued and then just 2 screws, like the drawing shows, that would screw in only about 1/2". Do you think this would not weaken the structure? I would drill the holes out as to not split/crack the wood.

18861gusset-med.JPG
 
Yeah that would work. The rule of thumb is 1:2 in length of screws. 1 being the thickness of the stock being screwed to whatever and 2 being double that length. So if you had 3/4 of that triangle under screw you would want a 2 1/4" screw. So about an 1 1/2" into the adjoining pieces. I am not sure how thick your cross bars are but I would probably go halfway through them or less. 1/2" would probably be too little but basically you are using the screws like clamps and the glue is going to do the work. Before I was afraid that you would put a large screw in it and split it. but you can do that with a short fat screw too if you don't drill it out.

I would Buy an #8 or #10 one of these. Try it out on some scrap and then try one somewhere on the stand where it is less cruicial then have at the corners. I think you would be fine.
http://www.leevalley.com/wood/page.aspx?c=2&p=40127&cat=1,180,42240,42281&ap=1
 
Ok, little update here. The sand is in and filled half with water. Getting that to the proper salinity and temp. now and will let it run for a week like that. I'll be taking water change water from the current tank and putting that in over the next several days.

NOW, i'm going to make some of you very proud of me in regards to my stand that will hold a 30 gal (36x12x17) refugium and a 30gal. (24x24x12) growout tank. It think you'll find the construction of this stand to be lightyears beyond overkill :) , but it didn't need to be pretty, and the 2x4's were the cheapest route to go.

The return pump will be tee'd off to feed the growout tank which will then drain to the refugium via an overflow box and gravity drain from the refugium into the sump via a bulkhead in the side of the refugium. I will have to make a couple of steps to be able to get into the growout tank because it will be so high. I could of made a new stand for the sump that wouldn't be as high, but I have a stand, why build another.

3030frontSmall.jpg


3030angleSmall.jpg
 
You system is looking great :), The stand is just right

I did overbuild my 300g stand 2 years ago, but my new 180g stand is built solid but not bomb proof like my fist one :)

Old set-up stand (300g tenecor) My 300g stand I probably could have stacked 3 300g tanks on it.

Old 300g stand below
DSCN2988.JPG


New system stand (180g AGA)(under construction now), I will be puting a 3/4" oak plywood top on it once im done with the drywall finishing and painting

180g stand below
DSCN4337.JPG


Steve
 
My 180g stand is built very similar to what you have Ereefic.......3/4" ply wood throughout. The support posts run four across the front evenly spaced..........one each against the side sheets & two spaced in the middle. In the back there's 3 support posts. The middle one is spaced exactly between the two front ones, if you were to draw a line back to front.

The only difference I see is that the support posts are 5" wide & there is no center piece running across the middle. There is also one full sheet of plywood over the top of the tank kinda creating a complete unibody.

This stand has supported my 180g acrylic tank for 15 years without a problem & has gone through two moves. The thing is rock solid.

If anyone wants me to post a pic let me know.
 
eric, did you have someone drill the holes, or did you do it yourself. I need to do 1 to 2 holes....but would do it myself, thanks...Brent
 
I had someone with experience drill the holes for me. I wasn't comfortable doing it myself. Although now having seen someone do it, I might give it a try on a smaller, less expensive tank.
 
Stands

Stands

Ereefic, I think that your stand is fine !!! I overbuilt mine using the suggestions of the GARF website. It is of 2x4 construction with 3/4" ply on top, 1/2" ply on the floor, and 1/4" ply for the sides. It is a behometh !!!! I actually dragged it into the house by myself ! I'd say that it weighs a good 300lbs !!! Way overkill !!! Here are some shots of it. I built it first when I had a 75 gal. I too, now am putting together a 210 AGA
67102mini-Reeftank_141.jpg
67102mini-Reeftank_152.jpg
Here's a shot of it with the 75gal. Here it is with the new AGA 210.
67102210.jpg
I am still getting everything together. I will be following along to see how you like the CL set-up that you went with. That is the point where I am. I have everything but the CL pump or some Tunzes. Still trying to decide to drill, go over the back of the tank, or just go with Tunzes. I like your stand for the simple fact that no space was wasted inside. Notice the way that my 2x4's are placed, the stand is 24.5" deep but you can only fit something 17" wide down the center !!! So I had a custom sump built that will fit into the center section with both doors opened. The sump measures 33" x 23" x 18" T.
 
Last edited:
Nice setup, Curtis1
I want to upgrade my tank too. If you dont mind, what are a dimensions of yours 210? And how much it cost? I'm planing to upgrade to 210, but I did not find it on a all glass page. The biggest one they have there is 180. Did you special order yours?
Thanks
 
Tagging Along

Tagging Along

Hey Ereefic

Been following along with everybody else;
your set up is looking good so far!
just curious what size is your sequence return pump.

Dave
 
Acillaton, I found mine thru the selling forums here at RC. The guy that had it only lived about 1hr away. I bought it as used, but it had never been filled and still had all the stickers on it !!! Plus came with the two overflow kits. I got it for $550. There was a thread on here somewhere, where they said that they were getting them new for around $600-$650, w/o overflow kits. Just do a search and look under 210 AGA. Mine is 72" x 24" x 29" Tall. HTH, later, Curt.
 
Back
Top