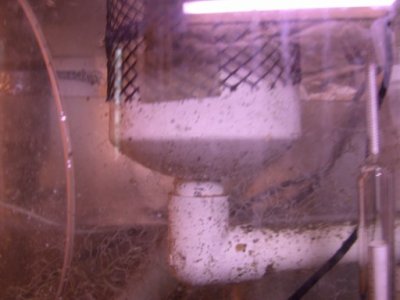
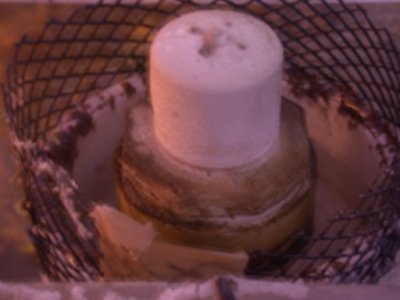
Stockman Standpipe--New, Easier Design

kstockman said:
Here is a picture of how the water intake portion of the reduction fitting is fitted to a 1" pipe. In this picture, I did not dremel out the inner lip of the reduction fitting, so the pipe will not slide down around the fitting. I had enough of the inner piece to not worry about it.

Ken how far in should the water intake portion of the reduction fitting be slide into the 2" coupling
thank you
brian
 
I found another trick that will silence this unit ten-fold.

On the cap that you have drilled a hole to allow air in.
Insert a piece of 1/4" flex tubing about 5" long and about 1/2" into the cap.

I'm sure someone else already dicovered it. BIG Difference, I can bareley hear anything going on now and I have to look to see if there is water really going down the pipe.

IT IS! Enjoy!
 
vmichael,
so does the hole have to be 1/4" wide and you put the flex into the hole? and do u need to seal the hole?
 
SoCal's Design

SoCal's Design

Ken and SoCal... made SoCal's version (black and white pics posted earlier on this thread) just as specified using 3" parts for a 1.5" drain. It works GREAT. I have the top cap "nut" portion about flush with the top of my overflow slits. That keeps my OF water level at about 2" below the slits. The water only has to fall that far and is virtually silent (as is the drain gurgle). I am using a Mag 24 in a 150g (single center OF). The 24 powers my EV-180 skimmer as well as my fuge flows. The tank return is estimated at 1050gph through two 3/4" lines (and Loc-lines).

One mod I'd suggest...the thread slot is not enough. With the cap closed (screwed inall the way), the water level rises and falls in waves. When you crack the cap open and let in air, it stops but an be too low. I can remove top completely but then gurggling. Suggest TWO similar notches 180 degrees apart but be careful not to cut too low as to not have them covered by cap threads if needed. Clear as mud?

I very easy $10 remedy for a QUIET overflow. Thanks so much.

Now I have a contri. Loc-line has a "tee" that snaps inline to regular nozzle. The tee has a smaller (1/4"?) nozzle that points at right angle to normal nozzle flow. This nozzle will blow straight down the overflow wall and behind rocks while still giving you most of the flow to main Loc-line nozzles. If you let your return pump sump some air, you will see just how well this circulates a normally hard-to-reach deadspot. Will post elsewhere but wanted to relate in turn for the standpipe remedy.
 
Re: SoCal's Design

Re: SoCal's Design

Snailspace said:
One mod I'd suggest...the thread slot is not enough. With the cap closed (screwed inall the way), the water level rises and falls in waves. When you crack the cap open and let in air, it stops but an be too low. I can remove top completely but then gurggling. Suggest TWO similar notches 180 degrees apart but be careful not to cut too low as to not have them covered by cap threads if needed. Clear as mud?

Snailspace I figured this out recently while using mine but I am not pushing as much flow as you are (only a Mag12). My water level is solid with just one notch, but you will definately need two notches if you have more flow.

It's very cool when running, the water level is VERY high in the overflow box, nice and quiet, I also like being able to easily screw off the top for full access to the standpipe :D
 
Here is the safest way to cut a reduction fitting with a miter saw.

cut an 8" piece of PVC of the inner daimeter pipe. Slide on fitting on either end. Place one fitting along the guide and the other out to be cut in half. Cut the first one in half. Take the top and slide it further back on the pipe. Now you have two fittings on the pipe and you can cut all you want.

Make sense.

That might be a way to cut a lot of them in one sitting. Now why would anyone want to do that? Hmmmmmm
 
Has anyone one here seen my surface skimming overflow/Stockmand standpipe. They are perfect for refugiums. I designed it for my acrylic refugium.

Basic design:

1. build a regular stockman with a pipe about 5" long.
2. Drill the appropriate sized hole in a 4" endcap.
3. Slide the endcap up the round the standpipe to make a cup out of it.
4. Glue in place (I used super glue).
5. Wrap a piece of gutter guard around the outside edge of the cup to prevent macro from going into the sump.
6. I then glued an offset with a couple of 90s so that the one edge of the cup lined up with the edge of the bulkhead. The bulkhead was too close to the edge of the tank to have a straight shot into the bulkhead.

I imagine that CJ will make a black one and call it his new and improved design. But he can't because I am claiming all colors in this message. I guess he will have to have his own idea this time. Couldn't resist the jab.

Just some random thoughts.
 
I am coming out with some new ideas in the near future. THey include:

Ca reactor
Kalk Reactor
Ocean's Motions knock off
water top off
protien skimmer (maybe)

All will work like professional grade, but cost less, be easier to work, and will only take 30 minutes or less to build. The only one that might take some time to build is the Ocean motions knock off. The water top off might not be cheaper, but great for the flood paranoid people that are out there.

Nobady get the panties in a bunch when I say knock off--about the Ocean's motion. This idea is novel and I think really cool.

Any one interested in any of the above?????
 
I imagine that CJ will make a black one and call it his new and improved design. But he can't because I am claiming all colors in this message. I guess he will have to have his own idea this time. Couldn't resist the jab.

ROFL! :rollface: do you have any pics of your refug surface skimmer on your site?

- g
 
Yeah, Ken, do you have any new pics? Your new ideas sound pretty cool. I would also like to see the refug surface skimmer.
 
Ken,
i just installed my stockman stand pipes a couple of weekends ago.
it was the best 3 dollars i invested in to my tank. i had to biuld the orginial design with the 2 1" squares cut into the stand pipe. with the new version i had to throttle back my pump to much.
my wife is so happy now that the tank doesn't sound like we have a waterfall in the living room.
thank you
brian
 
hopefully these pictures are clear enough

first is a side shot
 

Attachments

  • skimmer-standpipe-1.jpg
    skimmer-standpipe-1.jpg
    36.7 KB · Views: 0
top view--hopefully you can see the standpipe and how it sits in the cup
 

Attachments

  • skimmer-standpipe-2.jpg
    skimmer-standpipe-2.jpg
    38.8 KB · Views: 0
That is great Ken. Why did you need an offset again? Because the bulkhead was too close to the wall? I've got a straight drain through the floor of my refugium and that looks like a nice option.
 
two reasons now that I think back on it.

1. The bulkhead was too close to the side of the tank. The radius of the thing is about 2.5" and so it would have hit the side of the tank.
2. I wanted to maximize the water height so the top of the standpipe is higher than the top of the tank. I had to move it close to the center in order to avoid the top bracing of the tank.

THe black mesh around the top is gutter guard, which is sold at HD/Lowe's for rain gutters.

cheers
 
I really like it. I don't know if I can fit it, and unfortunately if I have to remove the current pipe I have in there now, sand will pour out the base. :(

But maybe I can come up with something practical along these lines. Thanks for posting images. :thumbsup:
 
I have been wanting to make one or two of these new revised standpipes but I can't find the parts. In particular, the 2" to 1" reduction fitting which seems to be the key component. I have tried three different Lowes and Home Depots plus several hardware stores. No one has the kind with the fluting. I even brought a picture from page 1 or 2 of this thread and I'm told they don't carry that kind.

Anyone know where I can order it online. I can find the fittings but how do I know which ones have the "flutes"?

thanks.
Mickey
 
Back
Top