You are using an out of date browser. It may not display this or other websites correctly.
You should upgrade or use an alternative browser.
You should upgrade or use an alternative browser.
260 gallon (96x24x26) reef and fish room upgrade
- Thread starter TheAquatect
- Start date
TheAquatect
I Could Stop If I Wanted
what color and intensity settings are you running on the kessils and how high above the water are the lights.setup looks awesome!!!!
Right now I am using the knobs so its difficult to say, but at 1/4 turn I would estimate 25%. Same with color, just a hint of blue. I have been keeping it low because the corals are not used to LED. Even at this level, I have had some mild bleaching so I am taking it slow. I need to get a controller but have been debating between the kessil spectral controller and the bluefish LED.
Dream dimensions for a tank. Love how nice it's coming along.
Thank you, I love it too. I am glad I opted for the taller tank again, its a real statement. I also have a bit more room to work on the top of the tank, so the reaching the back of the tank is not that bad. I do wish I could have gone a bit deeper, maybe 30" but it would have taken up too much room. (That is what my wife tells me, anyway :lmao: )
jdantunes
New member
The only thing that bugs me is the wires but I think I will find a nice black tubing, split it and cover the wires for a cleaner look. I also need to make the wooden shelf for the light rack.
Maybe if you redo the piping and use 3/4" instead of 1/2", you can run the wiring inside the pipe and use a dremel to cut holes right over where the light will hang.
I will be a little job to do, but definitely will give you a cleaner look.
Let's see that shimmering tank... post a video! :eek1:
TheAquatect
I Could Stop If I Wanted
Made some major progress with the water station and I'm taking advantage of the 3 day weekend to get it up and running.
After spending last week clearing out the garage so I could get some space to work, I spent last night and this afternoon building the frame for the 2 90 gallon storage tanks for RO and SW. I built it high enough to store 8 200 gallon boxes of salt (I use reef crystals) and a drawer above to store other equipment. I'll build the drawer a bit later.

The top is 23/32" plywood, I figured why not go thicker AND it was cheaper than the 3/4". Go figure!
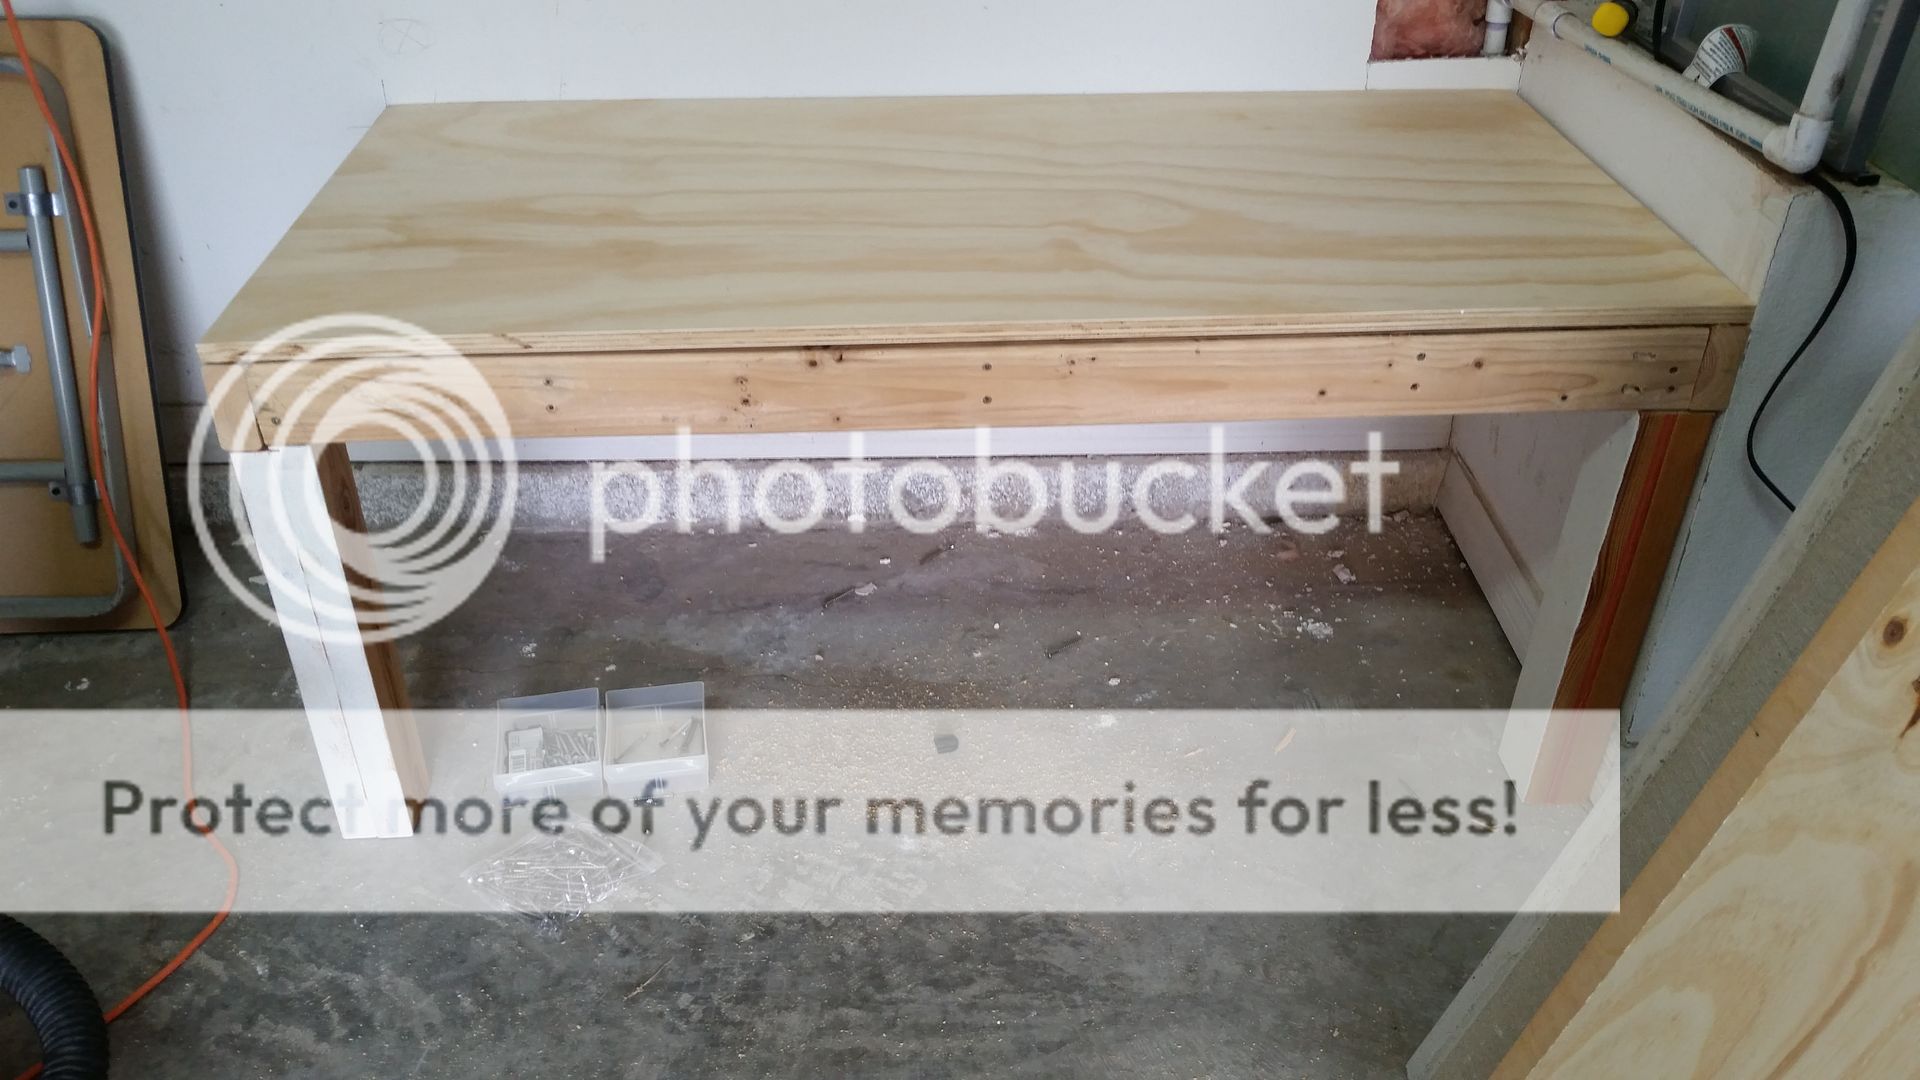
After everything was together, I put the tanks on to mock up equipment location and plumbing.

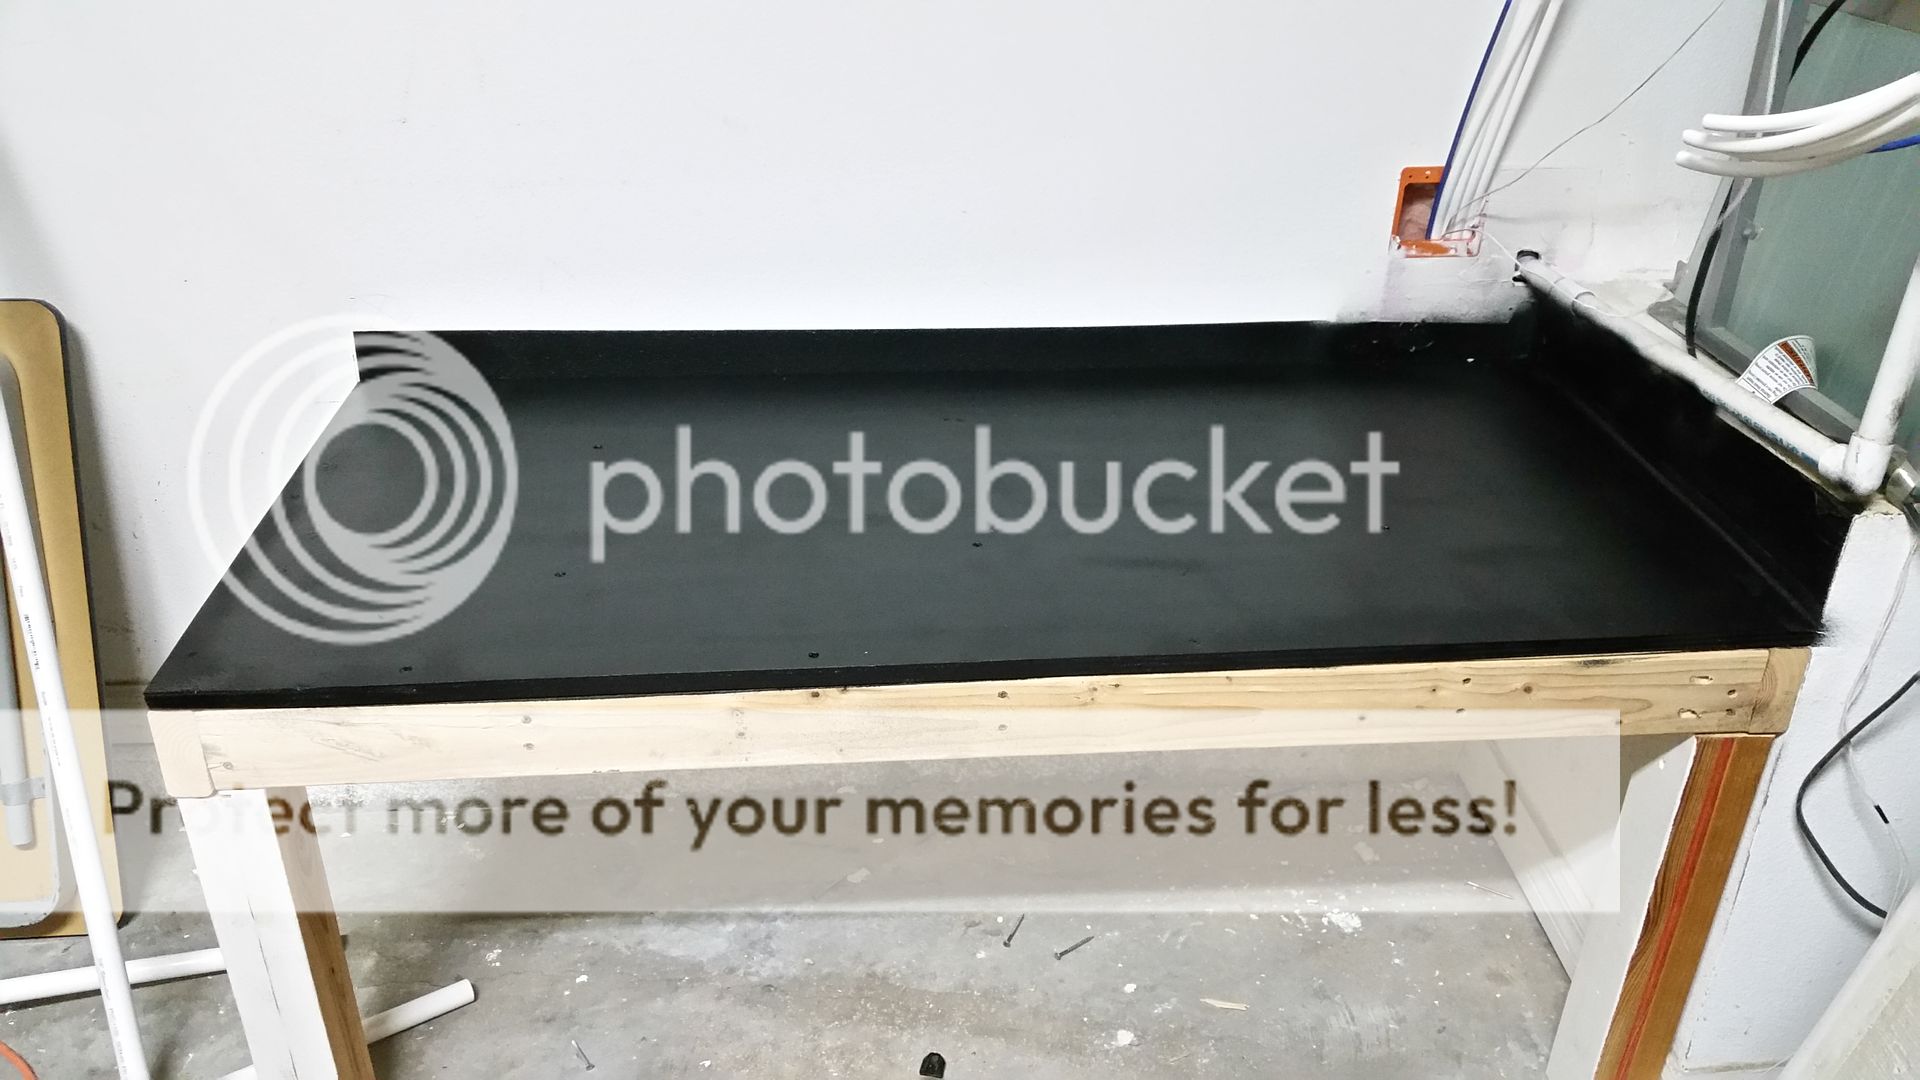
I was originally going to use the extra shower pan liner from the spill tray under the tank but it was not enough. I was mulling around the garage thinking I would just paint it when I found 2 cans of Rust-Oleum leak seal rubberized coating and put it to good use!
 ") Also, if you look to the right, I have the supply lines run. Those are the lines from the tank, 1 1/4" for RO, 1 1/2" for salt water and 2 1/2" for plumbing a future chiller. I also ran a few wires in case i want some push button type automation. They will all be trimmed out with a custom wall plate, similar to what I'll be doing for under the tank.
Also, if you look to the right, I have the supply lines run. Those are the lines from the tank, 1 1/4" for RO, 1 1/2" for salt water and 2 1/2" for plumbing a future chiller. I also ran a few wires in case i want some push button type automation. They will all be trimmed out with a custom wall plate, similar to what I'll be doing for under the tank.
After spending last week clearing out the garage so I could get some space to work, I spent last night and this afternoon building the frame for the 2 90 gallon storage tanks for RO and SW. I built it high enough to store 8 200 gallon boxes of salt (I use reef crystals) and a drawer above to store other equipment. I'll build the drawer a bit later.

The top is 23/32" plywood, I figured why not go thicker AND it was cheaper than the 3/4". Go figure!

After everything was together, I put the tanks on to mock up equipment location and plumbing.

I was originally going to use the extra shower pan liner from the spill tray under the tank but it was not enough.
I was mulling around the garage thinking I would just paint it when I found 2 cans of Rust-Oleum leak seal rubberized coating and put it to good use! Also, if you look to the right, I have the supply lines run. Those are the lines from the tank, 1 1/4" for RO, 1 1/2" for salt water and 2 1/2" for plumbing a future chiller. I also ran a few wires in case i want some push button type automation. They will all be trimmed out with a custom wall plate, similar to what I'll be doing for under the tank.
TheAquatect
I Could Stop If I Wanted
Maybe if you redo the piping and use 3/4" instead of 1/2", you can run the wiring inside the pipe and use a dremel to cut holes right over where the light will hang.
I will be a little job to do, but definitely will give you a cleaner look.
Let's see that shimmering tank... post a video! :eek1:
Funny you mention it, I had that in my original design but opted to not do it because the lights would be fixed in one spot. With the cables I can slide them to suite the coral needs. I was considering splitting some PVC and painting it black. After I'm done with the mixing station, I'll give both a try and post some picks to see what everyone thinks.
Great idea for the video, I'll grab one tomorrow as the lights are out now.
TheAquatect
I Could Stop If I Wanted
OK, its been about a week since my last update. I uploaded a small video to photobucket but it does not seem to work correctly so I'll get one up on youtube soon.
I was able to finish a major potion of the water mixing/changing station in the garage and get the tanks filled over the long weekend. My goal was to get it functional so I could do a water change. Happy to report that was accomplished. The stand is built to be higher than the sump under the DT so I am now able to move RO and SW without the need for a pump!! Go ole gravity does all the work. The pump you see there is just for moving RO into the SW tank and mixing salt.

I still have some additional work to do before its completed. I plan on adding some drawers on the bottom, above the salt boxes. I also need to drill the SW tank (on the right) for a bulkhead for the pump return. I thought I had the right size hole saw but did not. For now, I went over the top.
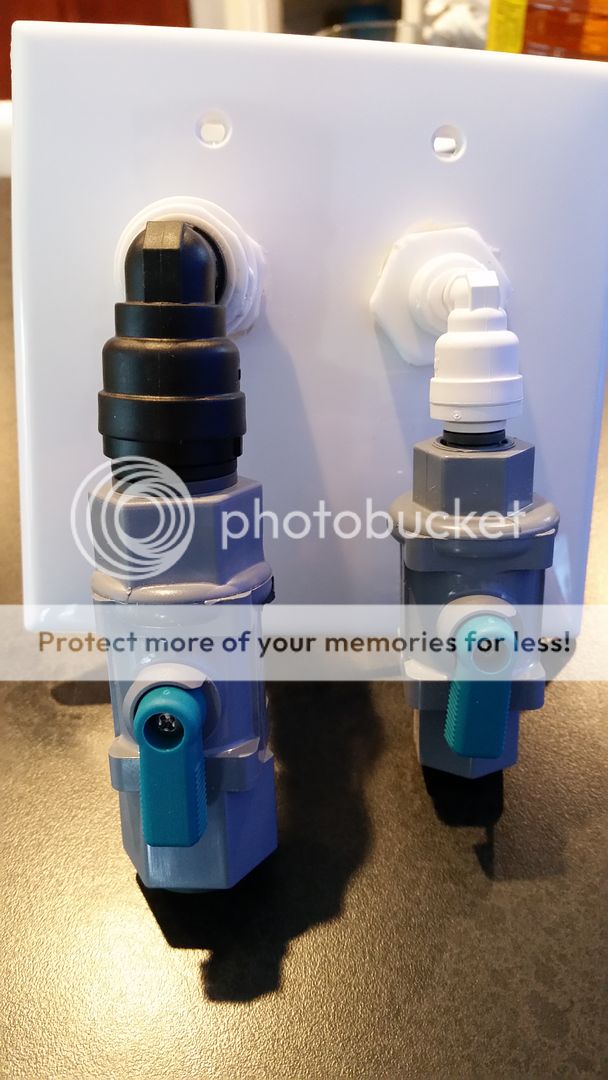
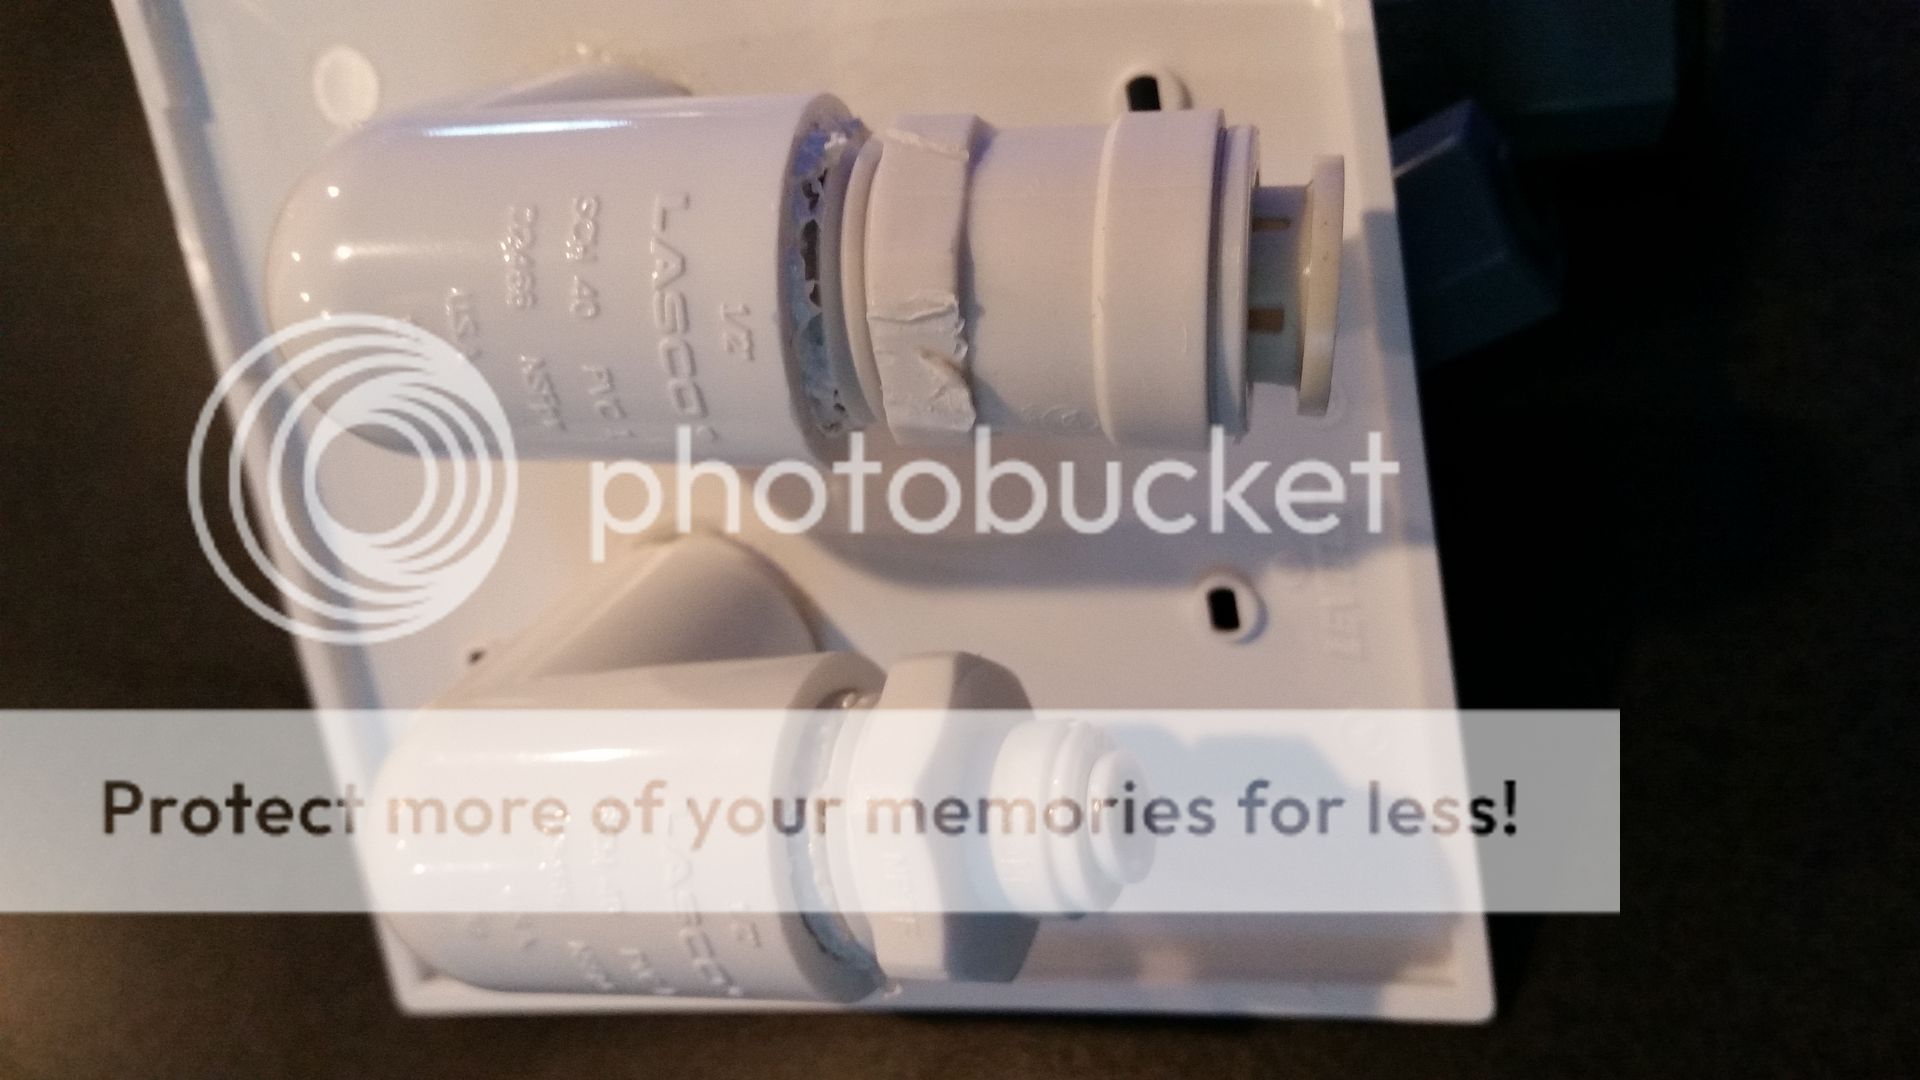
I also spent some time making the face plates for my RO and SW hook-ups.
These were made with blank nylon "unbreakable" plates and I drilled the holes for the fittings.
This one is behind the water tanks in the garage.

This one is under the tank. Its a bit different because i wanted to be able to turn the water on/off from the tank.

I was able to finish a major potion of the water mixing/changing station in the garage and get the tanks filled over the long weekend. My goal was to get it functional so I could do a water change. Happy to report that was accomplished. The stand is built to be higher than the sump under the DT so I am now able to move RO and SW without the need for a pump!! Go ole gravity does all the work. The pump you see there is just for moving RO into the SW tank and mixing salt.

I still have some additional work to do before its completed. I plan on adding some drawers on the bottom, above the salt boxes. I also need to drill the SW tank (on the right) for a bulkhead for the pump return. I thought I had the right size hole saw but did not.
For now, I went over the top. I also spent some time making the face plates for my RO and SW hook-ups.
These were made with blank nylon "unbreakable" plates and I drilled the holes for the fittings.
This one is behind the water tanks in the garage.

This one is under the tank. Its a bit different because i wanted to be able to turn the water on/off from the tank.


They make a split black tubing that you can use to conceal the wires coming from your kessils. It's cheap, looks good and can be found in the big box stores-lowes, hd. It's found in the electrical isle I can't remember it's name but I use it for my kessils and it works well
alphasig293
New member
How is the Vectra L1 doing? I have a 230 DT w/ a 125 sump that I will be setting up later this year, and I wasn't sure if it's enough.
TheAquatect
I Could Stop If I Wanted
Finally!
<iframe width="560" height="315" src="https://www.youtube.com/embed/XzVBU53RTJo?rel=0&controls=0&showinfo=0" frameborder="0" allowfullscreen></iframe>
<iframe width="560" height="315" src="https://www.youtube.com/embed/XzVBU53RTJo?rel=0&controls=0&showinfo=0" frameborder="0" allowfullscreen></iframe>
TheAquatect
I Could Stop If I Wanted
Thanks, glad you guys liked the video. I'm thinking I'll do a tank tour video in the near future.
Bit of an update on doing water changes. I am happy to report my design worked very well but I am not doing water changes the way I originally expected to.
Last week, I tried it for the first time. My plan was to turn off the pump and the valve to stop the back-siphon into the sump, then open the drain and let the tank back-siphon down the drain. This worked well, but after the Bean-animal drained out, the back siphon only amounted to about 15 gallons of water. So I was not that happy.
This week, I tried a different approach. I let the tank fully drain into the sump and marked the high water line. Then I diverted the flow from the pump directly to the drain and left the pump on low speed. It pumped all the water down the drain, then I just filled the sump to the high water line with fresh SW. After that, I just redirected the flow back to the returns and DONE! Short of an automated exchange, its the easiest WC ever! Final volume was 25 gallons, just under 10%.
The only downside I see is the fact I need to monitor the fill portion and stop it manually when it hits the high water mark. I am planning on fully automating the water changes next year, but wondering if I should look into some sort of float valve (for 1/2" tube) or solenoid of some type.
I also finally got around to tearing down my holding tanks and cleaning the equipment. That means there is going to be a quarantine & frag tank build in the future too!! Since I gave up the fish room, these tanks will be in my home office, which needs to be set up as well. 
Bit of an update on doing water changes. I am happy to report my design worked very well but I am not doing water changes the way I originally expected to.
Last week, I tried it for the first time. My plan was to turn off the pump and the valve to stop the back-siphon into the sump, then open the drain and let the tank back-siphon down the drain. This worked well, but after the Bean-animal drained out, the back siphon only amounted to about 15 gallons of water. So I was not that happy.
This week, I tried a different approach. I let the tank fully drain into the sump and marked the high water line. Then I diverted the flow from the pump directly to the drain and left the pump on low speed. It pumped all the water down the drain, then I just filled the sump to the high water line with fresh SW. After that, I just redirected the flow back to the returns and DONE! Short of an automated exchange, its the easiest WC ever! Final volume was 25 gallons, just under 10%.
The only downside I see is the fact I need to monitor the fill portion and stop it manually when it hits the high water mark. I am planning on fully automating the water changes next year, but wondering if I should look into some sort of float valve (for 1/2" tube) or solenoid of some type.
I also finally got around to tearing down my holding tanks and cleaning the equipment. That means there is going to be a quarantine & frag tank build in the future too!!
Since I gave up the fish room, these tanks will be in my home office, which needs to be set up as well. TheAquatect
I Could Stop If I Wanted
Im way over due for an update on this build. Its been slower than I would like but progress is still happening.
On the back-end, I did some upgrading and finalized the plumbing for the water mixing and storage station in the garage. First, I finally got the extra bulkhead fitted for the return plumbing for the mixing pump so I can put the top on the container!!

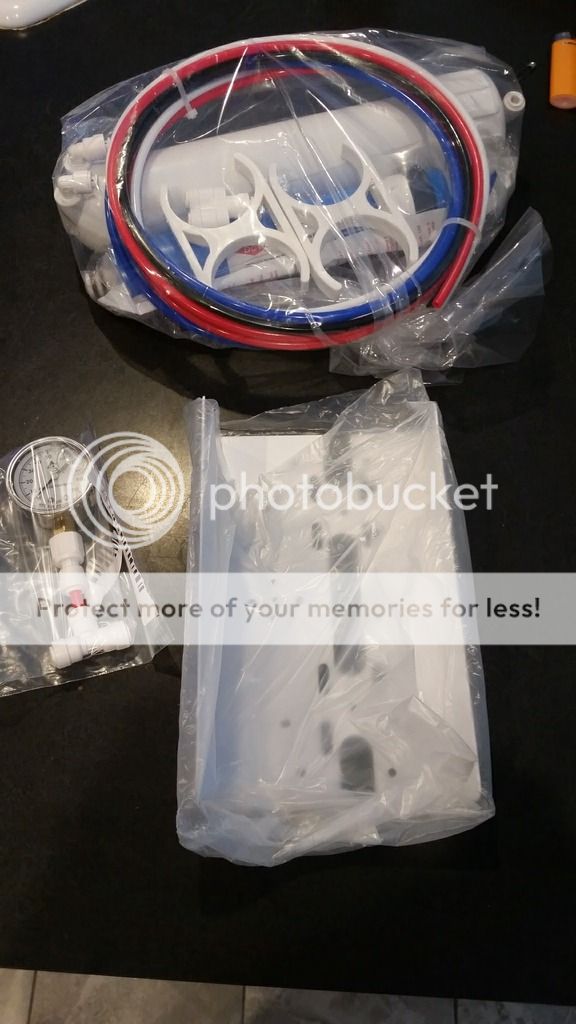
I also got some goodies in the mail; an extra RO membrane to upgrade to a 150GPD RO generation, a water pressure gauge so I know if I need a booster pump, and a new bracket for my dual DI Resin stages. After getting it installed, turns out I got lucky with 70 psi going into the first membrane so no need for the booster pump!!
I tapped into the water line feeding the hot water tank (not the hot water line coming out!!) and added a turnoff for maintenance.

And now I can make enough water to fill both tanks (180g) in a day!!

Next up, building and hanging the custom light fixture for the 4 Kessil 360WE and 8 T5...
On the back-end, I did some upgrading and finalized the plumbing for the water mixing and storage station in the garage. First, I finally got the extra bulkhead fitted for the return plumbing for the mixing pump so I can put the top on the container!!

I also got some goodies in the mail; an extra RO membrane to upgrade to a 150GPD RO generation, a water pressure gauge so I know if I need a booster pump, and a new bracket for my dual DI Resin stages. After getting it installed, turns out I got lucky with 70 psi going into the first membrane so no need for the booster pump!!

I tapped into the water line feeding the hot water tank (not the hot water line coming out!!) and added a turnoff for maintenance.

And now I can make enough water to fill both tanks (180g) in a day!!

Next up, building and hanging the custom light fixture for the 4 Kessil 360WE and 8 T5...
TheAquatect
I Could Stop If I Wanted
I've been drawing and modeling different lights for a while. I finally settled on a suspended lighting fixture for a couple of reasons. First, I dislike hoods on aquariums, I feel like they make the tank look too bulky. Second, this whole design is around a more modern looking set-up with just a touch of industrial/rustic, which matches the rest of our home. It's tough to get a 300g aquarium to blend in, right!?!?
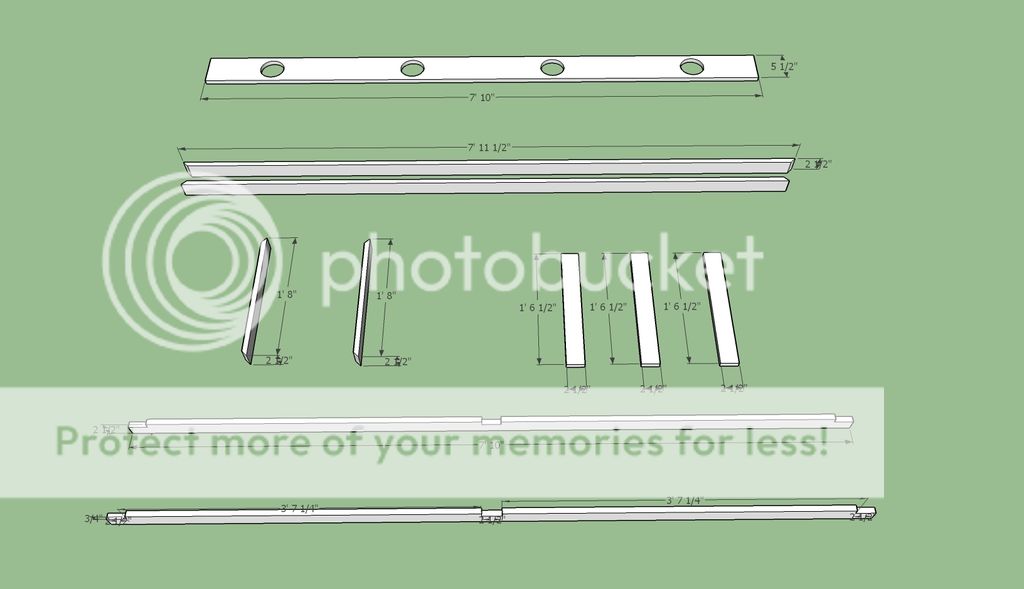
After a few designs, we settled on this version, which will be suspended above the tank by thin wire. This 3D model is done in SketchUp, which I use quite a bit, as you've seen from the initial plans in the beginning of the thread.

I also end up with a pretty accurate cutlist, which makes life easier during the build.
Now, honestly, I still had no real idea on the types of wood and finish I was going to use. I thought a lot about using real reclaimed wood but opted not to for 2 reasons; 1: It can be a pain to get straight and flat boards from old wood. And 2: Old wood might have flaky lead based pain dropping into my reef. So I opted for a manufactured aged barn wood from home depot that was very reasonable. I also wanted a little contrast, so I opted to get cedar for the center where the kessils protrude.
I also did a slight design change on the ends. Originally The ends were wood but I wanted a more industrial look so I changed the design a bit to add steel ends that would be bolted onto the wood. I got the idea after coming across a metal finishing video where they polished the metal with a torch. It came out so amazing, I hat to try it out. (steel is to the right of the cedar in this pic)

First, you need a good clean tablesaw, so I cleaned mine up and waxed the top. Ain't she pretty! lol
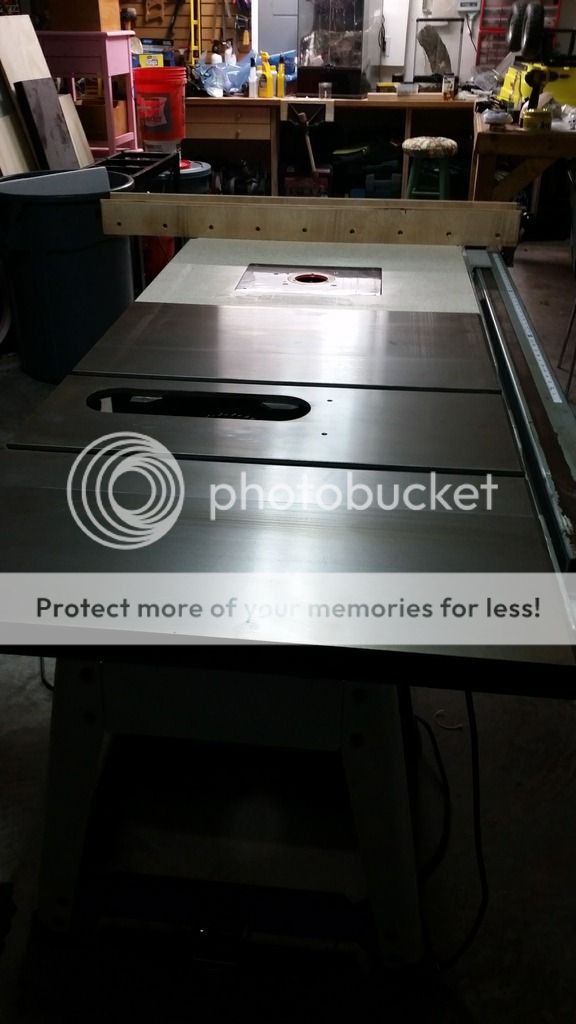
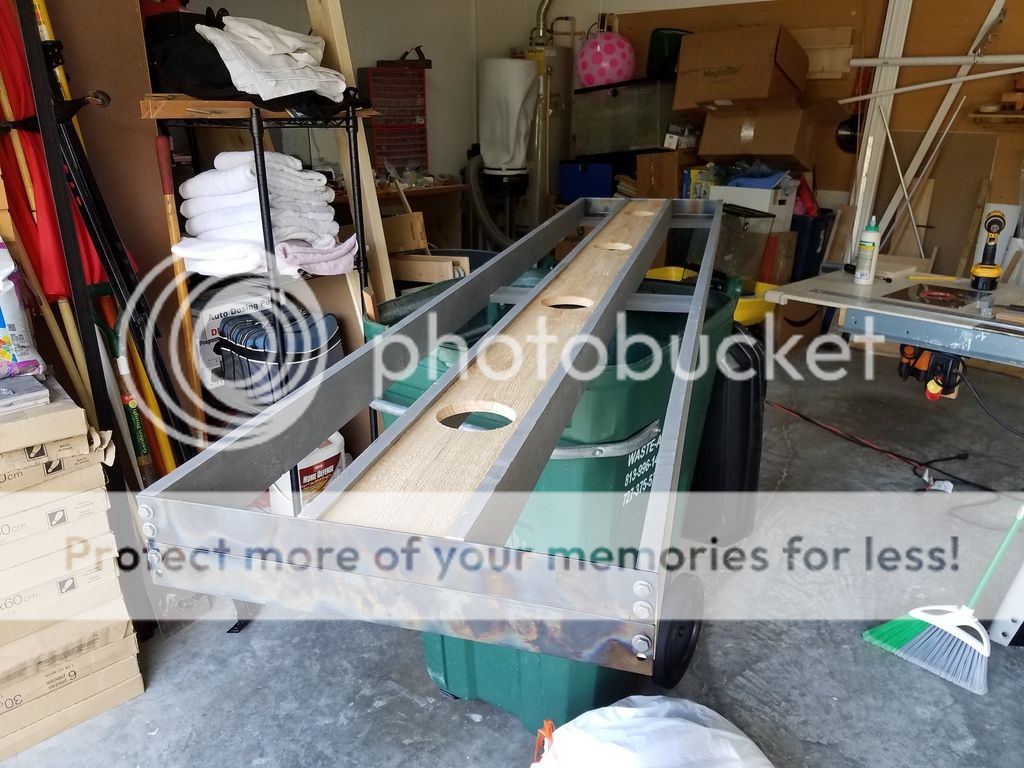
I started with the middle section that would house the 4 Kessil 360WE lights and the ballasts for the T5's. After cutting the board to length, the exact location for each light was measured and marked. They are all evenly distributed to provide each 2ft section of the tank with light. A 6" hole saw makes for a perfect fit!

The sides use the grey barnwood. I cut dadoes into these boards and then inserted the cedar board and glued it up. Here is the setup for the dado cuts. I needed a few guides to keep the twisted boards flat.

Because some of the boards had a twist in them, I glued it up in 2 stages. Lots of clamps were required!


The design is really simple actually, with the center "Kessil section" requiring the most work. The steel end plates hold it all together for the most part. I cut the steel plates to length and drilled 2 evenly spaced holes on each side. The top holes on these plates are also where I will attach the wires for hanging the fixture.

Once that was done, I dry fitted all the parts and then moved on to the fun part, the flame polish before final assembly and wiring...
After a few designs, we settled on this version, which will be suspended above the tank by thin wire. This 3D model is done in SketchUp, which I use quite a bit, as you've seen from the initial plans in the beginning of the thread.

I also end up with a pretty accurate cutlist, which makes life easier during the build.

Now, honestly, I still had no real idea on the types of wood and finish I was going to use. I thought a lot about using real reclaimed wood but opted not to for 2 reasons; 1: It can be a pain to get straight and flat boards from old wood. And 2: Old wood might have flaky lead based pain dropping into my reef. So I opted for a manufactured aged barn wood from home depot that was very reasonable. I also wanted a little contrast, so I opted to get cedar for the center where the kessils protrude.
I also did a slight design change on the ends. Originally The ends were wood but I wanted a more industrial look so I changed the design a bit to add steel ends that would be bolted onto the wood. I got the idea after coming across a metal finishing video where they polished the metal with a torch. It came out so amazing, I hat to try it out. (steel is to the right of the cedar in this pic)

First, you need a good clean tablesaw, so I cleaned mine up and waxed the top. Ain't she pretty! lol

I started with the middle section that would house the 4 Kessil 360WE lights and the ballasts for the T5's. After cutting the board to length, the exact location for each light was measured and marked. They are all evenly distributed to provide each 2ft section of the tank with light. A 6" hole saw makes for a perfect fit!

The sides use the grey barnwood. I cut dadoes into these boards and then inserted the cedar board and glued it up. Here is the setup for the dado cuts. I needed a few guides to keep the twisted boards flat.

Because some of the boards had a twist in them, I glued it up in 2 stages. Lots of clamps were required!


The design is really simple actually, with the center "Kessil section" requiring the most work. The steel end plates hold it all together for the most part. I cut the steel plates to length and drilled 2 evenly spaced holes on each side. The top holes on these plates are also where I will attach the wires for hanging the fixture.

Once that was done, I dry fitted all the parts and then moved on to the fun part, the flame polish before final assembly and wiring...
TheAquatect
I Could Stop If I Wanted
Now for the fun part, the flame finish.
You can use either a mapp gas or propane gas torch. Mapp gas burns hotter so the reaction will happen faster but I was fine with propane and felt like I had more control over the reaction as I heated the metal.
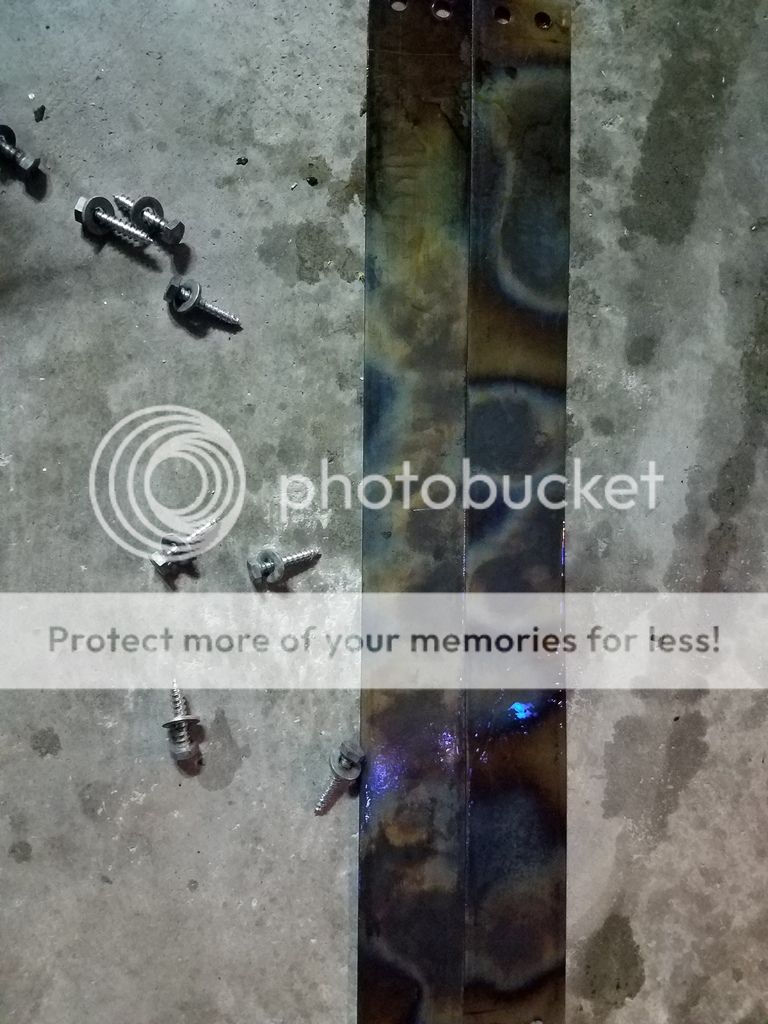
I'll be finishing the steel plates and the zinc coated lagg bolts and washers. This will take that shine off the zinc coated parts and it will also allow them to rust if you do not protect them after you are done.

Basically, you hold the steel plate/bolt with a well insulated pair of pliers and start to heat the metal with the torch. The blue portion of the flame should be touching the metal. When it gets hot enough (just before it would turn red) you will see blue hues start to appear. At that point you move the torch to a new section and continue. Here is the before and after:

You can really vary the look based on how slow or fast you move when the color changes. I got quite the different look with "slow vs fast".
Once done, final assembly happened. And it was looking better than I was imagining!
Onward to the wiring next!!
You can use either a mapp gas or propane gas torch. Mapp gas burns hotter so the reaction will happen faster but I was fine with propane and felt like I had more control over the reaction as I heated the metal.
I'll be finishing the steel plates and the zinc coated lagg bolts and washers. This will take that shine off the zinc coated parts and it will also allow them to rust if you do not protect them after you are done.

Basically, you hold the steel plate/bolt with a well insulated pair of pliers and start to heat the metal with the torch. The blue portion of the flame should be touching the metal. When it gets hot enough (just before it would turn red) you will see blue hues start to appear. At that point you move the torch to a new section and continue. Here is the before and after:

You can really vary the look based on how slow or fast you move when the color changes. I got quite the different look with "slow vs fast".

Once done, final assembly happened. And it was looking better than I was imagining!

Onward to the wiring next!!
Landshark61
New member
Great looking system. Very nice layout.
Similar threads
- Replies
- 9
- Views
- 249
- Replies
- 0
- Views
- 91