Back in 2017 I bought a 40 Breeder and a 75 to replace a 92 corner bowfront. I was replacing that tank as I didn't care for the look and difficult interior maintenance of the 92. The original plan was to make the 40 a Caribbean biotope and the 75 was going to be an Indo-Pacific biotope. I got the 40 going and just never had the time/drive to set up the 75. So, the 75 has been sitting in my basement since.
We're in the process of re-doing our basement and I figured I would just upgrade the 40 into the 75 instead of having 2 tanks. I originally planned to make the 75 an in wall tank, but have since decided against that. I was looking at stands for the 75 and a cheap Aqueon was going to run $450 and a much nicer stand (can't remember the make) was going to be well over $700. Since I'm cheap, I didn't want to spend that amount.
I was visiting my Mother and step father this weekend and my tank came up in conversation. They mentioned they have an old Oceanic 75 and stand in the basement. This tank and stand are well over 30 years old and have been in storage for a million years. My mother used the tank as a terrarium at one point and to raise guinea hen chicks at another point. The top bracing is melted and cracked for heat lamp she used, the silicone is torn to pieces, and the glass is scratched up so, the tank is worthless.
The stand was a little rough and wobbly, but the 3/4" birch plywood it's made from is still solid. So, yesterday, I removed the doors and sanded it down. Then, I replaced interior fiber/resin (pegboard type material) bottom with 3/4" plywood and added 2x4's to strengthen it up.
View attachment 32374614
View attachment 32374615
View attachment 32374616
Thank God I have an air compressor and nail guns
")
Next up, I'm going to cover it with a coat of Kilz and then paint it either a dark grey or black.
Then, I have to remove a wall in the basement and move the wall back about 3 feet. Once that is done, I will begin to set the 75 up and eventually move the LR and livestock over from the 40.
I have an Icecap 36XL sump I'll use, which has an integrated fuge. For skimming, I'm going to use my current eShopps cone skimmer and add an Oceanic #6 venturi skimmer I picked up on evilbay for $25. Lighting will be (2) Iwasaki 175 watt 10K MH and T5 actinics.
View attachment 32374617

")
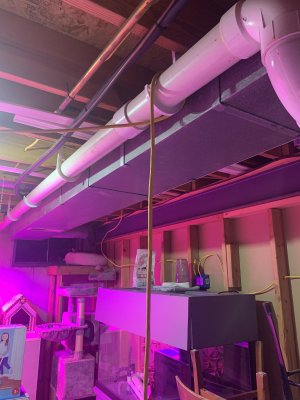
 . So, the wall is not supporting the beam at all. Yes, there are metal support posts under the beam in several locations.