Silent and Failsafe Overflow System

YEP, My skimmer is louder than my sytem, Rocket wsa over my house the other day, looking over my system, i was still doing finnish work on the plumbing, we able to test run it, was not dead silent, but i know why now, at first i thought it was because of my 45's, then i realized, my siphon drain was not full, that is, i was not pushing enough water through my system to fill the siphon and allow the balance to enter the second drain. so you can hear the water trickle down my pipes, but not loud. and that's only with everything off except the return. I kinda like the light sound of water, lets me know the system is running fine. if i hear absolutely nothing i may be checking it more than i want to, i miss when something goes wrong.
(Forgive me if i word it wrong.)


this is my system:
1177803813_NKuJ5-M.jpg


1193346689_MBY38-M.jpg
 
On Second thought...return lines go over the top and and the side

On Second thought...return lines go over the top and and the side

On second thought, Rocket Surgeon's returns positioned on the side, over his oveflow box, have me thinking this would be less distracting (Post No. 3013 above). Bean once cautioned me against making the plumbing wind up being a big distraction. If the returns are placed in the center portion of the tank (Post No. 3017 above), then they will be more of a distraction, than if they are tucked into the right and left corner (pictured below).

So here is Bean Animal's design on NanoCube 28-Gal. with returns over the top and positioned on side of overflow box. The PVC will be painted black, when it is hard-plumbed, in a few days. In the meantime, the mockup looks like this:

P2070236.jpg~original


P2070237.jpg~original


P2070238.jpg~original


P2070239.jpg~original


Thanks, all!
 
Last edited by a moderator:
Ok, I just got done scanning and reading all 4000+ posts of this monster thread, I wanted to avoid being one of those that asks the basic questions all over again!!

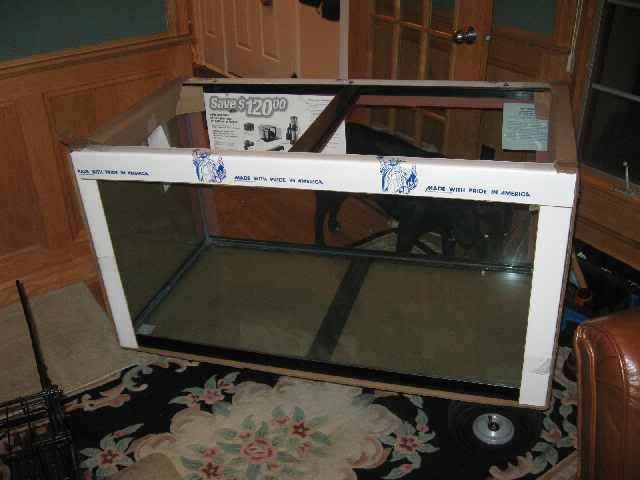
Just last night, I picked up my new 120 Gallon tank!!

IMG_9272.jpg


I will be installing the coast-to-coast along the side of the tank (24" wide) as I may eventually convince the wife to let me make it a through-the-wall tank.

My goal is to design the filtration system so that a bare minimum of real estate is taken up in the display tank. I would like to do something similar to Robertifly's design which has a low-profile acrylic black interior box and a clear acrylic exterior box, connected by 4 bulkheads like this:

newtankplumbing031.jpg


newtankplumbing032.jpg


newtankplumbing033.jpg


newtankplumbing034.jpg


newtankplumbing035.jpg


Robertifly your design is great, I hope you don't mind that I posted a few of those pics here!!

So in the interest of absolutely maximizing the interior space, I wanted to do a slight modificiation to this design and make the front panel angled upward like this:

weir2.jpg


(The external box is not the final design obviously, I just show the emergency standpipe for reference)

I figure that since the front panel has to be welded on after installation anyways (as it was in robertifly's design) that I might as well maximize the space in the tank and minimize the view of the internal box from the front (and back)

QUESTION #1: Does anyone see any issues with doing it this way?

The only thing I can think of is that it might be a little difficult to clean out the space at the bottom of the trough, but then again, the flow rate will be very high and nothing should be able to get trapped. The downside inherent to the design in general is that if you need to replace a bulkhead, you have to replace the inside box, as you have to break it apart to get the bulkhead out. The solution to this would be to reverse the bulkheads so that the nut is on the internal box, which is a possibility, and likely what I will do.

Also, I took an educated guess on the sequence of connection points as shown on the drawing, but maybe someone else can comment:

Bulkhead
Acrylic
Gasket #1
Tank Glass
Gasket #2
Acrylic
Compresson Nut

QUESTION #2: Should I add a gasket between the bulkhead and the internal box? (If I reversed the bulkhead, same question would apply)

QUESTION #3: Should I use a bead of silicone between the internal (and external??) acrylic box and the glass instead of a bulkhead? (I'm guessing this is a yes, since this would also eliminate dead space between the internal box and the glass, and a torque point on the external box from the weight of water and vibration of pipe during startup.)

I know that silicone won't bond acrylic and glass, but I do believe it would keep it sealed, especially when the bulkhead is keeping it under pressure.

If #2 and #3 are both "Yes" then it would be:

Bulkhead
Gasket
Acrylic
Silicone Bead
Glass
Silicone Bead
Acrylilc
Compression Nut

The final question I have it this:

QUESTION #4: If I make the internal and external boxes in a similar fashion out of glass and silicone everything in place, do I need to install a bulkhead? That is, if I drill a hole (or a series of holes) in a tank, is a bulkhead required in order to maintain the strength of the glass around each hole?

Maybe that's more of a hole-drilling / glass cutting type of question, but it's related to this design so I'm posting it here hoping someone will know the answer. I've seen designs on here with slots cut in the glass and back edges shaved off to create a weir, and comments about bracing and such. It would save a lot of internal box space if I could drill 4 holes with the diameter of the interior cross-section of a 1.5" bulkhead versus 4 hoels for 1.5" bulkhead, and additional space taken up by the bulkhead. I haven't seen anyone do this, either that or I missed it and I wonder if there is a reason.

Thanks for reading my long post and I hope I can get these questions answered...
 
You could further minimize tank space used by slotting the top of your tank instead of using bulkheads. A much cleaner install, and what I'd do if I had it to do over again. Of course this complicates the issue of sealing an acrylic box to the back of the tank, though I have read that Mr. Sticky's underwater glue will work well for that purpose. If you're willing to do your external box out of glass, simply use one of the structural silicones discussed many times on RC
 
If I did that, I would do a glass external box. I haven't put much thought into a slotted tank, but wouldn't I have to remove the trim and do some additional bracing?
 
If I did that, I would do a glass external box. I haven't put much thought into a slotted tank, but wouldn't I have to remove the trim and do some additional bracing?

You can remove the trim to do the slotting and then reinstall (trimming the bottom of it). You obviously want the water line to be at or above the base of the trim, which requires the bottom of the slot to align with the trim. How I'd do it:

1) mark trim line on back of tank
2) remove top trim
3) cut slots using your preferred method (dremel, etc...) with bottom at trim line and 1/4" to 3/8" tall. I'd put 3 18-20" slots on my 6' tank
4) drill bottom piece of overflow box for bulkheads
5) IMPORTANT - test fit bulkheads and other plumbing; do a full mockup against the tank to ensure you've gotten it right
6) build box with structural silicone and attach to tank
7) determine where cutting of trim needs to be done to accommodate box
8) cut trim
9) reinstall trim
10) enjoy a beverage while admiring your handiwork!
4) cut trim 1/8" to 1/4" above slot line
 
Wow we have some nice additions to the bean family here.... I really like the nano cube.

Thanks, Scott! I'm grateful to Bean for his awesome design.

I'm still wondering if there's an eyesore in the over-the-top return lines. I guess I'll have more confidence when I test the look with the raised hood on the tank. But for now, I'm waiting for the hood legs/mounts to arrive by mail.
 
The returns over the top are no big deal they look good maybe you can get some krylon fusion black paint to conseal them some.

Or you could drill another hole if there is room in the overflow and feed it through that way.
 
You can remove the trim to do the slotting and then reinstall (trimming the bottom of it). You obviously want the water line to be at or above the base of the trim, which requires the bottom of the slot to align with the trim. How I'd do it:

1) mark trim line on back of tank
2) remove top trim
3) cut slots using your preferred method (dremel, etc...) with bottom at trim line and 1/4" to 3/8" tall. I'd put 3 18-20" slots on my 6' tank
4) drill bottom piece of overflow box for bulkheads
5) IMPORTANT - test fit bulkheads and other plumbing; do a full mockup against the tank to ensure you've gotten it right
6) build box with structural silicone and attach to tank
7) determine where cutting of trim needs to be done to accommodate box
8) cut trim
9) reinstall trim
10) enjoy a beverage while admiring your handiwork!
4) cut trim 1/8" to 1/4" above slot line

You make it sound so easy!!

I found this thread http://www.reefcentral.com/forums/showthread.php?t=793396 and it doesn't look so easy to keep the trim in tact...

All things considered, it probably wouldn't be the way that I would want to go at this point. Since I want to leave open the possibility of having a through-the-wall tank (it's really just a dream, but the wife jokingly suggested it) I would want to leave the outside of the tank in tact, and the external box would not be the width of the tank. Plus I know that I can drill a tank but as far as slotting a tank - no thanks.

When I have a custom tank made or do it myself (notice I said WHEN) then I'll have a built-in weir. But for now I'll stick with the above idea.
 
I fear cutting slots in the back of my tank... I have a dremel.. just don't trust myself to do it. With the one I'm building, looks like I am going to cut a 3x 1" holes between the internal weir and the external overflow box... and go with that.
 
By being careful, you can remove the trim in a single piece. Lots of patience. I've seen other threads where trim has been removed successfully. Worse come to worst, simply order a new top trim from your tank vendor. Then you don't have to be quite as careful removing the one you've got. :P
 
Scott26: Wow very nice Bean setup. I like your video journal on YouTube of your wave-front design tank and stand. Sweet. That's a 90-gallon setup. It sounds super quiet as advertised "Silent and Safe" setup. I notice that your plumbing is black, and mine is, too. I used Krylon paint, and I will continue that with the return lines. Did you paint your elbows and other plumbing, or did you buy that PVC as black PVC?
 
Scott26: Wow very nice Bean setup. I like your video journal on YouTube of your wave-front design tank and stand. Sweet. That's a 90-gallon setup. It sounds super quiet as advertised "Silent and Safe" setup. I notice that your plumbing is black, and mine is, too. I used Krylon paint, and I will continue that with the return lines. Did you paint your elbows and other plumbing, or did you buy that PVC as black PVC?[/uQUOTE]

Don't want to clutter up this thread but it was all painted black everyhing was orginal white sch 40 but painted with black fusion paint if you have more questions check out my build thread I am pretty sure it has more pictures then you would like to see :)

Sent from my DROIDX using Tapatalk
 
Modified OF

Modified OF

I'm trying to change my BAA overflow to something more compact and since my return will be only about 600 gph, the weir doesn't have to be coast-to-coast.

What I'd like to do is use a standard 6x6 OF box on the back of the tank but instead of putting the drain holes side-by-side, I thought they could go on top of each other. I added a picture (I hope it makes sense). The picture represents the back of the tank. The top of the pic is the top of the tank. The holes aren't in their final place so you can move them around so there won't be that large of a drop for the water to fall.

Does this look like it would work? If it's not clear I'll try to explain it again.

Thanks.
 

Attachments

  • OF box.jpg
    OF box.jpg
    15.7 KB · Views: 4
Back
Top