Silent and Failsafe Overflow System

Oh I can get this one.

You want the siphon and open channel to end just under the normal operating water line in you sump if you put it above you will get a spalshing sound... you will however want to keep the emergency pipe above the water so that way you can hear the splashing and be alerted that the emergency standpipe is working.

:thumbsup:
 
I'll be using this overflow design with my new 120g tank (48x24x24).

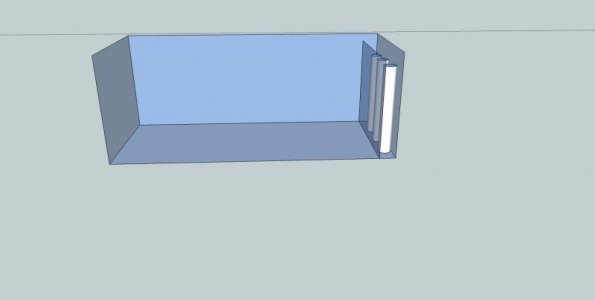
I'm debating between external and internal coast to coast overflow boxes. What would the minimum dimensions for each be to get the best balance between functionality, ease of use and real estate used up? I'm planning on 1.5" bulkheads although I may go with 1" if the 1.5" box would have to be too big.

Also, I've noticed that the best looking internal overflows use black acrylic to match a black background. I always thought that siliconing acrylic to glass is a no-no. At least that's what I was told when I wanted to use acrylic baffles in my glass sump. Any thoughts?

Thanks in advance for your help.

The box should be big enough to get your hands in, so that you can work with the plumbing and/or retrieve items that fall in or grow in there.

You can purchase tinted glass (called greylite) in 14% or 35% transperency. You can also simple clip or silicone a piece of thin black acrylic to the front of the glass overflow. I used the greylite 35% as that is what was easily available.

In short order, coraline, star polyps or whatever else will grow in the front surface anyway :)
 
Good idea about gluing on a thin strip of acrylic or purchasing greylite.

Any thoughts on how deep and high the overflow would need to be though for easy access to plumbing and good efficiency considering 1.5" bulkheads?
 
Sorry for the double post but I guess I just don't know how much space is required to get the plumbing fittings in and have enough room to work/clean. I'm trying to keep it as small as possible and still fit 1.5 inch bulkheads. Depth-wise (front-to-back) I'm thinking I can get away with 4 inches or maybe even 3 inches if I have an internal overlfow because the bulkheads would be in the back. As for height though, I have no idea how much space I need at the back to fit in the 1.5" bulkhead fittings and leave enough glass above for stability.

BeanAnimal what are the specs/measurements on your overflow box?
 
On my 1/2" thick glass tank, the guy who drilled my tank says that he likes to keep 1 hole's diameter from the edge of the glass. For thinner he prefers 1.5x hole diameter. As far as how far deep from the back edge to make your box, make it deep enough so that you can get a bulkhead out and a new one in, if you ever need to swap one. Height? I'm going to leave 1 intake pipe diameter from the bottom of the intake to the bottom of the weir glass on mine...
 
Sorry for the double post but I guess I just don't know how much space is required to get the plumbing fittings in and have enough room to work/clean. I'm trying to keep it as small as possible and still fit 1.5 inch bulkheads. Depth-wise (front-to-back) I'm thinking I can get away with 4 inches or maybe even 3 inches if I have an internal overlfow because the bulkheads would be in the back. As for height though, I have no idea how much space I need at the back to fit in the 1.5" bulkhead fittings and leave enough glass above for stability.

BeanAnimal what are the specs/measurements on your overflow box?

This is listed on his first page of the orginal thread... his is 6" tall and 4.5" deep I belive but he used 1.25" to 1" street ells so yours wouldn't be the same with that size tank you might not need to go with 1.5" I am going to be running 1" on my 90 gallon and it should be able to put out 1500 gph easy and I will be using 1.5" piping out the back just somethign to think about.
 
Bean - question on how I am planning on setting up my weir. I have a 72LX30Dx26H tank. I am planning on a full horizontal panel at the right end of the tank creating a 30Wx4Lx25H overflow compartment. This will be an in wall tank so the far end can be covered by drywall and unseen.

Several questions

1) Do you see a problem with the water flowing to the end of the tank instead of going off a weir in the back of the tank?

2) Do you think a 30 inch length is enough surface skimming?

3) I actually thought about putting a DSB in the overflow box but was concerned that too much debris would get in the bed from the surface skim. What so you think?

4) Any thoughts on size of pump or gph I should push from the sump directly underneath the tank?

Return lines will come over the top of the back of the tank. I have attached a rough design of what I am thinking.

I would appreciate your thoughts.
 

Attachments

  • tank.jpg
    tank.jpg
    11.2 KB · Views: 9
1) Nope... the longer the wier the better, but you can only work with what you have.
2) See above... It also depends on what size return pump you have.
3) Too much debris, and the water moves far too fast in the overflow box. If the bed ever needs replaced, you will have a hell of a time working with it.
4) It is a matter of preference, but with a 30" overflow, somewhere in the 400-500 GPH range, assuming you are going to use powerheads and/or closed loops for flow.

I don't see a need for the overflow box to go to the bottom of the tank, it is just cutting down on realestate and creating a place for crap to settle and rot. Then again, if you are a mainenance hound, you can use it as a trap to vacuum stuff out.
 
Thanks Bean for the fast reply and great advice. I have really learned alot from reading thru this thread and from your homepage as well!!!!
 
Bean - another question for you. I agree with you that the longer the weir the better the surface skimming. Since my tank will be in the wall I could definitely do a low profile internal weir across the back with holes drilled in the tank and build my drain box on the outside of the tank. My big issue is that I can't get the materials into the tank for a coast to coast given the bracing and framing on the top of the tank.

Any advice?
 
Hi Bean, love you design since going with it i dont want to do back. My problem is i am upgrading to a 180 non reef ready, i would love to cut a opening and put an external over flow but cant seem to find any infor on this. with that said i will have to run you setup and would like to know if a 3foot weir is good enough.
 
Hi Bean, love you design since going with it i dont want to do back. My problem is i am upgrading to a 180 non reef ready, i would love to cut a opening and put an external over flow but cant seem to find any infor on this. with that said i will have to run you setup and would like to know if a 3foot weir is good enough.

http://www.reefcentral.com/forums/showthread.php?t=1733011

Check out the above thread on how to do an external lots of good info on it.

Also a 3 foot weir should do just find for a tank that size if any thing that will not be your limiting factor the size of you pipes would be but if you go with 1.5" piping you shouldn't have a problem.
 
Part supplys?

Part supplys?

A pat on the back Bean, your information that you have been so committed to share and your guidance is indspensable and I personaly want to say thanks. I am wondering who is the best online source for all the plumbing parts for the Beanatastic overflow.:thumbsup:

Bigffish
 
hi bean, thats alot of reading, this must be one of the biggest threads in history.

im doing my tank for a freshwater sump that will be plumbed into a wet dry system, therefore the outlets of the overflows will not be submerged and will be probably be a spray bar or 2. will this effect flow rates at all?

also, is it possible to join the two 1.5" drains (not the emergency) into a 2 inch horizontal drain before it enters a spray bar?

thanks alot for you help, ive had a real hard time finding the plumbing parts i need, especially the sanitary tee and the street elbow, i did buy a sanitary tee but its a different size than the rest of my piping even though its classed as 1.5", so i think i might just might replace the 2 sanitary Ts with elbow and keep the emergency with just a normal T

and it will probably have to be normal 1 inch elbows instead of the street elbows as well, unless i find a place that ships internationally

thanks

oh and, is the pipe fittings used pressure pipe fittings? or drain vent (DWV) fitting? they both seem to be different sized piping
 
Last edited:
The outlet do not need to be submerged but the siphon control valve should be as close to the spraybar as possible to ensure that the siphon has enough back pressure to start and purge air.

Joining the siphon and open channel is not a good idea, as they will tend to interact with each other and possibly create stability problems. 90% or so of the flow will be in the siphon anyway.

You can replace the santees with elbows of you like.
DWV and pressure are the same size fittings, cell core PVC is not sized the same.
 
Bean - another question for you. I agree with you that the longer the weir the better the surface skimming. Since my tank will be in the wall I could definitely do a low profile internal weir across the back with holes drilled in the tank and build my drain box on the outside of the tank. My big issue is that I can't get the materials into the tank for a coast to coast given the bracing and framing on the top of the tank.

Any advice?


Bump
 
Back
Top