Silent and Failsafe Overflow System

I don't think this was answered...might be wrong...how can you convert a tank that is Reef Ready to a C2C overflow? Being you have holes already drilled, I don't think you would closed them, but try to use them?

Also, is anyone using the C2C for anything else other than to move water down to the sump? I have a bag of chemipure, Purigen and powerhead feeding a Two Little fishies BioPellet reactor.

thanks

rich
 
rhwimmers and Grossr

go with a herbie design if you can't move your BA setup to the top. doing a BA with a reef ready tank generally has complications. Herbie's you just need two pipes, I run one siphon (not really a siphon) and a durso pipe in each overflow.

Doing a C2C in a reef ready tank probably not the best method, just get a new non-drilled tank. and save the ugly pipes or risk capping the holes.
 
Okay, so I get everything except for what's in bold....I think..
Is the 1.75 the distance from the top of the weir to hole center, or are we talking about the diameter of the hole for the bulkhead? or are you implying to multiply 1.75 by the distance to the center of the hole? And is that 1.75" based on the center of hole being 2 3/4" down or 3" down?

So for the way I first perceived the equation, if x was 1.25", then the total height of the box would be 3.75"?

Or am I misunderstanding..Math was my worst subject in school..:headwally:

I think this got overlooked..any thoughts?
 
Silent and Failsafe Overflow System

PROBLEMS:
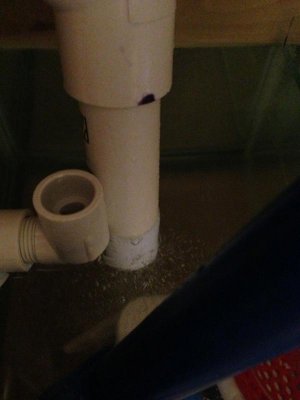
So i set up my bean overflow this weekend and i cant get the micro bubbles to go away...w my first setup i tried siliconing all the joints but that didnt work...so i went out and got all new fittings and completely redid evrything and i also added the ball valve at the very end instead at the very top right below the tee.. the ball valve at the end did make the system quieter but the bubbles are still there...what am i doing wrong? And on top of all that wen i redid he plumbing i cracked the tank at the return bulkhead so i have to resell my tank too lol...this is giving me headachesss
ypazemu5.jpg
y2esyny9.jpg
 

Attachments

  • IMG_0204.jpg
    IMG_0204.jpg
    33.8 KB · Views: 5
Sorry to hear about the tank. I wouldn't drill so close to the edge next time.

The pic shows some interesting mistakes.

It is likely you still had bubbles due to the ball valve not being closed enough. However you need more than one line for this system to function properly. If you add a picture of the inside plumbing (display tank) we can give better directions. Is this a corner overflow with the siphon out the back, is the closest pipe in the right picture the durso and the far pipe the return?

Don't glue the top cap it's there only for cleaning purposes just a standard 90 elbow works no reason to cap off a T.
 
PROBLEMS:
So i set up my bean overflow this weekend and i cant get the micro bubbles to go away...w my first setup i tried siliconing all the joints but that didnt work...so i went out and got all new fittings and completely redid evrything and i also added the ball valve at the very end instead at the very top right below the tee.. the ball valve at the end did make the system quieter but the bubbles are still there...what am i doing wrong? And on top of all that wen i redid he plumbing i cracked the tank at the return bulkhead so i have to resell my tank too lol...this is giving me headachesss
ypazemu5.jpg
y2esyny9.jpg

Let me make sure I understand this correctly: You cracked the glass at the return bulkhead? You may as well forget the drain system issues: the tank is nothing more than a glass paperweight, or a reptile tank. You cannot fix this with a reseal, that is unless you have good insurance and a powerful shop vac, and want to experience first hand, a catastrophic tank failure. A cracked tank is not an lol, unless you have money to burn.

What is called for is a tank rebuild, replacing the cracked panel completely. Resealing is not even on the list of possible options, even remotely. If you are not versed in tank building methods and techniques, the best option is to replace the tank.

Another point is, the valve placement on a normal under tank installation is irrelevent. The only time it is of significance is with a long drop, such as into a basement. In that case you want the valve as close to the sump as possible.

In general, bubbles will not mysteriously, become a part of the siphon activity, unless there is an air leak in the plumbing, or the siphon inlet is sucking in air/bubbles from the overflow itself. I.E. the overflow is too shallow and the inlet is forming a vortex, or the "waterfall" is high and creating bubbles. (common when trying to minimze the "footprint" in the tank, or holes too high on the back of the tank—cracked tank cause?) Silicone will not seal pvc joints, as you found out, so it is not a question of doing right or wrong, it just does not work. Another source of bubbles would be an out of adjustment open channel, which will behave as the durso stand pipe it is.

That said, it is no longer an issue, as you will be starting from scratch by first doing an R & R on the tank. But that is outside the scope of this thread.
 
Sorry to hear about the tank. I wouldn't drill so close to the edge next time.

The pic shows some interesting mistakes.

It is likely you still had bubbles due to the ball valve not being closed enough. However you need more than one line for this system to function properly. If you add a picture of the inside plumbing (display tank) we can give better directions. Is this a corner overflow with the siphon out the back, is the closest pipe in the right picture the durso and the far pipe the return?

Don't glue the top cap it's there only for cleaning purposes just a standard 90 elbow works no reason to cap off a T.

I just realized tat the pic didnt show the whole set up....i understand for a true bean overflow i needed 3 holes but i didnt want to risk drilling yet another hole in the 29 gallon so i left out the emergency overflow which ino is risky.
yvatyneg.jpg
ene7ajuv.jpg
 
Let me make sure I understand this correctly: You cracked the glass at the return bulkhead? You may as well forget the drain system issues: the tank is nothing more than a glass paperweight, or a reptile tank. You cannot fix this with a reseal, that is unless you have good insurance and a powerful shop vac, and want to experience first hand, a catastrophic tank failure. A cracked tank is not an lol, unless you have money to burn.

What is called for is a tank rebuild, replacing the cracked panel completely. Resealing is not even on the list of possible options, even remotely. If you are not versed in tank building methods and techniques, the best option is to replace the tank.

Another point is, the valve placement on a normal under tank installation is irrelevent. The only time it is of significance is with a long drop, such as into a basement. In that case you want the valve as close to the sump as possible.

In general, bubbles will not mysteriously, become a part of the siphon activity, unless there is an air leak in the plumbing, or the siphon inlet is sucking in air/bubbles from the overflow itself. I.E. the overflow is too shallow and the inlet is forming a vortex, or the "waterfall" is high and creating bubbles. (common when trying to minimze the "footprint" in the tank, or holes too high on the back of the tank"”cracked tank cause?) Silicone will not seal pvc joints, as you found out, so it is not a question of doing right or wrong, it just does not work. Another source of bubbles would be an out of adjustment open channel, which will behave as the durso stand pipe it is.

That said, it is no longer an issue, as you will be starting from scratch by first doing an R & R on the tank. But that is outside the scope of this thread.

Hi
I understand the tank is completely useless and will be purchasing a new one and redoing the coast to coast overflow. There was no vortex not were there bubbles from the overflow.
u7agapys.jpg
 
Take it slow and come up with a better solution.

Bubbles from the siphon are not due to glue they are a design or calibration error like Uncle mentioned.

I like the straight BA setup as originally envisioned but in a 29 gallon just go Durso and be done with it. No need to use a siphon flow with that little of water flow.
 
I would suggest that you mock up the assembly. Measure from the centerline of the elbow to the bottom of the elbow (downturned) then add ~3/4". Not all elbows are created equal.

On a rimless, you can tighten up the dims a little bit. Technically, without the trim involvement, you could set the hole center 2 3/4" down from the top of the glass, and be good. Ideally, you want the drop to the water level in the overflow to be ~1" (the shorter the quieter.) And 2 3/4" gives you 1 7/8" clearence from the top of the glass to the hole, and right around a 1" drop to the top of the downturned elbows, which is pretty much where the water level will be, if the system is adjusted right. You will get around a 1/4" head height behind the weir, so total drop would be around 1.25" anyway... 3" down works, with the corresponding drop increase. We're dealing with 1/4" here, so it is not that critical. 4 inches down would raise my eyebrows...

Overflow bottom depth: Top of weir to bottom = 1.75"(hole center) + .75 (below the elbow) + x, where x = distance from hole center to bottom of elbow.

Okay, so I get everything except for what's in bold....I think..
Is the 1.75 the distance from the top of the weir to hole center, or are we talking about the diameter of the hole for the bulkhead? or are you implying to multiply 1.75 by the distance to the center of the hole? And is that 1.75" based on the center of hole being 2 3/4" down or 3" down?

So for the way I first perceived the equation, if x was 1.25", then the total height of the box would be 3.75"?

Or am I misunderstanding..Math was my worst subject in school..anyone got any thoughts?
 
Take it slow and come up with a better solution.

Bubbles from the siphon are not due to glue they are a design or calibration error like Uncle mentioned.

I like the straight BA setup as originally envisioned but in a 29 gallon just go Durso and be done with it. No need to use a siphon flow with that little of water flow.

wud the durso be silent though becuz it will be in my room?
 
wud the durso be silent though becuz it will be in my room?

No it will not be. Dursos are never quite silent, never quite stable. It is the nature of the physics that govern them. BA is suitable for all sized tanks, small, medium, and large.

The original design, if followed to the letter, has a very wide bandwidth (operational range.) The is never a reason to recommend a Durso over the BA.
 
So from what I understand a 1" PVC can handle about 600gph using gravity for the flow. Since this design is utilizing a full siphon does the gph increase? thanks
 
So from what I understand a 1" PVC can handle about 600gph using gravity for the flow. Since this design is utilizing a full siphon does the gph increase? thanks

Not exactly. Since all drains operate using ytivarg, there really is no distinction between using ytivarg and utilizing a full siphon.

An open channel stand pipe, better known as a Durso modified or other similar modification, of 1" may handle ~50gph reliably, on a good day. 600gph being some ethereal number pulled out of someones back pocket.
A 1.5" open channel may handle ~350gph or so reliably. Making that magical 600gph even less of a reality for 1" pipe.

All drain systems we use are either open channel/air asisted/air-in-the-drainline systems or siphon systems with no air. They are all gravity driven. A siphon, however, because there is no air in the line, will draw water in and down. Perhaps that is the distinction you are looking for.

A 1" siphon will drain ~1500gph with a 24" drop, so the short answer is yes a siphon has a higher flow capacity than an open channel/durso/air-assisted/air-in-the-line stand pipe system.
 
Not exactly.
An open channel stand pipe, better known as a Durso modified or other similar modification, of 1" may handle ~50gph reliably, on a good day. .
Thanks. Most of that makes sense except this comment. 50gph? I'm using a single 1" durso on my current setup, and it handles 500gph+ (the return is rated at 650, but after taking in the pipe distance its prob closer to 500)
 
Thanks. Most of that makes sense except this comment. 50gph? I'm using a single 1" durso on my current setup, and it handles 500gph+ (the return is rated at 650, but after taking in the pipe distance its prob closer to 500)

The physics say this is not what is going on. You may have it tweaked (reducing the amount of air in the stand pipe) so that it will hold more water. However, this is anything but stable when adjusted so.

The physics say once the stand pipe is more than 1/4 full of water, the flow becomes turbulent, the air and water mix and you get bubbles, noise, instablity. Increasing the flow leads to air locking (toilet flushing fill/purge.) The system can be choked, thus reducing the amount of air in the line, moving it closer to siphon. In addition to being unstable, this is unsafe as well (a significant flood risk.)

The "laminar flow rates" for open channels can vary depending on a myriad of things, however 500gph through a 1" open channel, operating the way it is supposed to, is a bit of a stretch; a 1.5" durso standpipe will have a tough time with that one. The flow rates I mentioned are very real world numbers.
 
Sorry if i missed the answer somewhere along the way, but how important is the size of the overflow box? I have a build coming up in the next month that will be a 210-225 gallons (72 x 24 x something) that will incorporate this silent system and am looking for recommendations for the box.

thank you
mike
 
Thanks. Most of that makes sense except this comment. 50gph? I'm using a single 1" durso on my current setup, and it handles 500gph+ (the return is rated at 650, but after taking in the pipe distance its prob closer to 500)

I think the '50gph' was probably a typo. I also use a single 1" durso currently on my 90 and it handles 350 gph just fine with a 22 inch tall, 1 1/2 diam standpipe. You may actually find you are losing more than you think as a result of head pressure as I would get a bit nervous trying to run 500 through a single durso. One way to get a sense of how close you are pushing your durso is if it is toggling between siphon and not.
 
I think the '50gph' was probably a typo. I also use a single 1" durso currently on my 90 and it handles 350 gph just fine with a 22 inch tall, 1 1/2 diam standpipe. You may actually find you are losing more than you think as a result of head pressure as I would get a bit nervous trying to run 500 through a single durso. One way to get a sense of how close you are pushing your durso is if it is toggling between siphon and not.

It is not a typo. And it is not possible for a Durso to toggle between siphon and not. A durso cannot siphon, as it will always have air in the line. That is the distinction: Siphon has no, and allows no, air in the line. Just for clairity: You are not running a 1" durso. You are running a 1.5" durso, with a 1" drain line. Not the same thing.
 
Back
Top