Scrapz's Ultimate Gamble 3x3 SPS Cube

Originally I wanted to order a 3"x5" but the shop said they could not do a piece that small so I went ahead and just ordered a 3"x22" to secure along the whole read panel, bottom panel and left panel. The piece of glass I ordered today was ready for pickup but when I showed up, he had 2 pieces for me instead of just 1. Oh well, better for when I mess up.

Stopped by home depot for the milllionth time, got home and watched a few videos on youtube but nothing detailed the exact job I was trying to do.

First I cleaned both surfaces with 92% ISO alcohol. The left panel which attached to the bottom/read panel was off by almost 1/4" inch so extra silliconed needed to be applied along the bottom 5" section. To be expected, the first glass I tried to glue did not have enough sillicone. Second time, still not enough silicone but enough to secure the lower 5" of the tank I was most worried about. If I were to do this same job over, I would just run sillicone on the outer edges then Since I didn't have a clamp to hold down the piece while it was drying, I made myself one out of 2x4 scraps.

I'll have to admit that piece is pretty ugly. The plan is to paint it with krylon black that piece when I touch up the rear panel anyways. Should look fine but only time will tell.

Ghetto DIY at it's best.

20151124_1421431.jpg

20151124_1440051.jpg

20151124_1559151.jpg

20151124_1519121.jpg
 
Sorry for the lack of updates. Spent the holidays with family and didn't have much time to work on the tank.

I did spend my Black Friday lining up and scooping on some sick deals at SPS Coral Store. They had Geisseman T5 bulbs for 50% off with no tax, came out to about $11 a bulb. Tried to stock up but they ran out before I could, I did manage to snag 12. Score!

20151127_2336451.jpg


I changed my RO/DI filters recently and ny FO tank was starting to get overrun with cyano. Weird. Since my inline TDS meter broke, I purchased a handheld one and got a reading of 12TDS going in before DI and 24 after DI. Turns out instead of putting DI in the last filter, I accidentally put in catalytic carbon, big derp! At least I found out before setting up the reef tank.
 
More toys arriving from my Black Friday splurge. I also ordered 3x bags or Tropical Eden Reef Flakes/Meso Flakes, two of the boxes arrived damaged however Premium Aquatics went beyond what the needed to do to rectify the situation. Wouldn't hesitate to order from them.

c7f81814-c230-49e5-b5ef-6004309fb3102.jpg


For those interested in a comparison of the two. Reef Flakes(3mm) on the left and Mesoflakes (2.7mm) on the right. For such a small grain difference, it's quiet noticeable. The sand is much whiter in person, just looks yellow in picture. No regrets on this purchase, this grain/color is much better than Caribisea I've used in the past.

bc37df19-3ab4-4d41-a5d3-43752bf5b9f31.jpg
 
12/4/15

The big day finally came today. Finally got the keys to my new place after months of waiting. I can finally get moving on this build.

20151203_1454581.jpg


First thing to take care of was getting my sump ready. It's probably never been scrapped once in the 4 years I was using it. Oh yeah, thats a TLF reactor down there for size comparison.

20151203_1149491.jpg


Three credit cards later and a tired arm resulted in this. Sumps don't need to be that clean right?

20151203_1225002.jpg


Jimmy007 came by later that night and helped move all the tank from my old place to my new place. First thing to go up in my garage :D

20151119_1936411.jpg
 
12/5/15-

Spent the next day moving small parts over and got ready to tackle the lighting project. LET's Miro-4 T5 kit was fairly easy to setup, I think I spent more timing untangling the bundle of wire then actually assembling the kit. Please excuse the ugliness on canopy, basically just test mounting to see how the light spreads and what position everything so be at.

Honestly, the best color to my eye was just a 400w radium with no supplement lighting. Might be different once I see how the corals look underneath MH/T5.

Oh yeah, also got the side piece of glass painted black. I purchased semi-gloss but would recommend going with a glossy black, semi-gloss is just too flat looking still.

20151205_1926221.jpg

20151205_1914021.jpg

20151205_2004241.jpg

20151205_2026411.jpg

20151205_2102561.jpg


From this
20151124_1559151.jpg

To this
20151205_2108242.jpg
 
12/4/15

The big day finally came today. Finally got the keys to my new place after months of waiting. I can finally get moving on this build.

20151203_1454581.jpg


First thing to take care of was getting my sump ready. It's probably never been scrapped once in the 4 years I was using it. Oh yeah, thats a TLF reactor down there for size comparison.

20151203_1149491.jpg


Three credit cards later and a tired arm resulted in this. Sumps don't need to be that clean right?

20151203_1225002.jpg


Jimmy007 came by later that night and helped move all the tank from my old place to my new place. First thing to go up in my garage :D

20151119_1936411.jpg

Thanks for the big update and congrats on getting into your place! Daschshund lover as well???
image_zpsidur7uja.jpeg
 
Looking forward to seeing this take shape. If it comes out as well as your last projects, I will be awesome!
 
Thanks for the big update and congrats on getting into your place! Daschshund lover as well???
image_zpsidur7uja.jpeg


Dad was a pure bred mini but my pup is a mix. Cool story is i woke up to him being born on my foot, slimy little thing. He turns 12 this year. <3

155751_590814180930042_1355064426_n.jpg
 
Dad was a pure bred mini but my pup is a mix. Cool story is i woke up to him being born on my foot, slimy little thing. He turns 12 this year. <3

155751_590814180930042_1355064426_n.jpg

Both of them are adorable, and that is pretty cool that you could be there at his birth! We have 2 Hybrid Wieners and 2 Purebreds...we are wiener crazy at my house:D
 
Subscribed.

I'm setting my 36x36x22 up today. It'll be good to see how someone else sets up the same size tank :)
 
Didn't get much work done this weekend. I did manage to build the skeleton for my sump. Everything fit snug but I found out my floors were completely uneven, it was bad as 1.5" sunken in on one corner.

20151206_112747.jpg

20151206_134858.jpg

20151206_151352.jpg

20151206_154146.jpg
 
The next day I decided to move over my FOWLR setup so I could begin collecting frags. Got the tank and stand moved over without a hitch but ended up dropping my 40g breeder sump. Guess I'll have to go sumpless and pray the LR can handle the filtration .

20151206_234152.jpg


And the first tester to go in. A pink lemonade mini colony. Please don't die!

20151208_2235281.jpg


A short vid taken today of day 6 of fish & LR transfer & day 3 for the pink lemonade. Everything is looking good and the pink lemonade has even started to encrust!

<iframe width="560" height="315" src="https://www.youtube.com/embed/WMo9oHr_ZTI" frameborder="0" allowfullscreen></iframe>
 
Last edited:
Just to show you guys how unlevel the floors were. It took me almost 2 hrs to level out the whole stand. My cuts were always just slightly off and if I wedged it in, one of the other shims would be off balance. I placed shims about every 2ft so should be strong enough to hold the weight of any tanks placed on it.

20151211_2213411.jpg

20151211_2214061.jpg

20151211_2229131.jpg

f2db953b-68bf-49eb-b202-a87be3bb493f.jpg


Water is in!
20151212_0048271.jpg


Stand nice and leveled.
20151212_0104231.jpg

20151212_0104431.jpg


And something only the OG reefer's will know. Still mixing my salt after god know how many years.
20151212_0120381.jpg
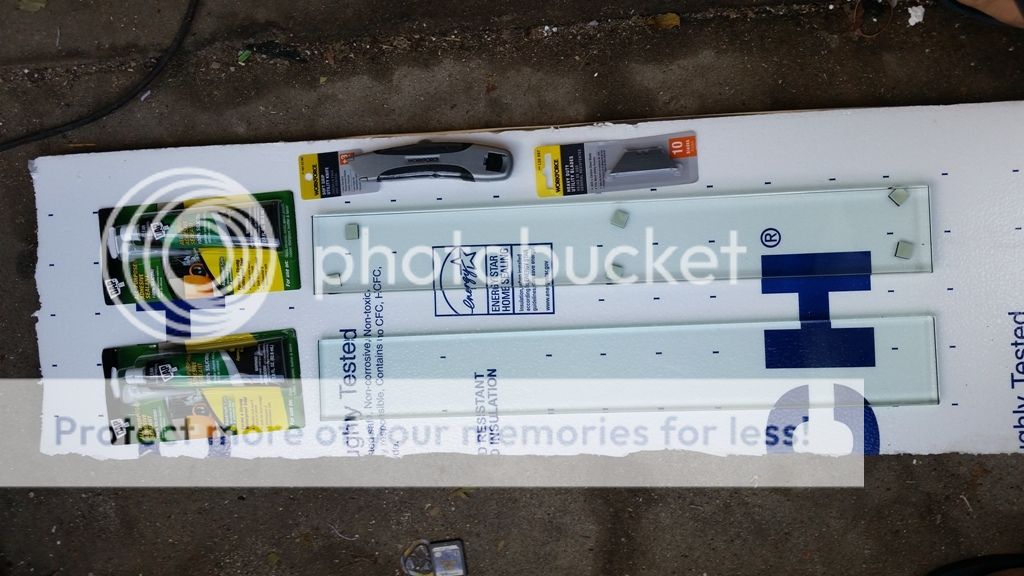
Is the sump in the garage? If so make sure to put some insulation underneath and on the sides - garages get cold. I still have a power head from my first reef tank, purchased in 1991- still works too:)
 
@mhucasey

Yup, got some foam already lined up. Previous tanks have been in the garage but it was poorly insulated. This garage on the otherhand seems to be insulated fairly well. Hopefully my power bill goes down with this tank.
 
Well probably the most important update yet. Gave the tank a leak test and glad to say there was none.

FT2shOX.jpg


The aquascape will consist of maybe 2-3 pieces. I've collected these pieces for a long time in anticipation for a tank like this.
eLMJ2fr.jpg

JFK1w5C.jpg


Funny that they look so small in the tank. Don't mind the other rocks, they are just there to aid the spread of bacteria in the display.

What the planned scape should look like
PII75N5.jpg


The layers and levels for multiple sps mounting on the right rock.
F06rtTU.jpg


What the tank looks like IRL /w 400w Radiums + 2x Blue PLus 1x Super Purple and 1x Super Actinic
pzdIga7.png
 
Happy there was no leak man:beer:
I absolutely love the planned aquascape:inlove:
Don't even change a small part.Awesome!
 
Back
Top